

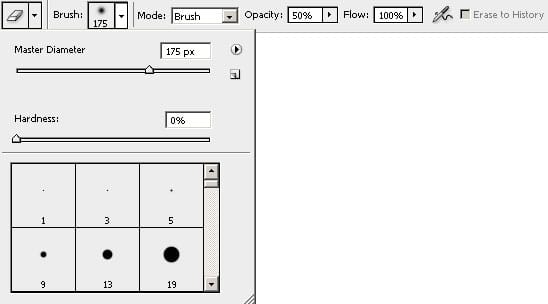
Once you have the Eraser tool selected, the option bar near the top will show you the settings you can set for the Eraser tool. Set the Opacity to 50% and adjust the brush size and hardness.
Using the Eraser tool, erase the foreground to make it brighter. If you make a mistake, you can switch back to the brush tool to paint back the areas that you want to reverse.
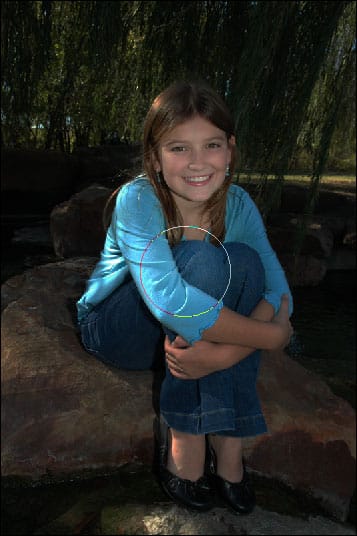
Here’s what my image looks like after erasing the foreground.

Erase the foreground or just the subject again. This time, I ony erased the subject to keep the rock a little darker.

In the option bar, set the Opacity of the brush to 100%.
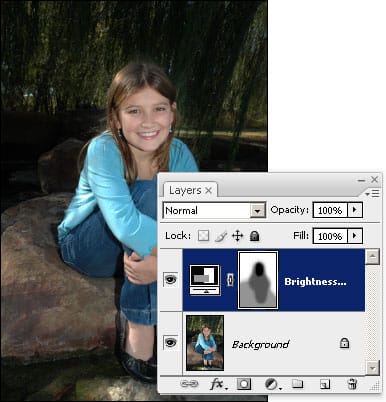
We’ll apply one more layer of erasing to the layer mask. This time, I only erased the face. In the image below, you can see the areas that I erased. If you look closely, you can see a halo around the subjects head. This is because I was being sloppy and my brush hardness was too soft. I can fix this by switching back to the brush tool and using a stronger hardness (50%) to paint back the background.
Final Results

Dimming the background is a simple, but truely effective way to hide busy backgrounds and increase focus to the subject.

Leave a Reply