


Add a mask to this layer to make the leaves less visible and integrate better with the background.

Step 21
Make a new layer and use a soft brush with the color #cceeef to paint highlights for the leaves (we aim to add the main light source to the top middle).

Step 22
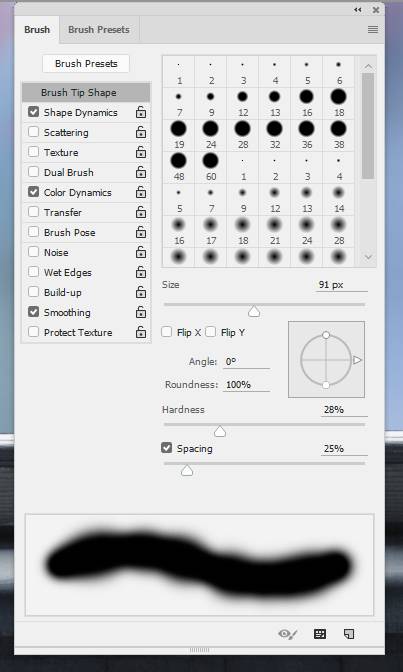
Create a new layer and select a medium-hard brush with the color #ddddeb. Press F5 to change the setting of this brush:

Step 23
Use this brush to paint many colorful circles over the background. Convert this layer to a Smart Object.

Apply a Gaussian Blur of 12 px to this layer and use a soft black brush to reduce this colorful effect.

Step 24
Make a new layer and use a soft brush with the color #0a0a1a to paint on the background. Change this layer mode to Linear Dodge 100%. Duplicate this layer to bring more light to the background.


Step 25
Create a new layer and use a small brush with the color #d8ebed to paint the rain drops above the window rails.

Add a new layer and use a small brush with the color #f2feff to paint the rain drops falling over the window.

Step 26
Open the leaves image and use the Quick Selection Tool (W) to take a leaf on the bottom to add to the right of the window.


Step 27
Create a Hue/Saturation adjustment layer (set as Clipping Mask) and alter the Master values:

Step 28
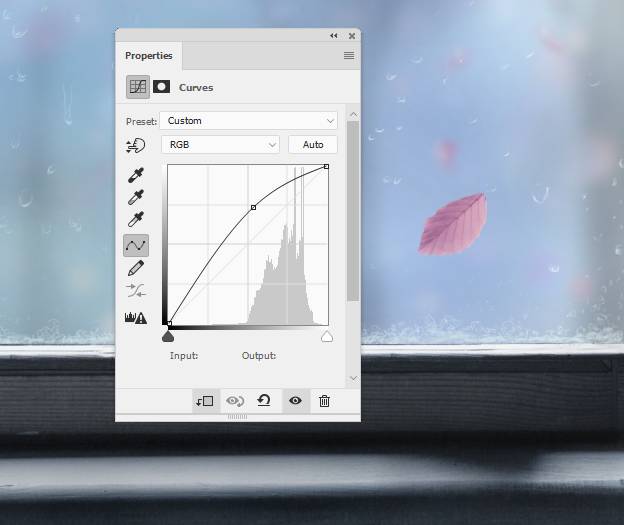
Make a Curves adjustment layer to brighten the leaf.
Step 29
Create a new layer, change the mode to Overlay 100% and fill with 50% gray. Activate the Dodge and Burn Tool (O) with Midtones Range, Exposure about 10% to refine the light and shadow on the leaf. You can see how I did it with Normal mode and the result with Overlay mode.


Step 30
Make a new layer and use a small brush with the color #131314 to paint the leaf stalk. Add another layer and change the brush’s color to #cceeef to paint highlight on the stalk.


Step 31
Create a new layer and use the Clone Tool to remove the shadow details on the window frame.

Step 32
In this step we’ll make more shadow for the window’s rail on the sill. Make a new layer and use the Rectangular Marquee Tool to make a selection on the bright part of the window frame. Fill this selection with the color #0f192a and convert this layer to a Smart Object.
One response to “How to Create a Rainy Window Scene with Adobe Photoshop”
-

Excellent and very helpful. Thanks for sharing.
Leave a Reply