
Step 10
Add a mask to this layer and use a soft black brush to remove the hard edges and a part on the top left of the sky. Don’t worry if the sky doesn’t look good, we’ll fix it later.

Step 11
Create a Curves adjustment layer (set as Clipping Mask) to darken the sky.

Step 12
Make a Color Balance adjustment layer to match the color of the sky with the background.

Step 13
Create a new layer on top of the layers and use a soft brush with the color #d66c59 to paint more color effect for the background. Change this layer mode to Soft Light 100%.

Step 14
Make a new layer and use a small brush with the same color to fill in the mountains on the background. Change this layer mode to Hard Light 100%.

Step 15
Place the stars image onto the sky area and change this layer mode to Screen 100%. Add a mask to this layer and use soft black brush with the opacity about 30% to reduce the stars’ opacity and visibility, especially the middle where we’re aiming to add the main subject (the dolphin).


Step 16
Create a Levels adjustment layer to remove the white edges and reduce the opacity of the stars again.

Step 17
Open the nebula 1 image and place it onto the sky area. Change this layer mode to Overlay 80% and add a mask to this layer. Use a soft black brush to erase the hard edges and remove some details on the top of the sky.


Step 18
Create a Hue/Saturation adjustment layer and change the Hue values to give some red to the nebula effect.

Step 19
Make a new layer on top of the layers and use a soft brush with the color #e3a39a to paint on the red parts of the sky and the ground to make them redder and darker a bit. Change this layer mode to Multiply 100%.


Step 20
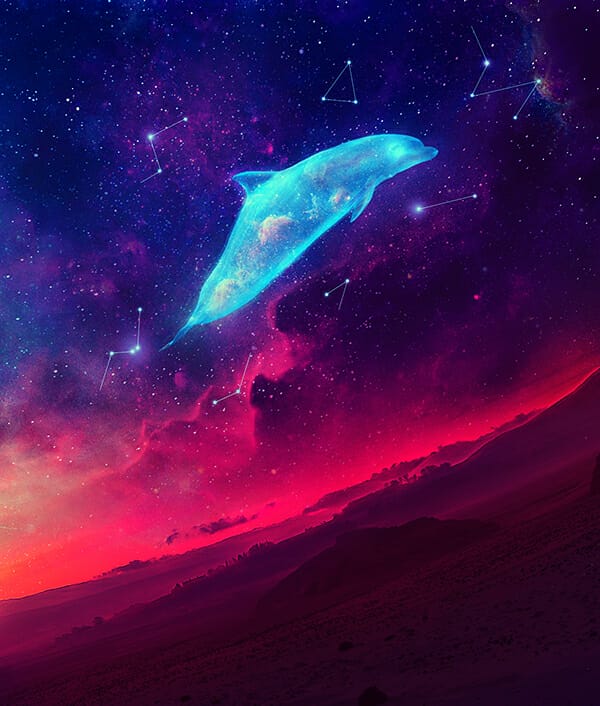
Open the dolphin image and use the Move Tool to drag him into our working document. Place him in the middle of the sky and use Ctrl+T with the Warp mode to rotate and tweak his pose to fit the perspective of the background. Add a mask to this layer and use a soft black brush with the opacity about 20% to reduce the visibility of the dolphin.


Step 21
Make an Invert adjustment layer to reduce the contrast of the dolphin

Step 22
Make a Color Balance adjustment layer to change the color of the dolphin to blue.
2 responses to “How to Create a Space Dolphin Scene with Adobe Photoshop”
-

So beautiful
-
hi
your file is broken …
Leave a Reply