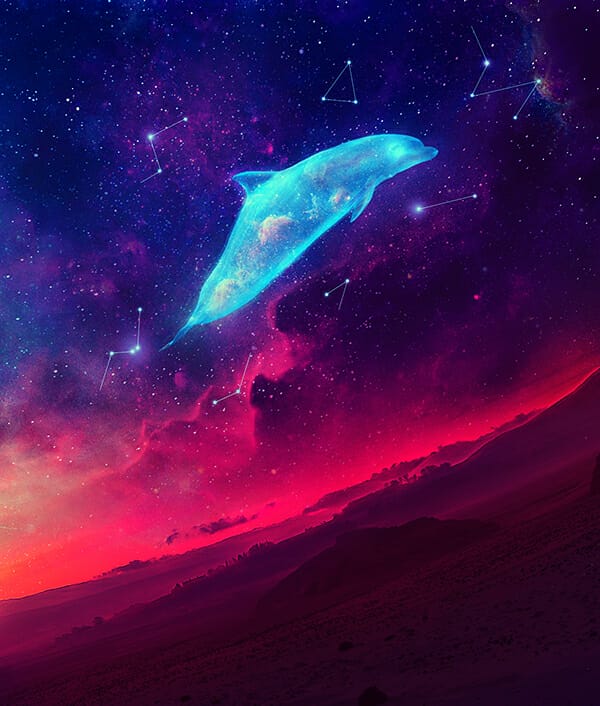

Step 23
Use a Curves adjustment layer to brighten the dolphin.

Step 24
Make a new layer on top of the layers and use a soft brush with the color #bdd9f5 to paint around the dolphin to give him some glow. Change this layer mode to Soft Light 100%.


Step 25
Create a new layer and use the same brush to paint on the dolphin to add more glow to the dolphin. Change this layer mode to Screen 20%.


Step 26
Add a new layer and use s very small brush (about 2-3 px) with the same color to paint a dot inside the eye’s area of the dolphin.

Step 27
Double click this layer, choose Outer Glow. Set the color of glow to #cfe2ff to give some fantasy effect to his eye.

Step 28
Make a new layer and use a soft brush with the color #ccdef0 to paint on the fin on the back and around the mouth (lower the opacity of the brush to 10-15% to paint around this mouth). Change this layer mode to Overlay 100%.


Step 29
Open the nebula 2 image and place it onto the dolphin. Use Ctrl+T with the Warp mode to bend the effect along the pose of the dolphin. Change this layer mode to Screen 100% and use a layer mask to remove the hard edges and most of the effect part outside the dolphin.


Step 30
Duplicate this layer and move it to the lower part of the dolphin. Use the Warp Tool to change the form of the effect to fit the pose of the dolphin.


Step 31
Select all of the nebula 2 layers and hit Ctrl+G to make a group for them. Change the group’s mode to Screen 100% and make a Levels adjustment layer within the group to remove the hard edges completely.

Step 32
Create a Hue/Saturation adjustment layer to change the color of the effect to blue.

Step 33
In the next steps, we’ll add some galaxy effect to the dolphin. Open the nebula 3 image and select the one on the top right to add to the main document. Use Ctrl+T to rotate it above the dolphin as shown below. Change this layer mode to Screen 100% and use a layer mask to reduce the opacity and visibility of the nebula effect outside the dolphin’s body.


Step 34
Use the Lasso Tool (L) to take a part on the top right of the nebula image to add to the top of the dolphin. Change this layer mode to Screen 100% and use a layer mask to remove the hard edges outside the dolphin’s body.
2 responses to “How to Create a Space Dolphin Scene with Adobe Photoshop”
-

So beautiful
-
hi
your file is broken …
Leave a Reply