
Go to Filter > Distort > Spherizeand you should have a similar result like below:

Press Ctrl+Jto copy this sphere into a new layer.

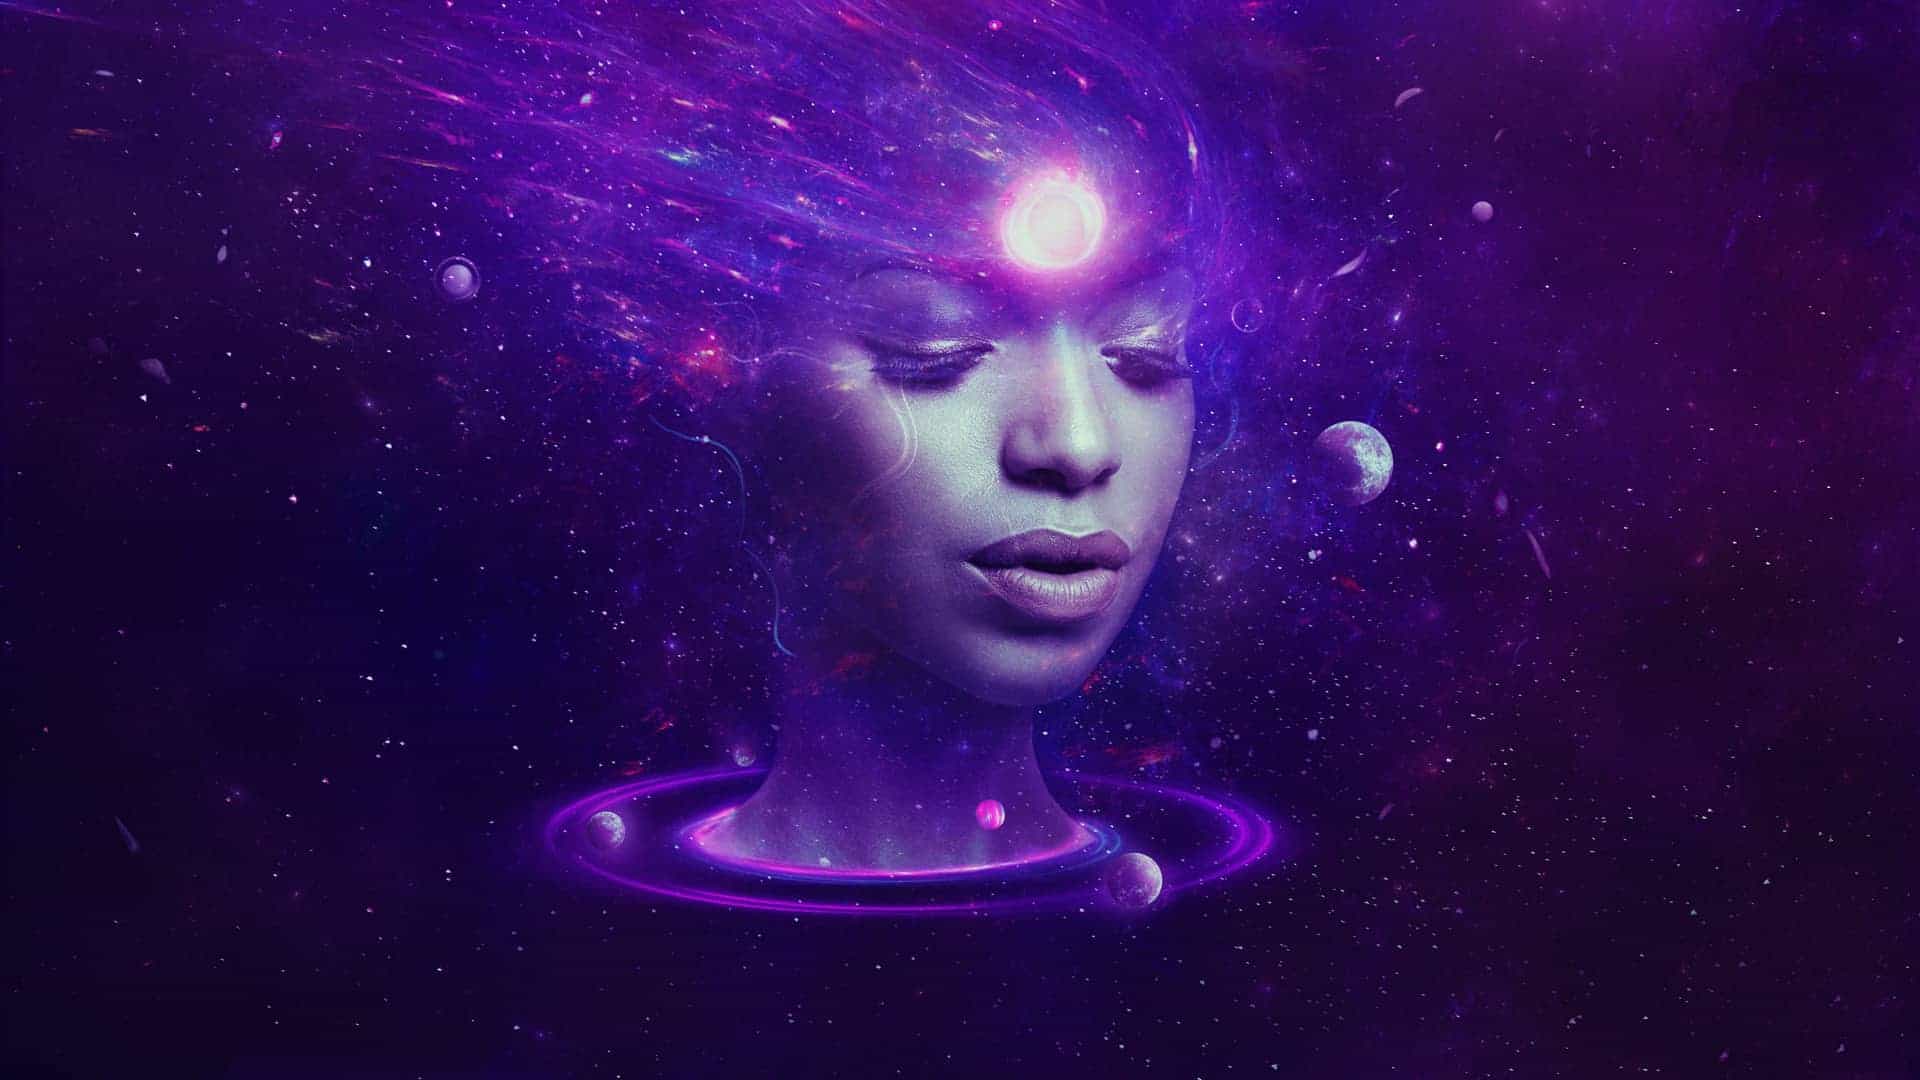
Step 20
Move the planet into our main document and place it on the right side. Duplicate it three times and arrange them along the light circles on the neck area. Use Ctrl+Tto vary their size and direction.

Step 21
Select the planet layers and hit Ctrl+Gto make a group for them. Change the group’s mode to Normal 100%and add a Hue/Saturationadjustment layer to change the color of the planets.

Step 22
Create a Curvesadjustment layer to make shadow for the planets. On this layer mask, paint on the right of the bigger planets and the lower of the smallest one to reveal the lightness there.

Make another Curvesadjustment layer to bring more light to the right of the planets except the smallest one. Use the layer mask to reduce the light to keep the shadow and contrast of the planets.

Add another Curvesadjustment layer to decrease the shadow of the planets. The selected areas show where to paint on the layer mask.

Step 23
Create a new layer and use a soft brush with the color #7e63a2to paint on the planets around the light circles to make a glow for them. Change this layer mode to Hard Light 100%.


Step 24
Place the space background into our canvas and change this layer mode to Screen 100%. Add a mask to this layer to erase the part covering the model’s face.


Duplicate this layer and move it to the lower right of the canvas. Use its layer mask to remove the effect on the model’s face and the right side, leaving it visible around the neck and head.


Step 25
Duplicate this again and move it to the top right and use its layer mask to remove the hard edges and decrease the effect, making it appear more subtle.


Step 26
Continue duplicating this layer and go to Filter > Liquify and use the Forward Warp Tool (W)to tweak the nebula area as the screenshot below shows.

Move this part onto the head of the model to make it as a flow of light and remove the hard edges using its layer mask.


Step 27
Create a group for these space layers and change the group’s mode to Screen 100%. Add a Hue/Saturationadjustment layer to change the color of the effect.
One response to “How to Create a Space Woman Portrait with Adobe Photoshop”
-

This is lovely
Leave a Reply