

Step 33
Now Duplicate Fog layer set set Opacity to 25%.

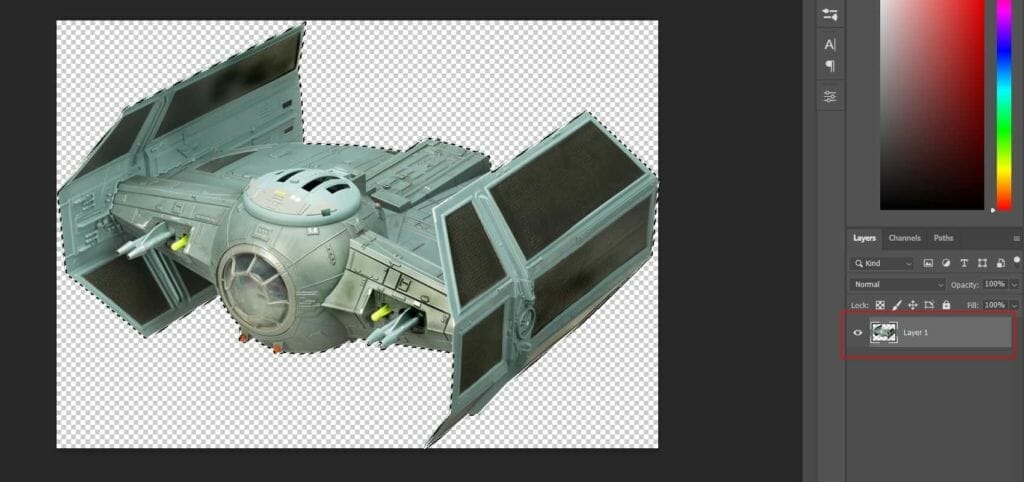
Step 34
Go to File > Open and select Spaceship 1 then hold Ctrl/Cmd and click on layer and after the selection area has been created, simply copy (Ctrl / Cmd + C) and Paste (Ctrl / Cmd + V) it to our work canvas. Then position the image with the transform tool (Ctrl / Cmd + T). Hold Alt + Shift and resterize like image below. In Photoshop CC only hold Alt to resterize al sides together. Now add some blur, go to Filter > Blur > Motion Blur and set Angle to 20 and Distance 35.

Step 35
Add Adjustment Layer “Color Balance”

Step 36
Add Adjustment Layer “Hue/Saturation”

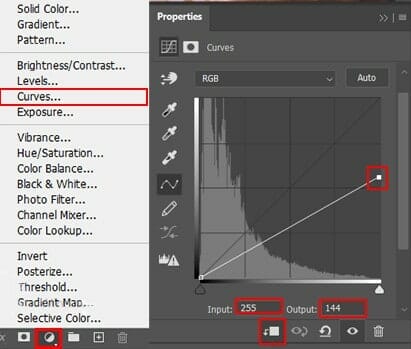
Step 37
Add Adjustment Layer “Curves” and press Ctrl/Cmd + I to invert and use Brush Tool(B) Soft Round with foreground color white and paint the highlights parts. Blend mode change to Luminosity

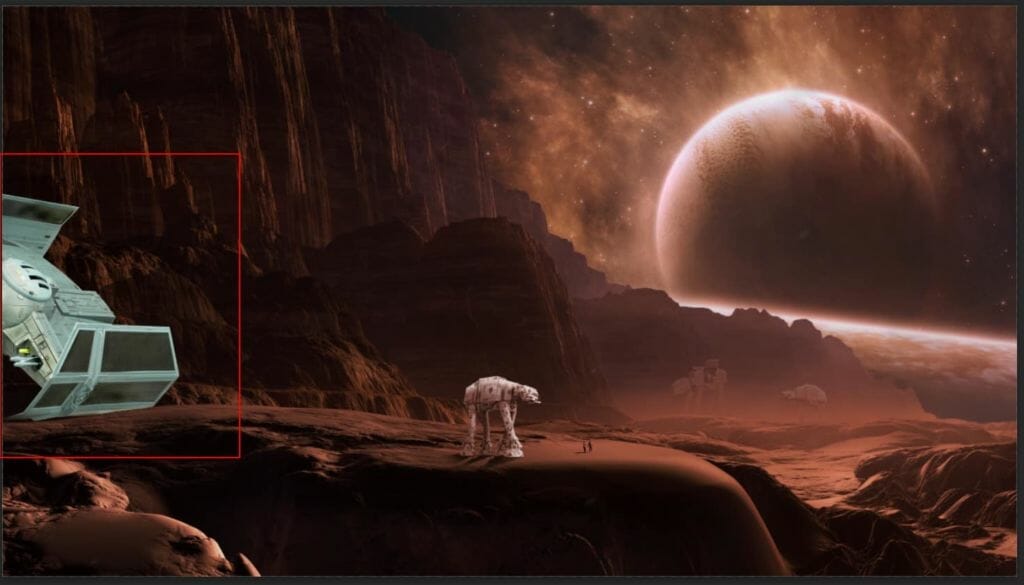
Step 38
Go to File > Open and select Spaceship 2. After you open the image, use Lasso Tool(L) and select left spaceship. After the selection area has been created, simply copy (Ctrl / Cmd + C) and Paste (Ctrl / Cmd + V) it to our work canvas. Then position the image with the transform tool (Ctrl / Cmd + T). Hold Alt + Shift and resterize like image below. In Photoshop CC only hold Alt to resterize al sides together. Now add some blur, go to Filter > Blur > Motion Blur and set Angle to -39 and Distance 35.


Step 39
Add Adjustment Layer “Color Balance”

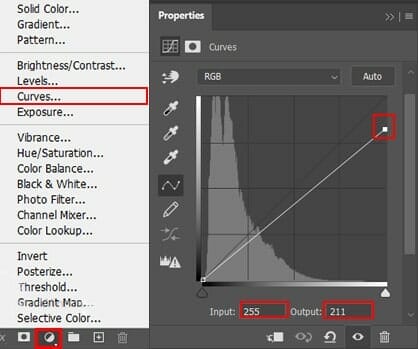
Step 40
Add Adjustment Layer “Curves” and Blend mode change to Luminosity with Opacity 69%.
Step 41
Add Adjustment Layer “Hue/Saturation”

Step 42
Next, create a new layer and add more fog. Open Brush Tool (B) and select Clouds folder then use first clouds and start painting. Use color code #8a4636. The procedure is the same as on step 32/33.

Step 43
Next create adjustment layer Gradient Map. Blend mode change to Hue with Opacity 73%.

Step 44
Add Adjustment Layer “Curves” and use Brush Tool(B) Soft Round with foreground color black and start painting highlight parts.
Step 45
When we finished all this, now merge all layers to one. Select the last layer and hold CTRL/CMD + SHIFT + ALT + E. Now we have a final layer, right click on mouse and select Convert to Smart Object. Then go to Filter > Camera RAW Filter. At its most basic, the Photoshop Camera Raw filter allows you to use the functions of the ACR interface at any time within Photoshop.
9 responses to “Create a Star Wars Scene Photoshop Tutorial”
-

HI why are the colors red and the file i downloaded it is blueish? i followed the steps for changing colors with adju layers but wont get it redish. Please explain? i mean if you download een blueish file and yours is read somehow the outcome will be different then yours.. and that is really frustrated when you follow a tut step by step :)
-
Which step are you on?
-
-
Why do i get a different color then your Mountains? I changed the color and added the adjustment layers but didnt changed a thing with the colors how come? I mean i download the file from mountains and that is blueish not red … and even with the changes you made it wont become red… Did i mis something?
-
Does anyone know if this tutorial is good? I’m at step 5 and struggling to understand what it’s asking me to do. If anyone has already beat this challenge please let me know, it would help wonders.
-
Hey Student,
I’m currently up to step 21, and have found the tutorial becomes a lot easier to understand. My design currently looks spectacular, and this ‘challenge’ has almost been conquered. I truly believe if you put your mind to this, then you can do it.
With the kindest regards,
Another Student -
Yeah I agree with everything you just said whole heartedly
-
-
Meh
-
meh
-
-
Looks good thank you
Leave a Reply