
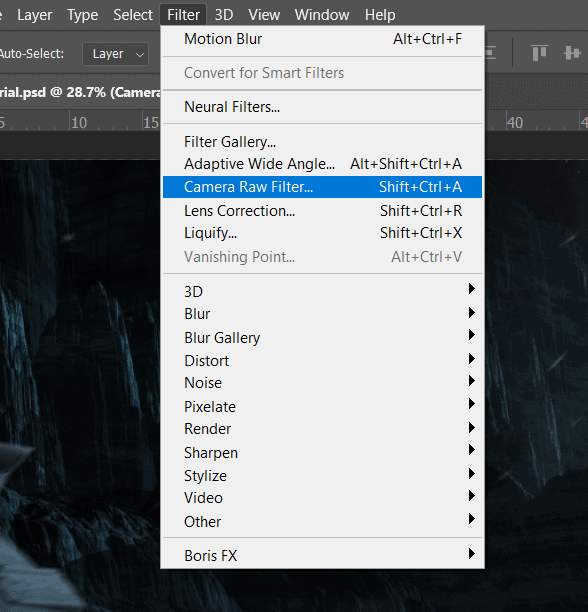
Step 46
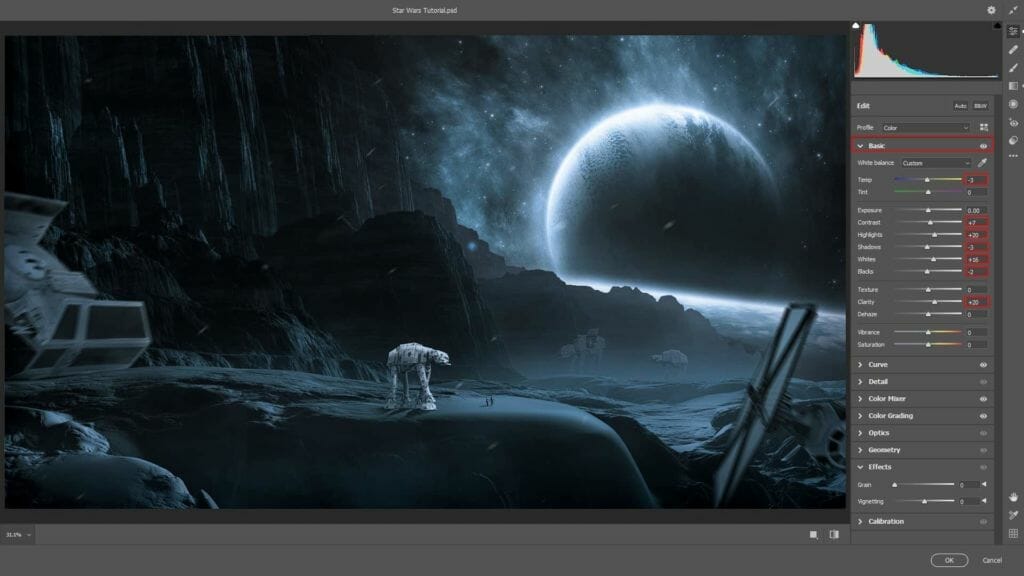
Now in Camera Raw Filter, set the Value: Basic
- Temp: -3
- Contrast: +7
- Highlights: +20
- Shadows: -3
- Whites: +16
- Blacks: -2
- Clarity: +20
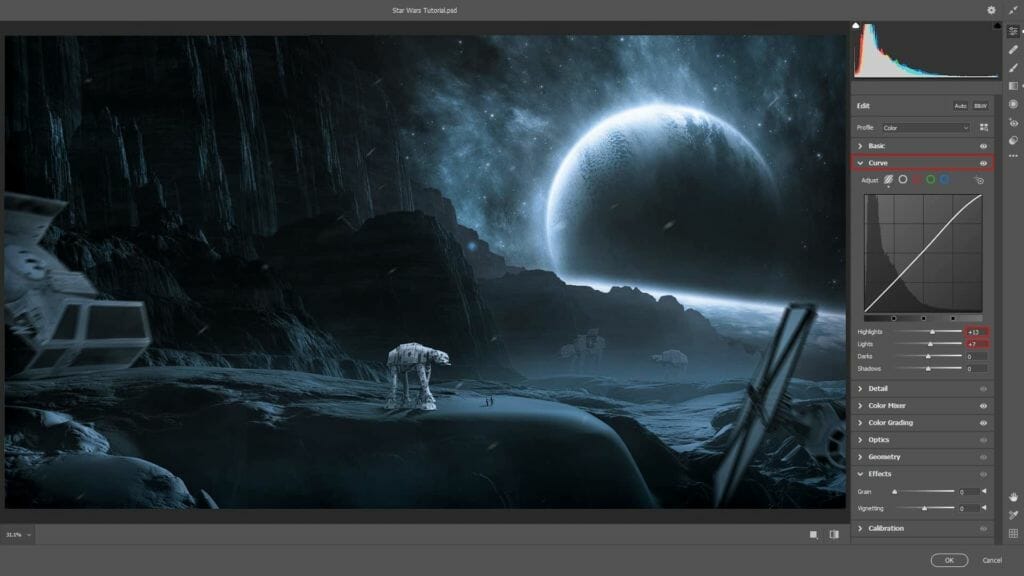
Tone Curves
- Highlights: +13
- Lights: +7
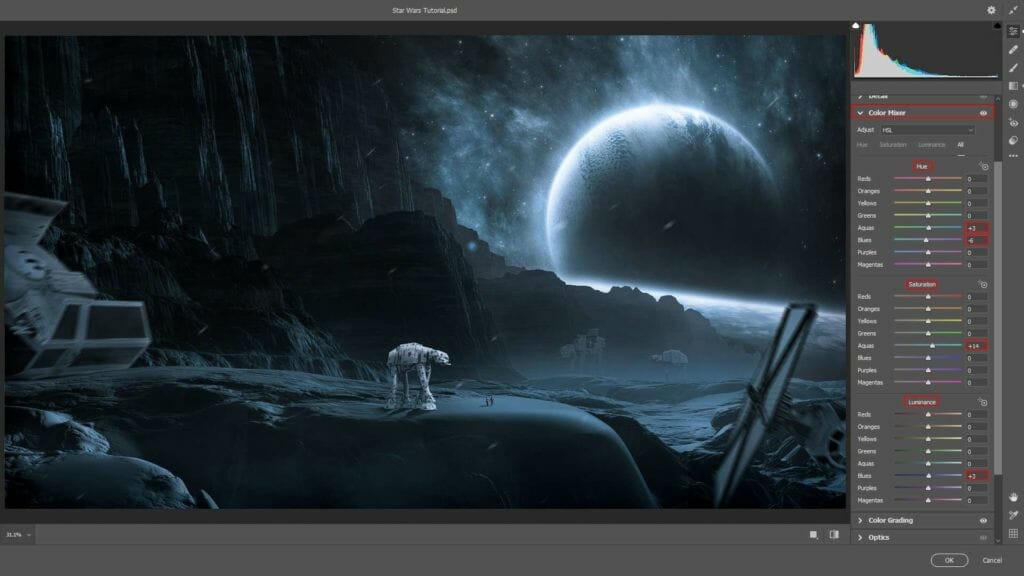
Color Mixer
Hue
- Aquas: +3
- Blues: -6
Saturation
- Aquas: +14
Luminance
- Blues: +3
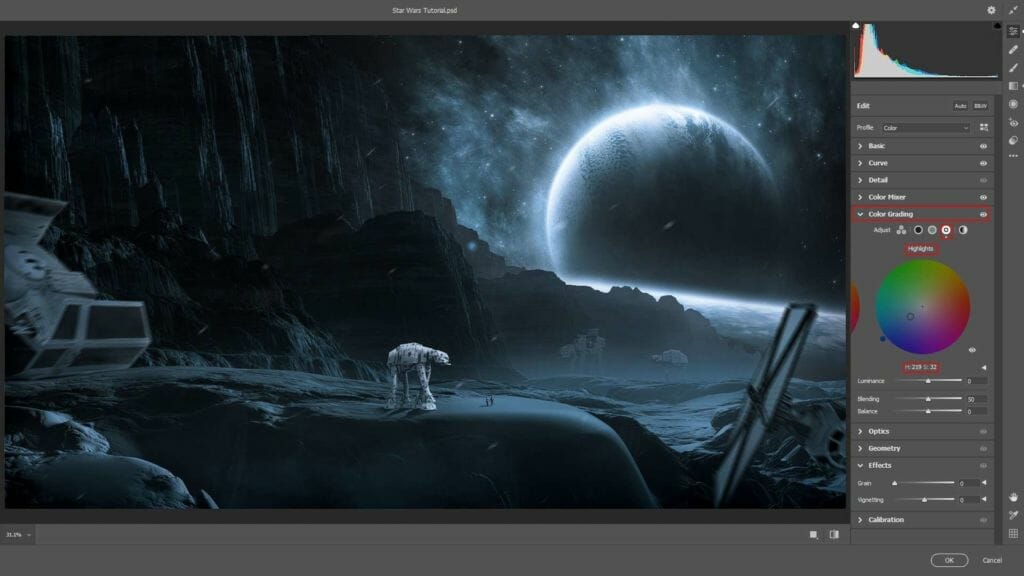
Color Grading Highlights
- H: 219 S: 32
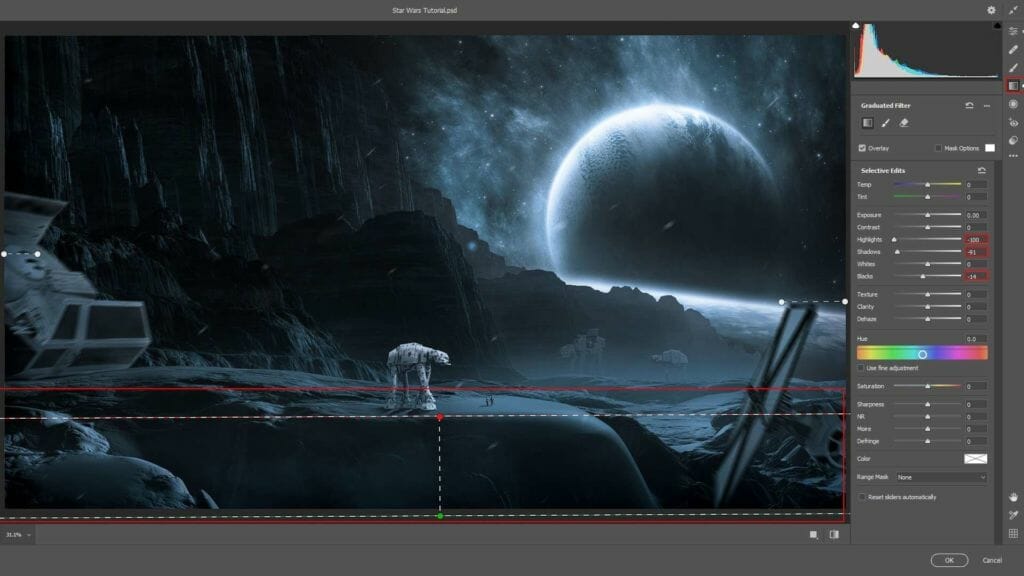
Gradulated Filter
- Highlights: -100
- Shadows: -91
- Blacks: -14
Gradulated Filter
- Highlights: -100
- Shadows: -91
- Blacks: -14

Finally everything should look like this:

Final Resuts

Download the PSD
9 responses to “Create a Star Wars Scene Photoshop Tutorial”
-

HI why are the colors red and the file i downloaded it is blueish? i followed the steps for changing colors with adju layers but wont get it redish. Please explain? i mean if you download een blueish file and yours is read somehow the outcome will be different then yours.. and that is really frustrated when you follow a tut step by step :)
-
Which step are you on?
-
-
Why do i get a different color then your Mountains? I changed the color and added the adjustment layers but didnt changed a thing with the colors how come? I mean i download the file from mountains and that is blueish not red … and even with the changes you made it wont become red… Did i mis something?
-
Does anyone know if this tutorial is good? I’m at step 5 and struggling to understand what it’s asking me to do. If anyone has already beat this challenge please let me know, it would help wonders.
-
Hey Student,
I’m currently up to step 21, and have found the tutorial becomes a lot easier to understand. My design currently looks spectacular, and this ‘challenge’ has almost been conquered. I truly believe if you put your mind to this, then you can do it.
With the kindest regards,
Another Student -
Yeah I agree with everything you just said whole heartedly
-
-
Meh
-
meh
-
-
Looks good thank you
Leave a Reply