
Power Tip: If you need to edit the filler texture image or if you don’t like how it looks within the letter, you can still change it! Just choose the Move Tool (V) & drag over with your texture layer selected. Also, if you need to resize the texture image select Edit>Transform to resize it.
Step 7
Now, select the Background layer & fill with a Gradient Tool (G). I used Linear Gradient & the colors for the two stops are as prescribed in the screenshot. Drag the gradient tool diagonally from bottom to top.

Step 8
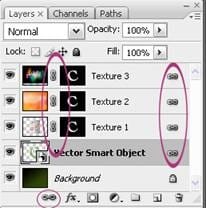
Pressing down Shift key select all the layers in the Layer Palette except the background layer & Link all of them. Also make sure to link the Layer Mask thumbnails with their corresponding layer thumbnails by clicking once between them.
{articlead}
Step 9
Now, we will do the reflection of our letter “C”. For that, select all the linked layers & duplicate them.

Step10
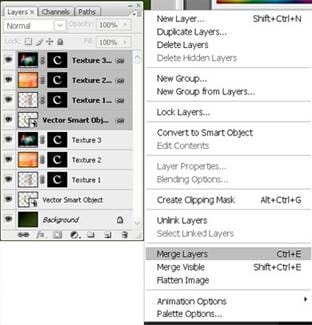
Merge all the duplicated layers & name it Reflection.
Step 11
On the Reflection layer, go to Edit>Transform>Flip Vertical & place it beneath the letter “C”. Adjust its perspective if the need be.
Step 12
The next step is to add a layer mask to the duplicate layer. To do this simply click on the add layer mask button in the layers palette.

Now pick the Gradient Tool (G) and draw a gradient (black to white) in the direction from bottom to mid top.

Finally just reduce the opacity of the duplicate layer and you are all done. I reduced the opacity to 20% , there is no golden rule about the opacity % , just play with the opacity setting & choose the one that suits your image.
Step 13
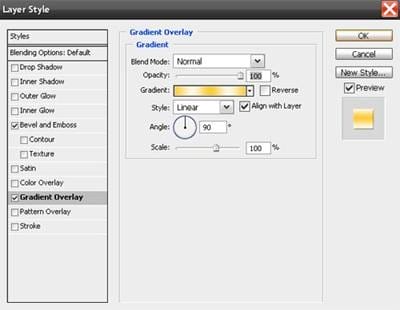
Finally, with the Type Tool, I wrote the words “for creativity” with the settings as shown in the Character Palette.
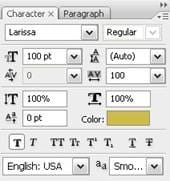
The font used is Larissa & can be downloaded from here. I also rotated the words a bit via Edit>Transform. Then I applied the layer style, as shown in the screenshots below.

Step 14
To add a bit of finishing touch, I added Outer Glow to the Vector Smart Object layer, as shown.

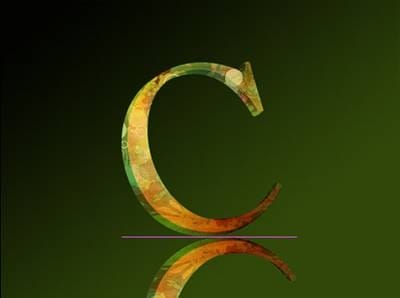
And, that’s how my Layers palette in end & final image looks like.
17 responses to “3D Textured Text Effect”
-

I really like this product because its aimed
-
hi
-
hi i am vishal rana i am graffics designer in surat.i have used photoshop, illustrater,coral & flaceCS3 so your have requerment in your company.i have complite my education T.Y B.COM complite.
-
I wanted to thank you for posting this tutorial, I had a lot of fun learning.
This is what my image turned out like http://s747.photobucket.com/user/Sensaki610/media/Anyone/merci002f_zps93221ff8.png.html
One note the link on Page 2 “another texture pack” no longer exists, however I was able to use a similar image here http://joorteloog.deviantart.com/art/numbing-blow-160234146
I am retired and Photoshop and other Adobe apps are a hooby.
Thanks again John.
-
thanks for tutorial. i’m still a bit confused about how much PS distinctive in comparison with AI on the fly objects customization
-
i like
now its simple before -
Thank you so much.
-
Np
-
-
hi
-
Naren
ojha -
Thank you so much it was very helpful everyone!
-
thanks very much for this tut – it was really helpful and clear!
-
I thought this was for photoshop. I don’t have illustrator
:( -
Ayyo
-
Here is very good.
-
Can anybody help me out pls…
How can i place or Overlape any image on this 3D Art…??
As in this they do some flowers & leaves on the 3D image of “C”…-
You can fill option.. :)
-
Leave a Reply