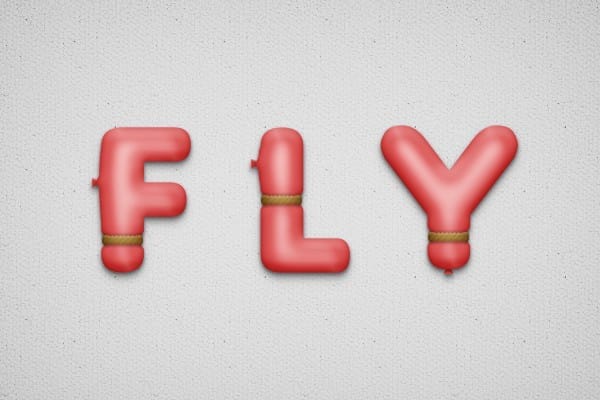
Step 6
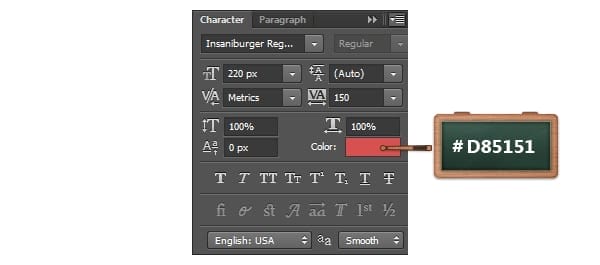
Pick the Horizontal Type Tool set the size to 220px and color to #D85151.
Move to your canvas, add the “L” text and place it as you can see below.


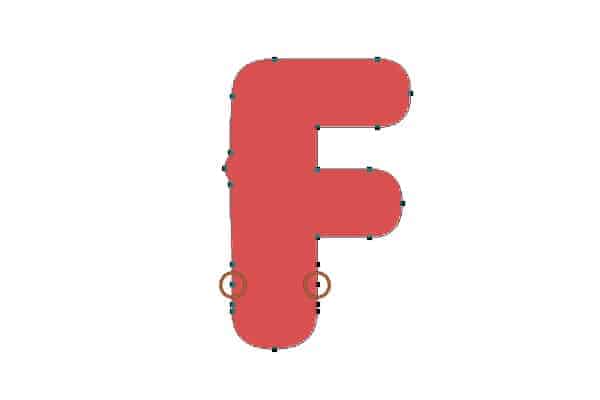
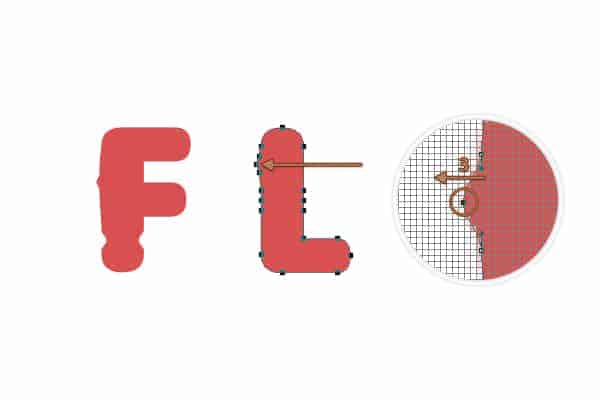
Step 7
Focus on the Layers panel, right click on your “L” text layer and go again to Convert to Shape.
Make sure that your “L” vector shape is selected, pick the Add Anchor Point Tool and add new anchors points roughly as shown in the next images.


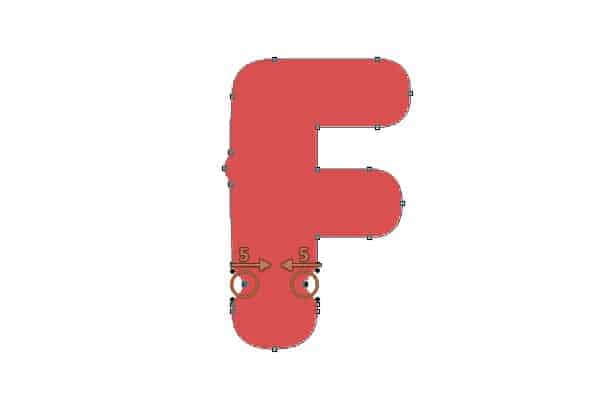
Step 8
Pick the Direct Selection Tool, focus on the top side of your “L” shape, select the three anchors points highlighted in the first image and drag them 2px to the left. Now, make sure that only the middle anchor point remains selected and move it another 3px to left.
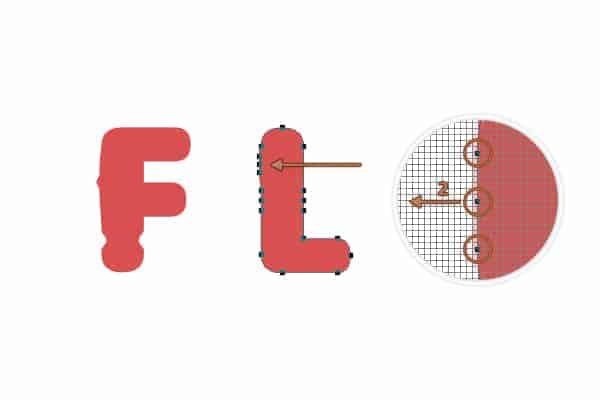
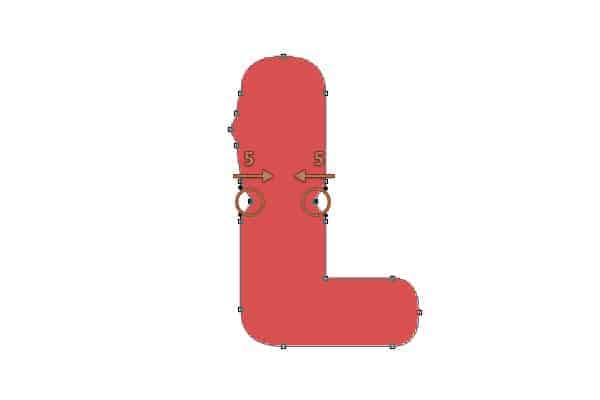
Step 9
Focus on the middle side of your “L” shape, select the left anchor point highlighted in the following image and drag it 5px the right and then select the right anchor point highlighted in the same image and drag it 5px to the left. In the end your shape should look like in the second image.

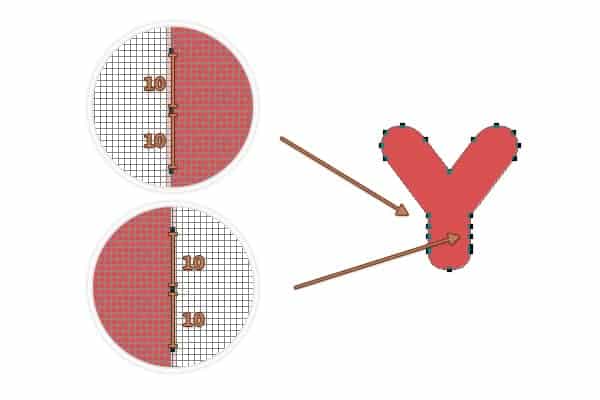
Step 10
Now, add the “Y” use the same font and color adn then basically repeat the procedure used for your “F” and “L” shapes.


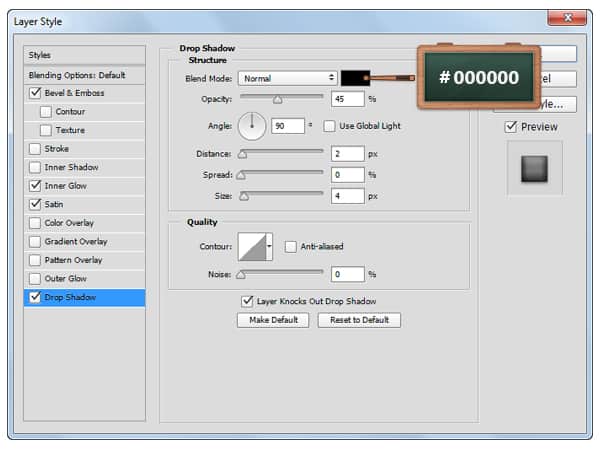
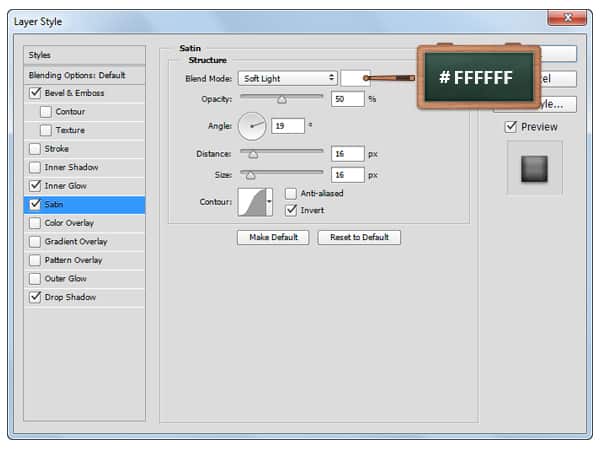
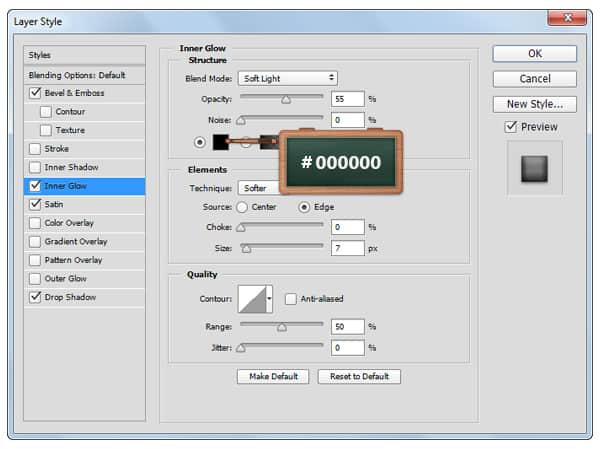
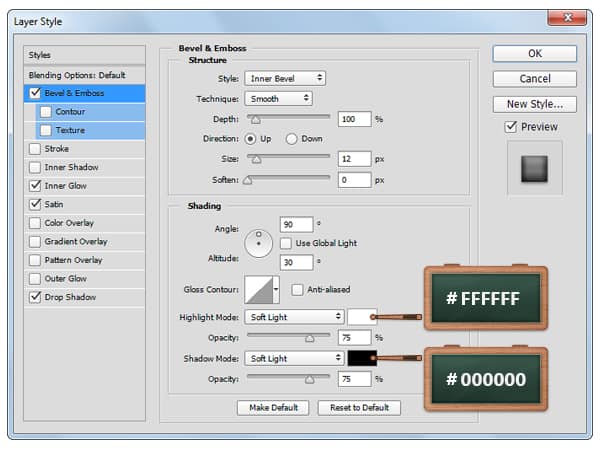
Step 11
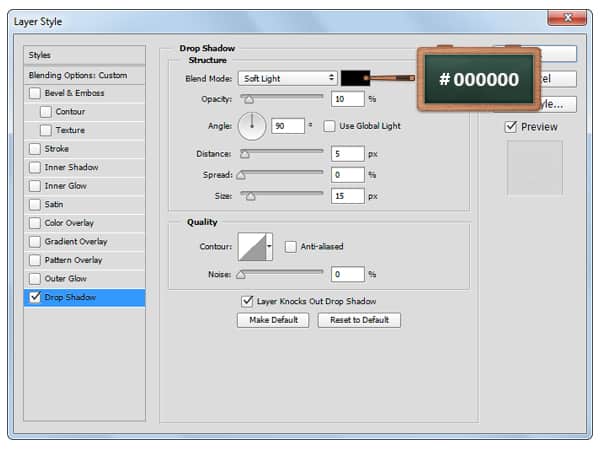
Open the Layer Style for one of your text vector shape and enter the settings mentioned in the next images. After you apply thesse settings, focus on the Layers panel, right click on that edited shape and go to Copy Layer Style . Move to the other two shapes, right click and this time go to Paste Layer Style.

Step 12
Make sure that your three shapes are selected and duplicate them using the Control-J keyboard shortcut. Focus on the Layers panel, select the fresh copies, right click on one of them and go to Merge Shapes. Open the Layer Style window for the shape made in this step, disable the existing settings, enable the Drop Shadowand then enter the attributes shown below. Keep focusing on the Layers panel, make sure that the shape made in this step is still selected and lower the Fill to 0%.


Step 13
Focus on your Layers panel, hold the Control buttons from your keyboard and then click on the thumbnail icon that stands for the vector shape made in the previous step to load a simple selection around it.
Go to Select > Modify > Contract and set the Contract by to 15px.
Focus on the bottom side of the Layers panel and click the Create a new layer button.
Set the foreground color to #FFFFFF, pick the Paint Bucket Tool and fill your selected zone.
Once you’re done, simply hit Control + D to clear your selection.
1 response to “Create a Balloon Text Effect in Photoshop”
-

nice text effect. :-)
Leave a Reply