


Step 14
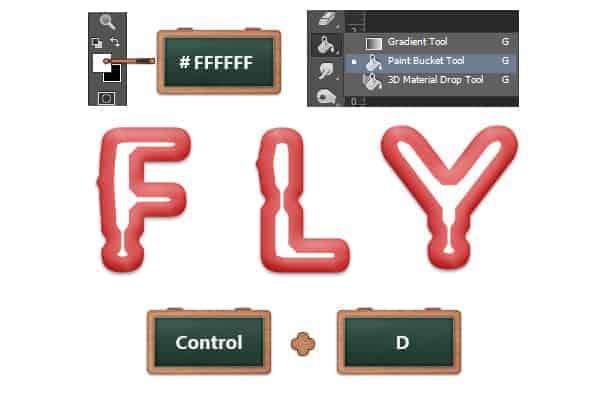
Focus on the Layers panel, rename the layer made in the previous step “Highlight” and lower its Fill to 0% .
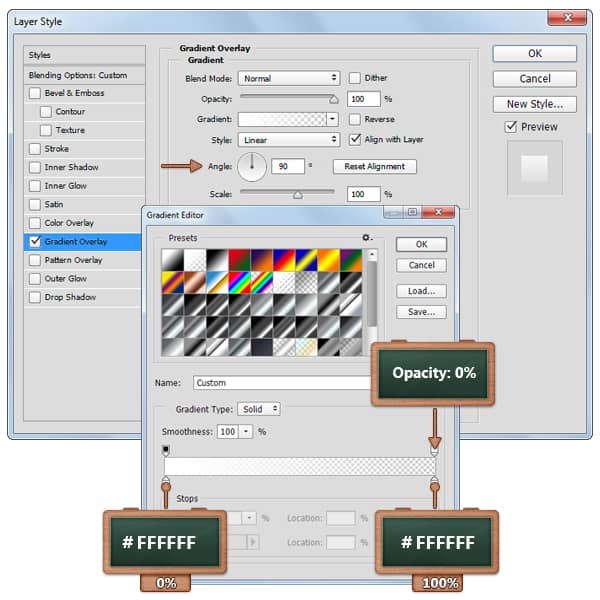
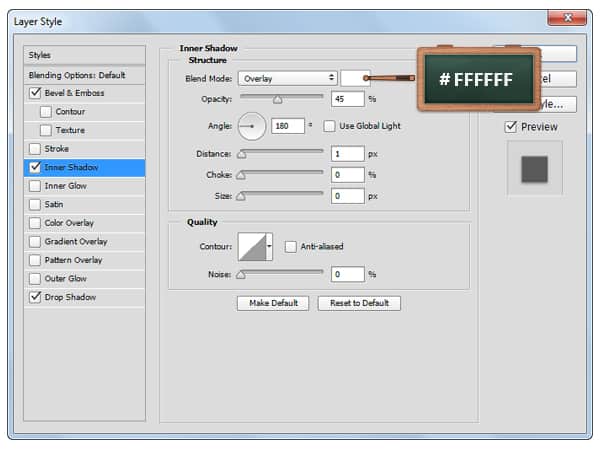
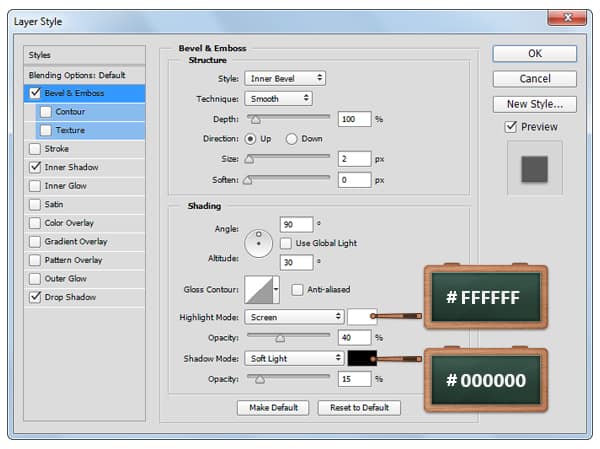
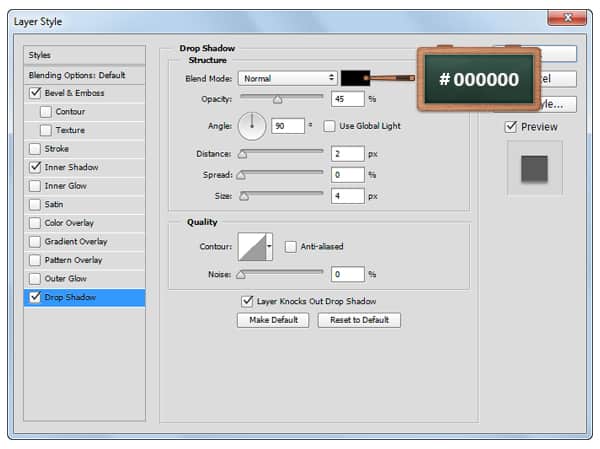
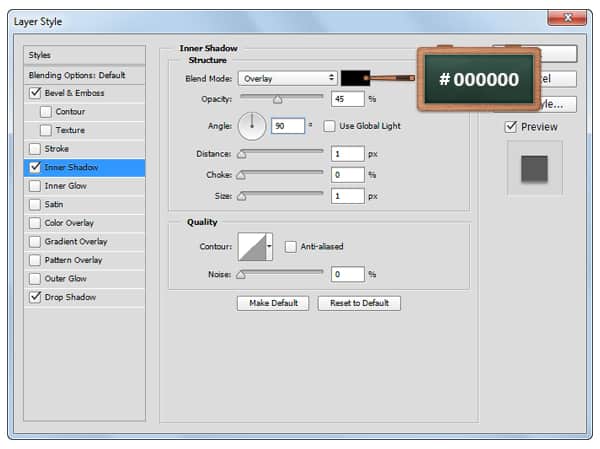
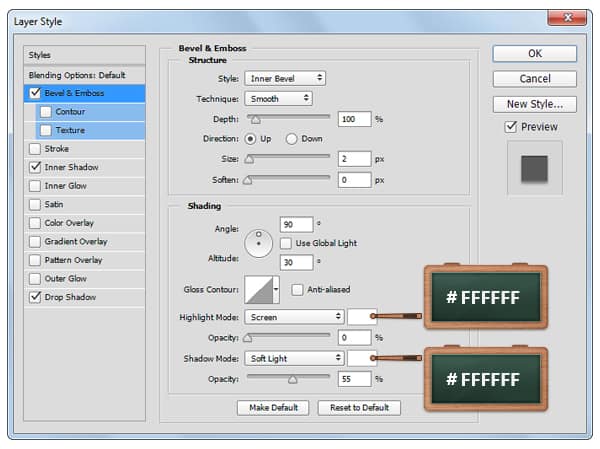
Open the Layer Style window for your “Hightlight” layer and enter the settings mentioned below.


Step 15
Make sure that the “Highlight” layer is selected and duplicate it ( Control + J ).
Open the Layer Style window for this “Highlight copy“, go to Gradient Overlay and simply inverse the angle.

Step 16
Focus on the Layers panel, right click on your “Hightlight” layer and go to Convert to Smart Object.
Make sure that your new smart object stays selected, change the Blend Mode to Overlay, lower the Opacity to80% and then go to Filter > Blur > Gaussian Blur . Enter a 5px Radius and then click the OK button. .


Step 17
Focus on the Layers panel and convert your “Hightlight copy” layer into a smart object.
Make sure that your new smart object stays selected, change the Blend Mode to Overlay, lower the Opacity to50% and then go to Filter > Blur > Gaussian Blur . Enter a 5px Radius and then click the OK button. .

Step 18
Set the foreground color to #C33333, select the Rounded Rectangle Tool and click on your canvas to openCreate Rounded Rectangle window. Enter the settings shown in next image and then click the OK button.
Make sure that your vector shape is selected and pick the Direct Selection Tool.
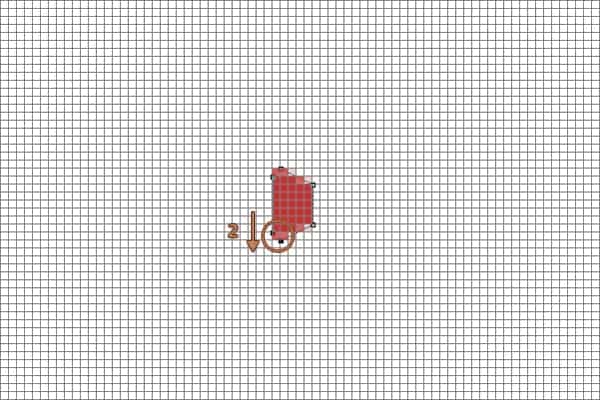
Select the top left anchor points and hit the up arrow button twice and then select the bottom, left anchor points and hit the down arrow button twice.


Step 19
Duplicate the vector shape made in the previous step and place the shapes as you can see below.
Open the Layer Style window for these tiny vector shapes and enter the settings mentioned in the next images.


Step 20
Make a new copy of that tiny vector shape, rotate it ( Control + T ) – 90 degrees and then place it as shown in the following image. Open the Layers Style window for this shape and replace the existing attributes with the ones shown below.

Step 21
In this step you will learn how to create a pattern.
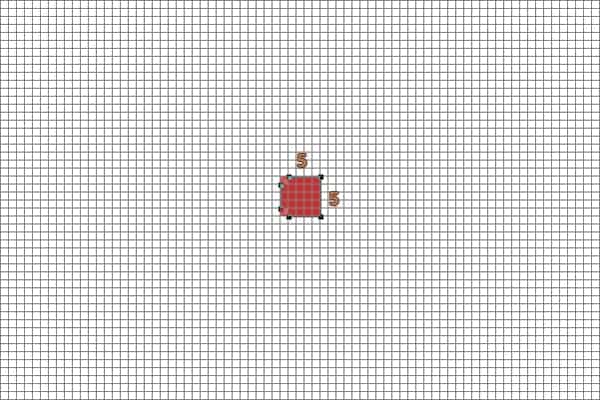
First, hit Control + N and create a 6 x 6px document.
Set the foreground color to #000000, pick the Line Tool and set the size at 2px. Move to your canvas and create the following vector shapes.
Once you’re done, save your pattern simply by going to Edit > Define Pattern. Pick a name for your pattern and click OK.
1 response to “Create a Balloon Text Effect in Photoshop”
-

nice text effect. :-)
Leave a Reply