


Step 22
Return to your main document. Set the foreground color to #97712E, pick the Rounded Rectangle Tool , focus on the top bar and set the Radius to 2px.
Move to your canvas and simply create a 4x10px vector shape.
Make sure that this vector shape is still selected, hit Control + T and rotate it 30 degrees.


Step 23
Duplicate ( Control + J ) the vector shape made in the previous step seven times and move the copies as you can see below.

Step 24
Pick the Rounded Rectangle Tool and set the Radius to 4px. Move to your canvas, create two, 8 x10px vector shapes and place them as you can see below.
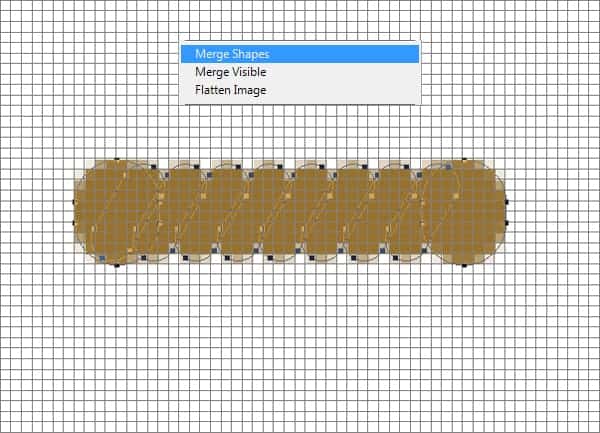
Select all your brown vector shapes, right on one those shapes and go to Merge Shapes.

Step 25
Open the Layer Style window for your brown vector shape and enter the settings mentioned below.
Make sure that your brown vector shape is still selected, make two copies (Control-J) and place them as shown in the first images.


Step 26
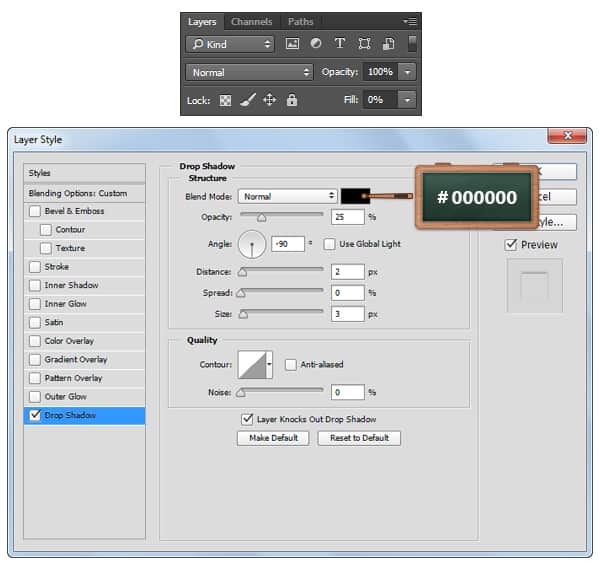
Make sure that your three, brown shapes are selected and duplicate them ( Control-J ). Focus on the Layerspanel, select these fresh copies, right click on one of them and go to Merge Shapes. Open the Layer Stylewindow for the shape made in this step, disable the existing settings, enable the Drop Shadow and then enter the attributes shown below. Keep focusing on the Layers panel, make sure that the shape made in this step is still selected and lower the Fill to 0%.

Step 27
Concentrate on your Layers panel, select all your shapes and layers and then group them using the Control + Gshortcut.
Open the Layer Style window for this group and enter the settings mentioned below.


Step 28
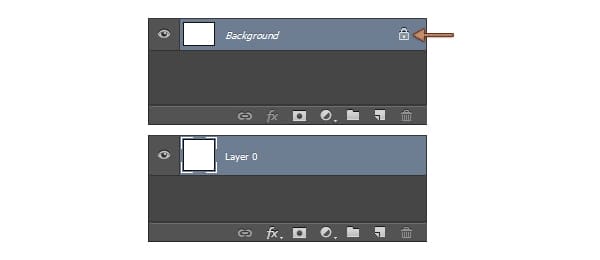
Focus on the Layers panel, select the Background layer and click on the padlock icon to unlock the layer.
Set the foreground color to #CDCDCD or #A3D49C, grab the Paint Bucket Tool and fill the canvas with a new color.
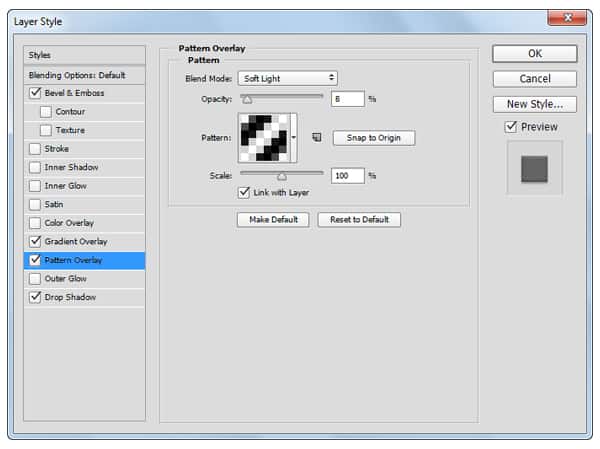
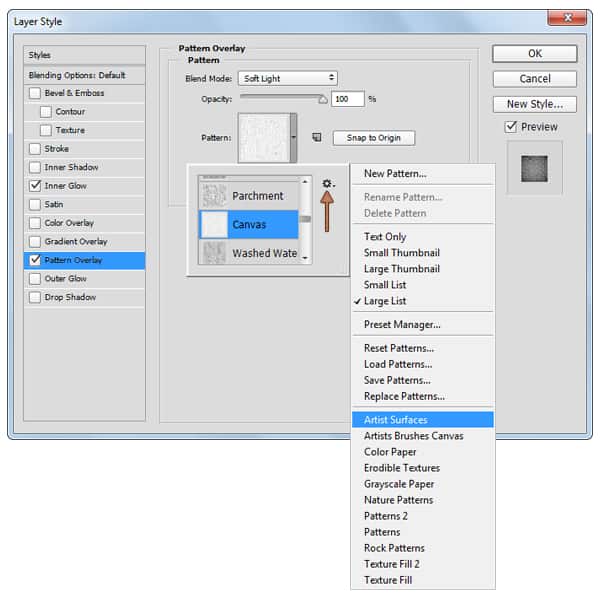
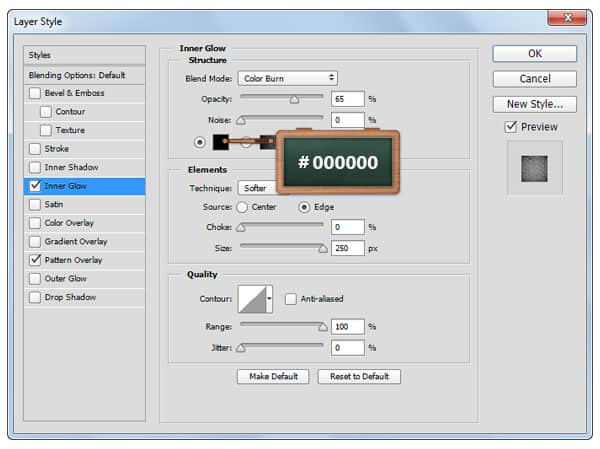
Open the Layers Style window for the layer unlocked in this step and enter the settings mentioned in the next images.


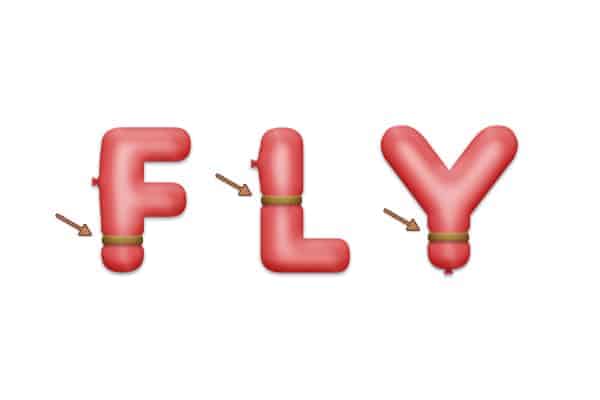
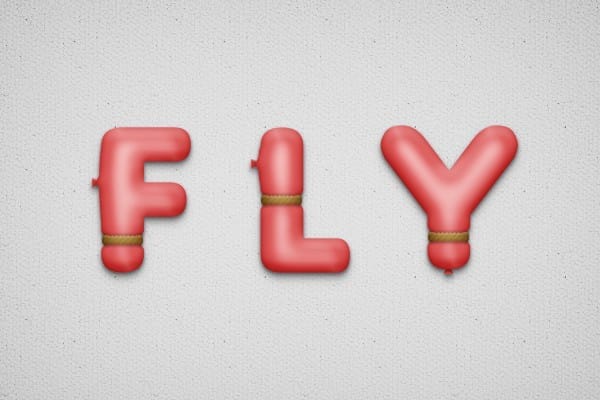
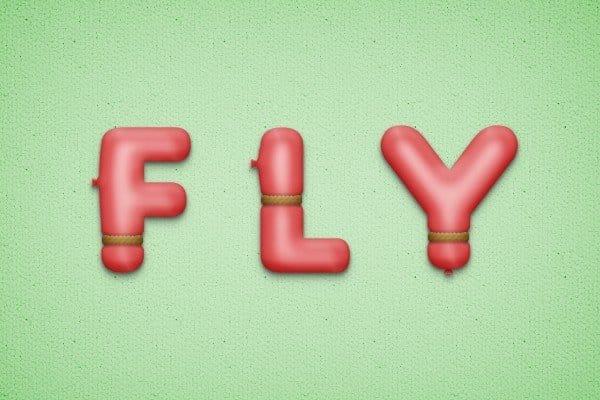
Final Results
Download the PSD
[vc_column width=”1/1″ el_position=”first last”] [vc_cta_button title=”Download” href=”https://downloads.photoshoptutorials.ws/Balloon Text.zip” color=”btn” size=”btn-large” icon=”none” target=”_self” position=”cta_align_right” call_text=”Balloon Text.zip | 6.45 MB” width=”1/1″ el_position=”first last”] [/vc_column]
Tutorial by Razvan Gabriel

I hope you’ve enjoyed this tutorial and you can apply these techniques in your future projects. Thank you for reading this tutorial ! See my portfolio here: MySketch.net
– Razvan Gabriel
1 response to “Create a Balloon Text Effect in Photoshop”
-

nice text effect. :-)
Leave a Reply