
With the same tool, lower the Radius to 75px, create a 1700x 600px vector shape and place it in the center of the rounded rectangle that you have created before.


Step 17
Focus on the Layers panel, select the vector shapes made in the previous step, right click on one of it and go toMerge Shapes.
Pick the Path Selection Tool, select the 1700x 600px vector shape, focus on the top bar and go to Subtract Front Shape.


Step 18
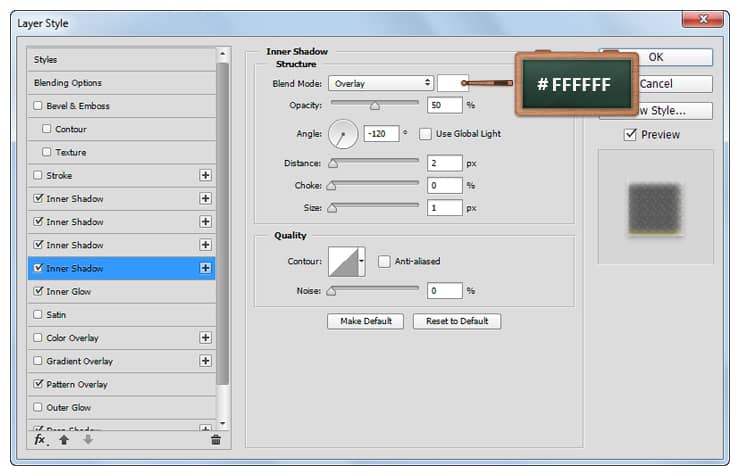
Open the Layer Style window for the vector shape made in the previous step and enter the settings mentioned below.


Step 19
Change the foreground color to #226167, and pick the Pen Tool. Move to your canvas and create the following vector shape.
Focus on your Layers panel, hold the Control button from your keyboard and then click on the thumbnail icon that stands for the vector shape edited in the previous step to load a simple selection around it.
Make sure that the blue vector shape is still is selected and click the Add Layer Mask button.


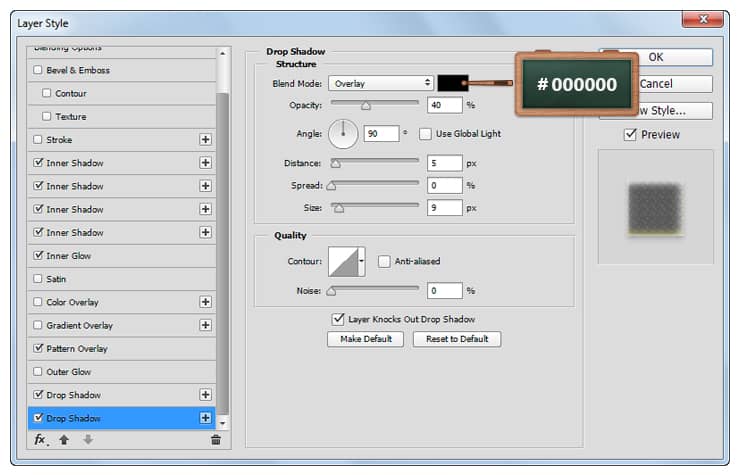
Step 20
Open the Layer Style window for the vector shape made in the previous step and enter the settings mentioned in the next images.


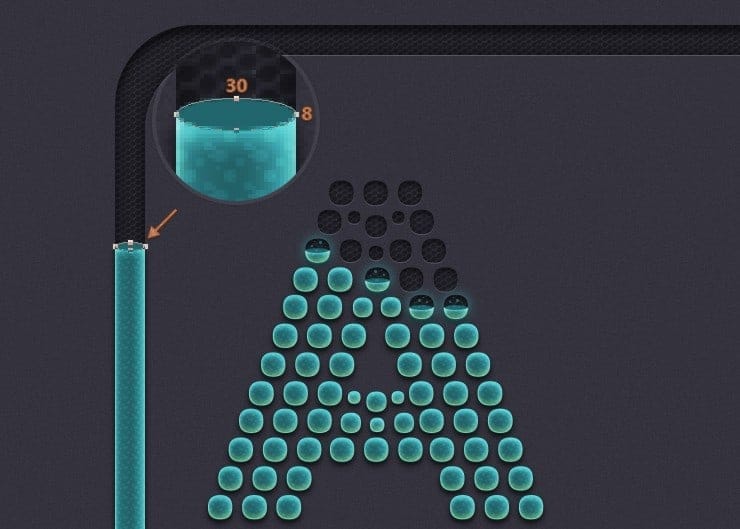
Step 21
Set the foreground color to #21656C, pick the Ellipse Tool, create two, 30x 8px vector shapes and place them in the highlighted places.
Focus on the Layers panel, select the vector shapes made in this step, right click on one of it and go to Merge Shapes.


Step 22
Open the Layer Style window for the vector shape made in the previous step and enter the settings mentioned in the next images.
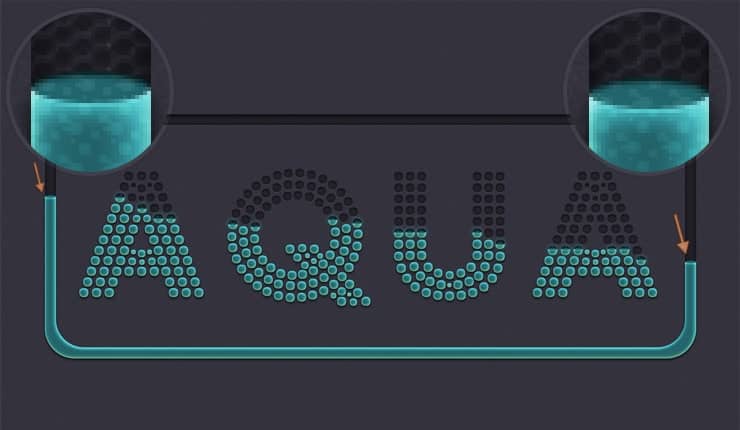


Step 23
Finally, change the foreground color to #226167, pick the Ellipse Tool and create several small circles roughly as shown below.
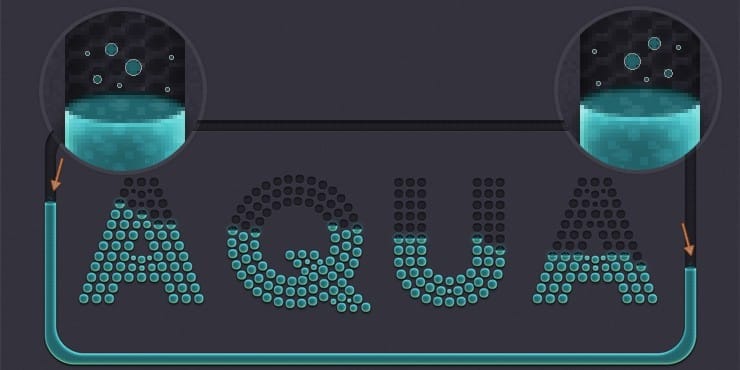
Final Results

Download the PSD
[vc_column width=”1/1″ el_position=”first last”] [vc_cta_button title=”Download” href=”https://downloads.photoshoptutorials.ws/Aqua Text.zip” color=”btn” size=”btn-large” icon=”none” target=”_self” position=”cta_align_right” call_text=”Aqua Text.zip | 1.60 MB” width=”1/1″ el_position=”first last”] [/vc_column]
Tutorial by Razvan Gabriel

I hope you’ve enjoyed this tutorial and you can apply these techniques in your future projects. Thank you for reading this tutorial ! See my portfolio here: MySketch.net
– Razvan Gabriel
6 responses to “How to Create a Cool Dot-Matrix Text Effect in Adobe Photoshop”
-

AWESOME…VERY NICE TUTORIALS.
-
how to add the multiple inner shadow to the same layer? i just can’t make it work…
-
I would have never guessed that this result was so involved. Its probably a good thing that you made this tutorial.
-
This makes for some really cool artwork on a website. even getting down to the detail like you have posted is such a cool look.
-
Awesome..
-
Wow, that seems like a very long process to get that look, BUT it is pretty fricken cool!
Leave a Reply