
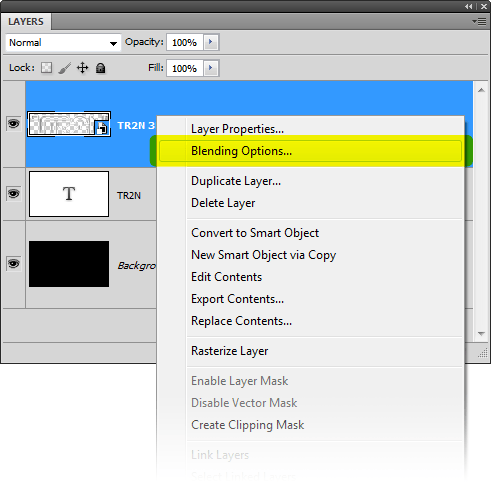
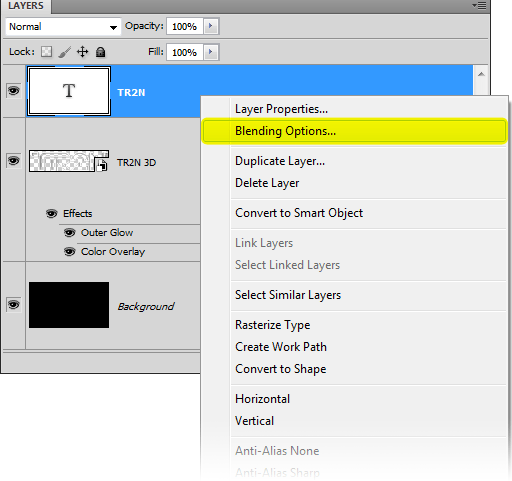
Step 10
We’re now going to use layer styles to give the 3D text a blue glow. Right-click on the TR2N 3D layer then choose Blending Options.
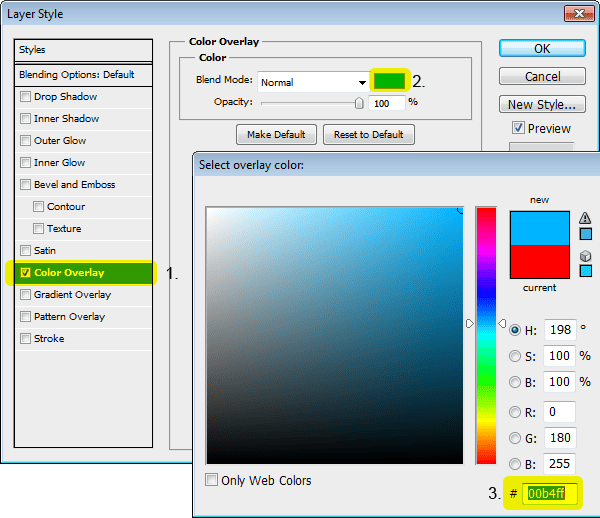
Select the Color Overlay option then set the color to #00B4FF. You can also change the blending mode to Overlay if you like. Don’t click OK yet.
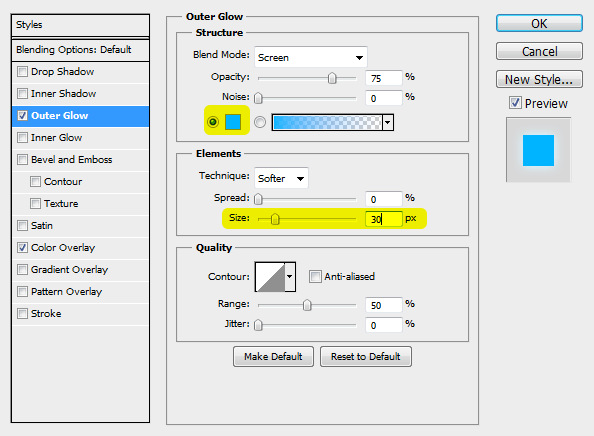
Step 11
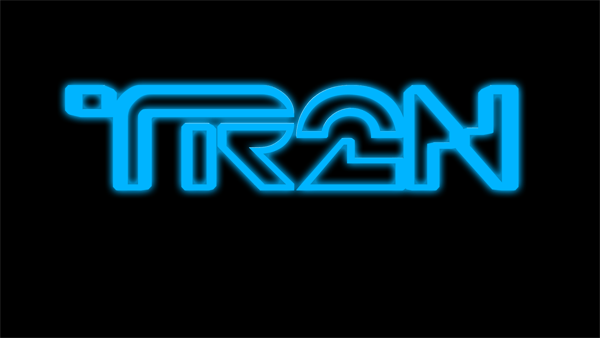
Select the Outer Glow layer style then set the color to the same color we used earlier (#00b4ff). Set the size to around 30px. Note that the size you use will vary if you used a different font size than the one we used. Click OK to apply the changes.
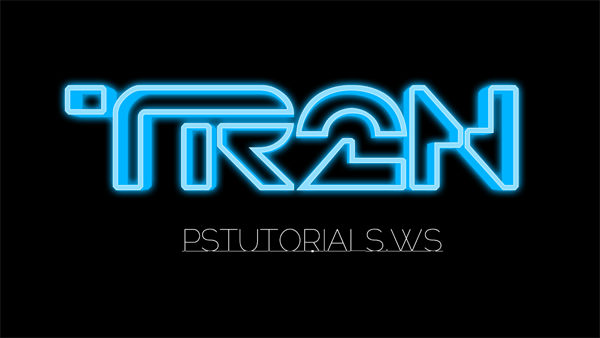
Here’s how the blue glow looks like.
Step 12
Now we’re going to work on the front face of the 3D text to give it a glowing effect. In the Layers palette, move the TR2N layer above the TR2N 3D layer. You can move the layer by dragging it above the TR2N 3D layer.
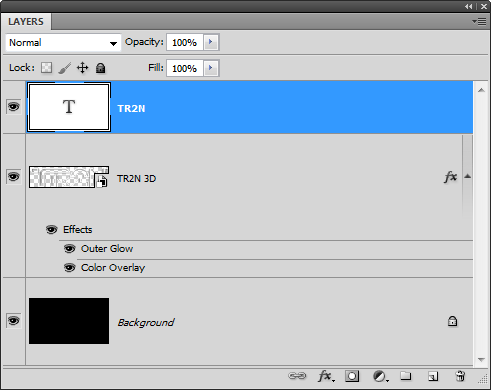
Your text will now have a nice white glow.
Step 13
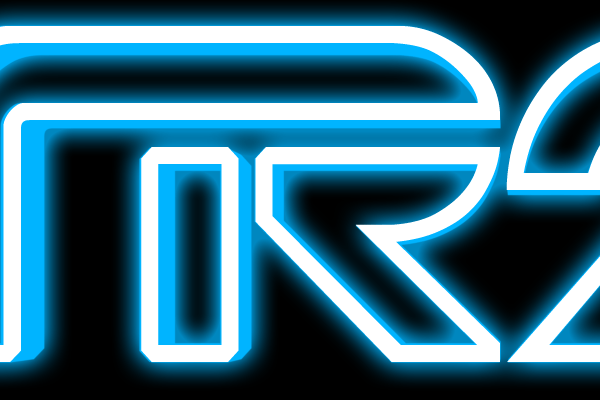
If you zoom in and look closely, chances are that your white outline is not aligning perfectly with the 3D text.

To fix this, use the Free Transform tool by going to Edit > Free Transform. Zoom in and drag the handles of the transform box to scale it so that it fits your 3D text. If your bounding box is snapping and you don’t want it to, hold the Ctrl or Cmd key while dragging to disable snapping.
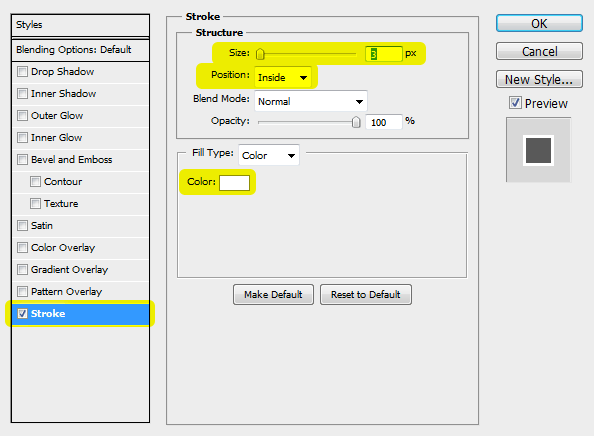
Step 14
We’re now going to add a very thin outline that will improve the look of your text. Right-click on the layer then choose Blending Options.
Select the Stroke layer style then set the size to 3px, position to inside, and color to white. Click OK to apply the changes.
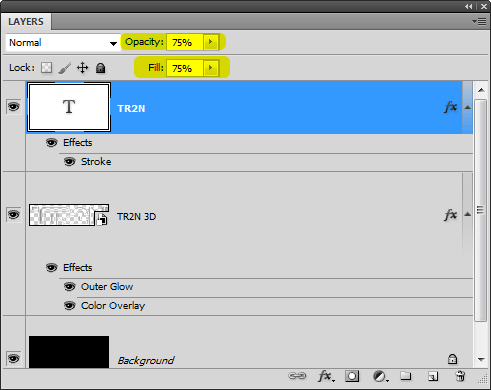
Step 15
It’ll look like you did nothing because the text is white and the outline is white. To fix this, set the Opacity and Fill of the TR2N layer to 75%.
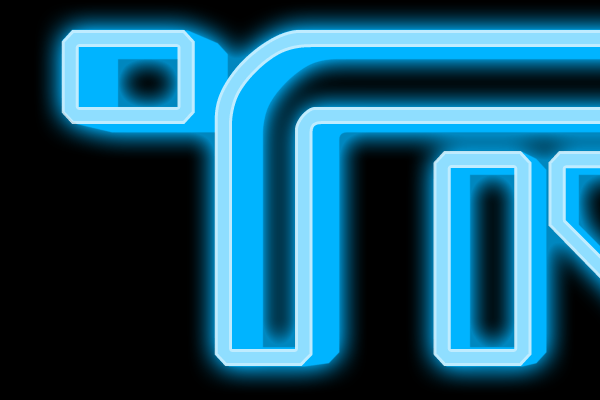
Here’s what we just made.
Step 16
Select the Text tool and type some below the TR2N text. I used the font Raleway. If you have the Neue Helvetica 35 Thin font, you can use that instead – it’s the same font that was in the movie but it’s not free ($35 USD).
If you want to increase the spacing between the letters, go to Window > Character then adjust the spacing value. Make sure you have the text highlighted.
14 responses to “How to Create Glowing TRON-Inspired 3D Text in Photoshop Extended”
-

thank you
-
The download link is broken. (404 Not Found). Please reupload it! :)
-
um can someone please help me. MY font size at 480pt is so tiny that i can barely see it. How do I fix it?
-
Thanks for this
-
can you post a tutorial for cs6? I have a hard time applying the 3d instructions
-
I feel your pain as I type this :\
-
-
Thanks for this tutorial! Very well done; explains everything clearly and has the screencaps too.
-
i dont find Repoussé tool
help me
i work by photoshop cc-
me too
-
-
Thanks :) easy to follow
-
thanks
-
For some reason, when I try to do the colorize on the Bokeh, it doesn’t work at all. I also made the layer mask and tried to erase some of the dots but that is not working either. I am using Photoshop CS5 Extended x64
-
very nice very nice very nice!
i really love your tutorial!! -
Very good tutorial. Very good descriptions, pictures and techniques. I am a PS amateur and I never had the feeling I didn’t understand or didn’t know what to do. Thank you for sharing this.
Leave a Reply