
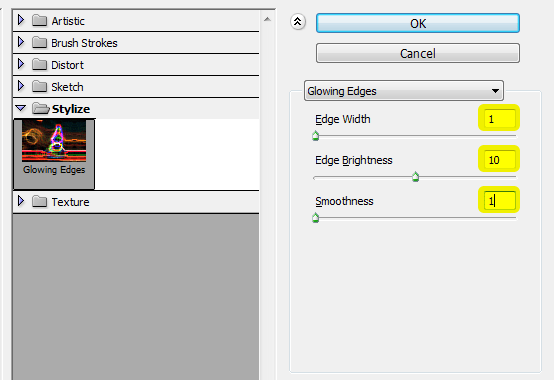
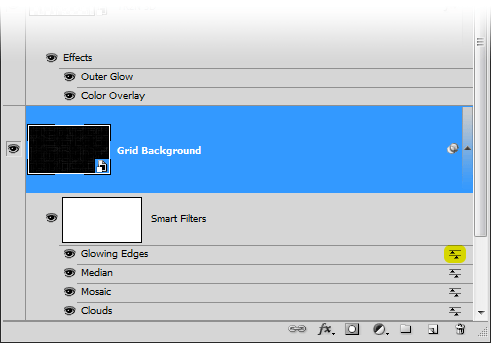
Double-click on the blending options button for the Glowing Edges filter in the Layers palette.
A Blending Options window will appear. Set the blending mode to Screen and opacity to 50% then click OK.

Step 23
Now we’re going to add some contrast to it by adjusting the black clip. We’re going to use a trick to do this because we can’t use the Levels or Curves tool on a Smart Object layer. Instead of using those tools, we’re going to use the Shadows/Highlights tool which is compatible with Smart Objects.
Go to Image > Adjustments > Shadows/Highlights. There is a black clip setting we can use but it’s grayed out unless you make changes to the shadows or highlights settings. To get around this, just set the shadows to 1%.
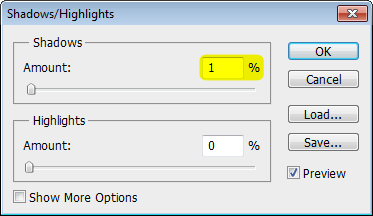
Checkmark the Show More Options option. The tool will expand and give you a lot more settings. Ignore all the other settings and just adjust the black clip setting to your likings. This setting will increase the black areas in your image. If you want to increase the white areas in your image, adjust the white clip setting. I’m just going to set the black clip to 10%. Click OK to apply the changes.

Here’s what the image looks like.
Step 24
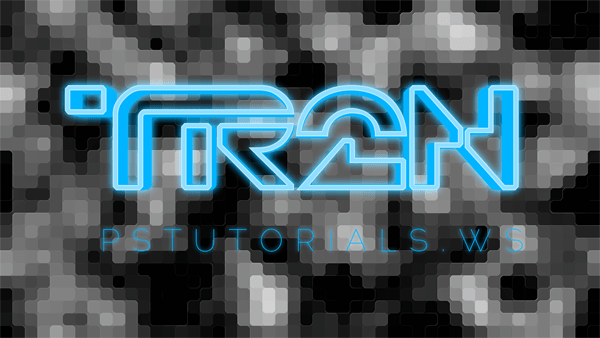
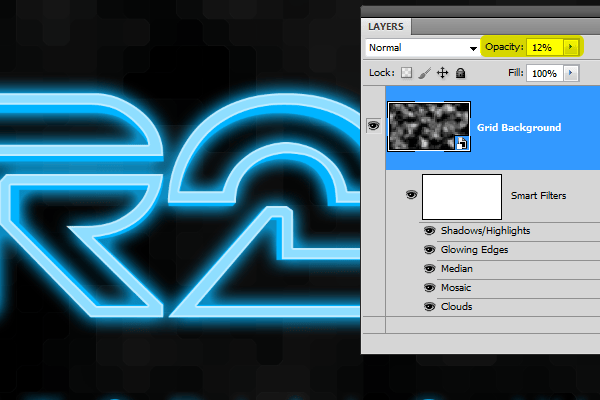
Reduce the opacity of the Grid Background layer to your likings. I set mine to 12%.
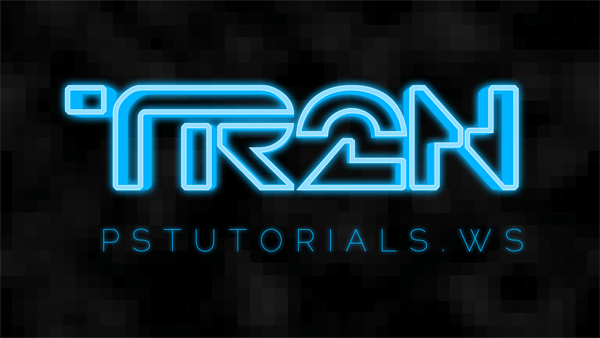
Here’s what the image looks like with the grid background. We’re not quite done yet… just one quick tip before we move on to the bokeh effect.
Step 25
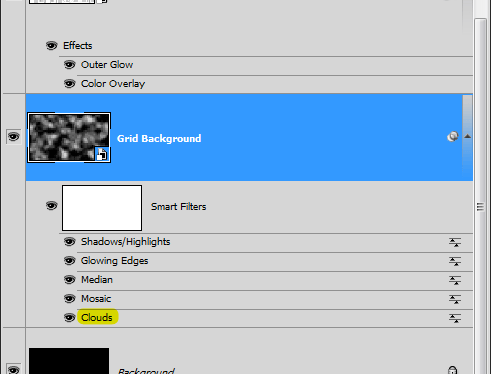
Here’s the coolest part of about the grid background we just created. You can randomize the grid simply by double-clicking on the Clouds Smart Filter. Photoshop will randomize the effect every time you do it.
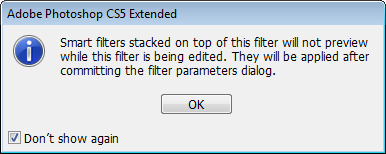
Photoshop will give you a info popup when you double-click on the clouds layer. You can checkmark the “Don’t show again” option if you don’t want to see this popup again.
Keep double-clicking on the Clouds Smart Filter until you get a pattern that you like. Here’s the one I settled with.
Step 26
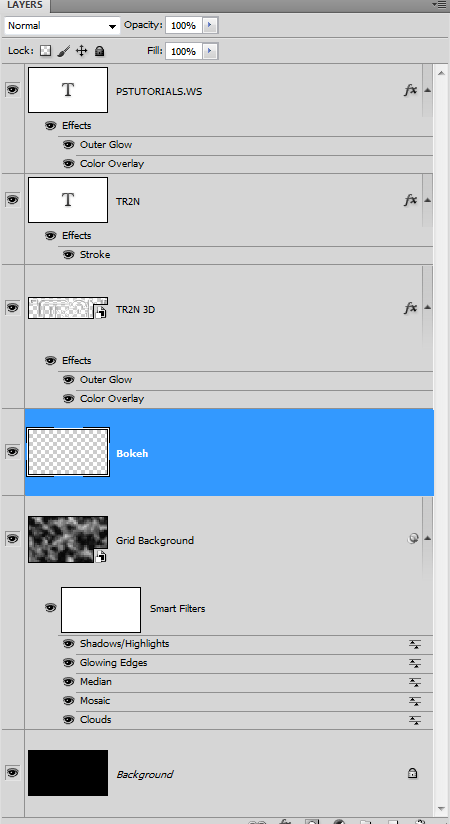
Create a new layer and position it above the Grid Background layer. Name this layer Bokeh.
Step 27
Select the Brush tool then right-click anywhere on the document to bring up the brush settings. Pick this brush here. It should be a round brush with a 100% hardness. Set the Size to 200 px.
14 responses to “How to Create Glowing TRON-Inspired 3D Text in Photoshop Extended”
-

thank you
-
The download link is broken. (404 Not Found). Please reupload it! :)
-
um can someone please help me. MY font size at 480pt is so tiny that i can barely see it. How do I fix it?
-
Thanks for this
-
can you post a tutorial for cs6? I have a hard time applying the 3d instructions
-
I feel your pain as I type this :\
-
-
Thanks for this tutorial! Very well done; explains everything clearly and has the screencaps too.
-
i dont find Repoussé tool
help me
i work by photoshop cc-
me too
-
-
Thanks :) easy to follow
-
thanks
-
For some reason, when I try to do the colorize on the Bokeh, it doesn’t work at all. I also made the layer mask and tried to erase some of the dots but that is not working either. I am using Photoshop CS5 Extended x64
-
very nice very nice very nice!
i really love your tutorial!! -
Very good tutorial. Very good descriptions, pictures and techniques. I am a PS amateur and I never had the feeling I didn’t understand or didn’t know what to do. Thank you for sharing this.
Leave a Reply