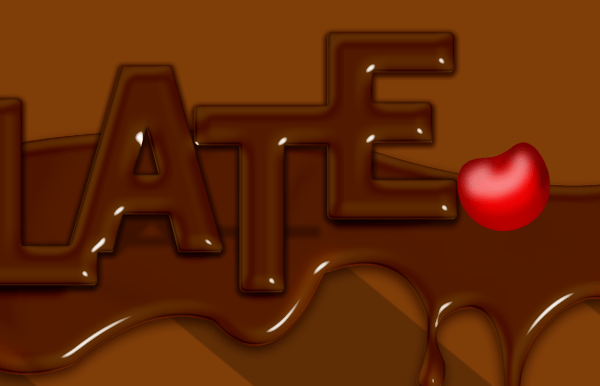
Create a new layer and name it ‘Shine 2.’ And with your Brush tool (10px) place two dots on top of the cherry so that it looks like the image below.

Create a new layer and name it ‘Shine 3.’ Grab your Brush tool again (18px) and make your cherry look like the one below. Change the Layer Opacity to 35%.

Step 23 – Add the Stem
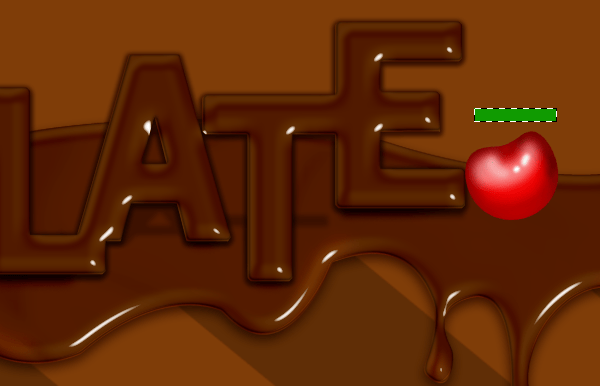
Create a New Layer and name it ‘Stem.’ Grab your Rectangular Marquee Tool and make a rectangle on your canvas. Once you have done so fill it with #109b01

Then Edit > Free Transform and rotate your stem like the image below.

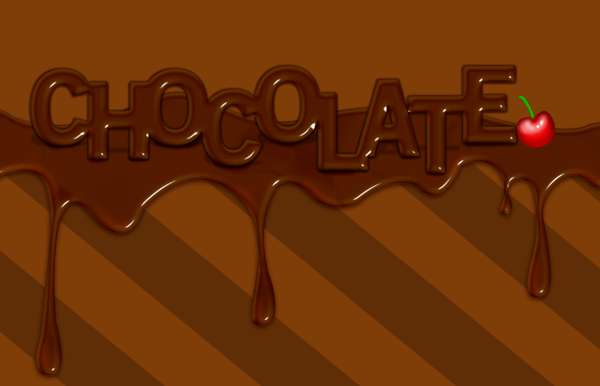
Once you rotated your stem then Edit > Transform > Warp and create a stem-like shape. After that take out your Burn tool and burn one side of the stem and on the other side use the Dodge tool so that it looks like the image below.

Step 24 – Let’s Add One More Cherry
This is how it looks so far but I think it needs one more cherry.

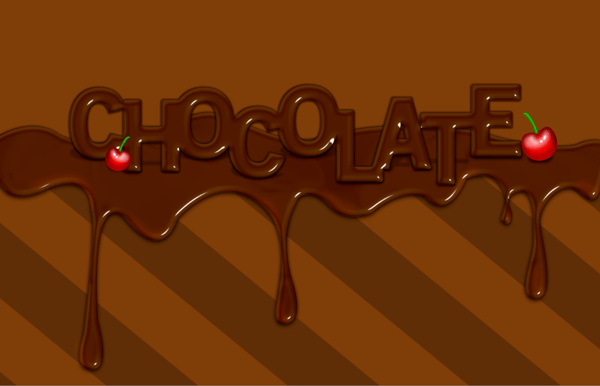
Take your ‘Cherry’, ‘Shine’, ‘Shine 2’, ‘Shine 3’ and ‘Stem’ Layer and place them all in a group. Select all of these layers and drag them to the folder icon like the image below. And you can name this group ‘Cherry.’

Duplicate this group (right click layer ‘Duplicate this Group’) it will automatically be named ‘Cherry copy’ which is fine. Take ‘Cherry Copy’ and resize and put it over in front of the letter ‘C.’ Also go to Edit > Transform > Flip Horizontal so that it looks like the image below.

Step 25 – Almost Finished!
Go back to your 3rd ‘Drips’ Layer and grab your Burn tool and place it under the areas of the cherries. Then you will be done my friend!

You can play around with the color of the drips to get a different effect like the one below. Mmmm Yum!

Final Results
![final-results[1] final-results[1]](https://cdn.photoshoptutorials.ws/aa6ab30268b3_124DA/final-results1.png?strip=all&lossy=1&webp=82&avif=82&w=1920&ssl=1)
Authors Comment
6 responses to “How to Create a Chocolate Text Effect in Photoshop”
-
aaaaaaaaaaaaahhhhhhhhhhhhhhhhhhhhhhh
-
no me sale la parte del color donde quedan los reflejos blancos
-
This is actually excellent ! unique tutorial. I never seen such.
Thank you thank you ! Really thank you for this tutorial !
Wish you all the best for your work in graphic designs . . .
best luck. Thnkies once again. -
Thank you. Very delicious!!!
-
Thank you! Great job
-
this is brilliant! thankyou sooooo much!


 Hello! I’m a 20 yr old aspiring Graphic Designer. Currently I’m attending Florida State University in Tallahassee,FL majoring in Graphic Design. I’ve been designing for almost 3 years now.
Leave a Reply