


Step 21
Add Adjustment Layer “Curves”

Step 22
Next, go to open another Birds. File > Open and select Birds. After you open the image, use Lasso Tool(L) and start selecting seagulls. After the selection area has been created, simply copy (Ctrl / Cmd + C) and Paste (Ctrl / Cmd + V) it to our work canvas. Then position the image with the transform tool (Ctrl / Cmd + T). Hold Alt + Shift and resterize like image below. In Photoshop CC only hold Alt to resterize al sides together


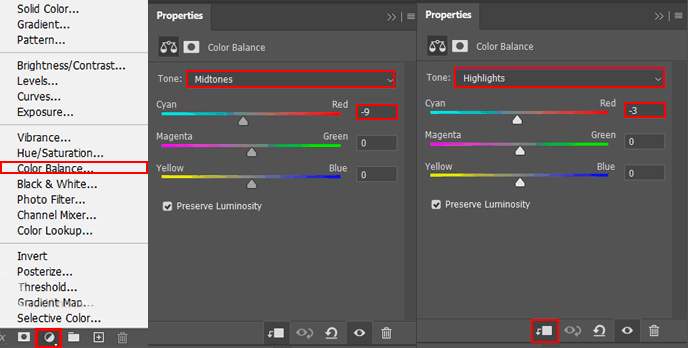
Step 23
Add Adjustment Layer “Color Balance”
Step 24
Now open another Birds, go to File > Open and select Birds 2. Hold Ctrl/Cmd and click on layer to make a selection. After the selection area has been created, simply copy (Ctrl / Cmd + C) and Paste (Ctrl / Cmd + V) it to our work canvas. Then position the image with the transform tool (Ctrl / Cmd + T). Hold Alt + Shift and resterize and Rotate like image below. In Photoshop CC only hold Alt to resterize al sides together. Opacity set to 60%.


Step 25
Go to File > Place and select the Underwater 2 photo. Then place it to our work canvas, position the image with the transform tool (Ctrl / Cmd + T). Hold Alt + Shift and rasterize like the image below. In Photoshop CC only hold Alt to rasterize all sides together. Create a layer mask and with Soft round brush tool paint on top and bottom parts to delete it. Blend mode change to Overlay with Opacity 90%.


Step 26
Go to File > Place and select the last Underwater 3 photo. Then place it to our work canvas, position the image with the transform tool (Ctrl / Cmd + T). Hold Alt + Shift and rasterize like the image below. In Photoshop CC only hold Alt to rasterize all sides together. Blend mode Soft Light with Opacity 60%.


Step 27
Now go to open Water Line. File > Open and select Water Line. Use Quick Selection Tool(W) and start selecting. After the selection area has been created, simply copy (Ctrl / Cmd + C) and Paste (Ctrl / Cmd + V) it to our work canvas. Then position the image with the transform tool (Ctrl / Cmd + T). Hold Alt + Shift and resterize like image below. In Photoshop CC only hold Alt to resterize al sides together.
One response to “Create Underwater Atlantic City Photomanipulation”
-

nice
Leave a Reply