

Step 10
Isolate the rock and place it below the water’s surface. Use Ctrl+Tto rotate the rock to make its top go straight . Add a mask to this layer and use a medium-soft black brush to erase the rock’s part on the sea’s surface to make it hidden below the water and the top part a bit.

Step 11
To blend the rock with the water, make a Color Filllayer above the rock one and set it as Clipping Mask. Pick the color #0f5164and lower the opacity of this layer to 60%. On this layer mask, use a soft black brush to erase the top of the rock above the water so it won’t be affected by this fill layer.

Step 12
Make a Curves adjustment layer to darken the rock, especially the part below the water. On the layer mask, paint on the top part to keep its lightness.
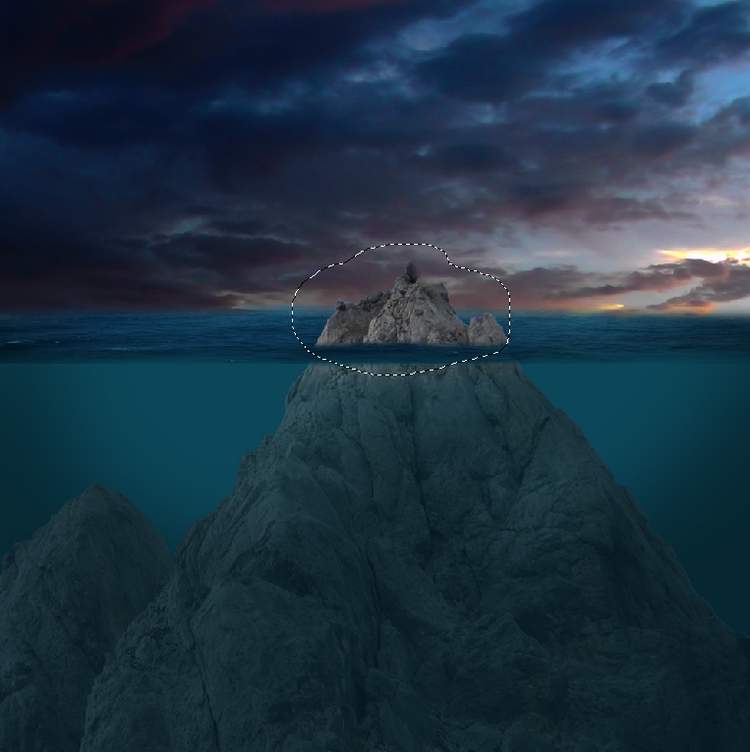
Step 13
Create another Curvesadjustment layer to continue darkening the rock. The selected area shows where to paint on the layer mask.


Step 14
Make a new layer, change the mode to Overlay 100%and fill with 50%gray:


Step 15
Make a new layer on top of the layer and activate the water brushes. Change the foreground to #eaf4faand select the brush numbered 752 to paint on the right of the sea’s surface to make a part of the water line. Add a mask to this layer to erase the part on the middle of the sea.
Step 16
Duplicate this layer several times and move them along the line of the water. Use the Move Tooland Ctrl+Tto fill in the line and besides the rock with the different parts . Use a layer mask on each of these layers to make the results appear different.
Step 17
Create a new layer on top of the layers and use a soft white brush to paint on the upper of the canvas. Change this layer mode to Soft Light 100%and use a layer mask to erase the both sides to make the light visible around the rock and the middle only.4 responses to “Create a Mysterious Underwater Scene with Photoshop”
-

Downloading the required materials is way too difficult. Sign up for this, sign up for that, etc., etc. I wanted to give the technique a try, but not at the expense of that much of my time.
-
Simple solution to this is to pay for stock photos. My opinion is that it’s not worth using free resources unless it is for practice because when you make a final piece, you can rest assured that everything is rightfully licensed.
-
-
Dear,
Extraordinary and great work , also a very clear tutorial to follow.
Thaks for sharing , it is a great help .Kind regards ,
Yves -
Wow! This is so cool!
Thank you for this tutorial!!
Leave a Reply