

Step 9
Add Adjustment Layer “Levels”
Step 10
Now open a Stars, go to File > Open and put it above Man layer. Change Blend mode to Lighting Color with opacity 100%. Create a layer mask and use Brush Tool (B) Soft Round with foreground color Black and start painting.

Step 11
Add Adjustment Layer “Hue/Saturation”
Step 12
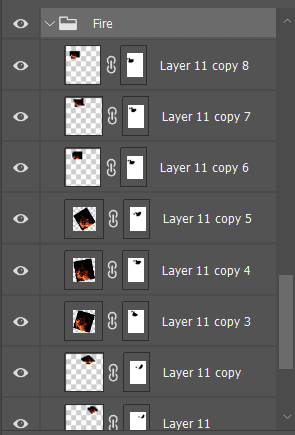
In this step we add fire. First go to File > Place and open fire photo stock.. After that change blend mode to Screen and use Brush Tool(B) Soft Round forefround color black. Start painting the edges to look realistic, see example in pictures below.


Step 13
In this step we will change the color of the eyes in a very simple way. First create a new layer, click on icon create a new layer in layer panel.


Step 14
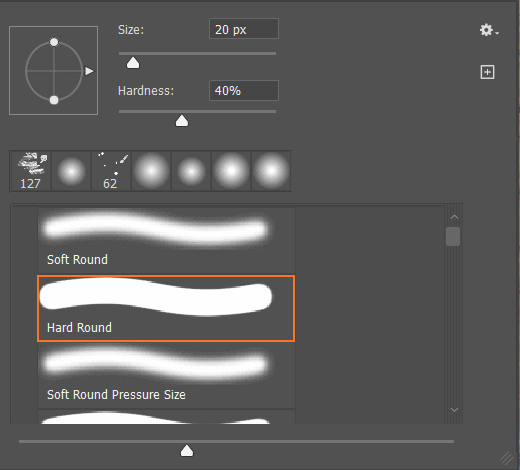
Next, we repeat the same process in this step. Create a new layer and use Brush Tool(B) size 20px Hardness 40% and foreground color white. Start painting and change blend mode to Overlay with Opacity 50%.


Step 15
Next, go to File > Place and select Underwater 4. Place it and position the image with the transform tool (Ctrl / Cmd + T). Hold Alt + Shift and resterize like image below. In Photoshop CC only hold Alt to resterize al sides together. Blend mode change to Hue with Opacity 100%.

Step 16
Go to File > Place and open Underwater 5, place it and position the image with the transform tool (Ctrl / Cmd + T). Hold Alt + Shift and resterize like image below. In Photoshop CC only hold Alt to resterize al sides together. Blend mode change from Normal to Overlay with Opacity 100%.

Step 17
Next, Go to File > Place and open Underwater 2 stock photo. Place it and position the image with the transform tool (Ctrl / Cmd + T). Hold Alt + Shift and resterize like image below. Create layer mask and use Brush Tool(B) Soft Round with foreground color black and start painting left corner like as image below. Blend mode change to Hard Light.2 responses to “How to Create a Water & Fire Portrait Photo Manipulation in Photoshop”
-

I personally love that this is step by step (and not a video). Going to try this idea and see how it all works out for me – looks interesting!
-
Hello, please do you guys have a video?
Leave a Reply