

Step 18
In this step we will set the background in the water, behind the shoulders as you can see in the picture below.


Step 19
Now go to add Texture 1, File > Open > Texture 1. Use Rectangular Marquee Tool(M). With the Rectangular Marquee tool, drag over the area you want to select. Hold down Shift as you drag to constrain the marquee to(release the mouse button before you release Shift to keep the selection shape constrained). After the selection area has been created, simply copy (Ctrl / Cmd + C) and Paste (Ctrl / Cmd + V) it to our work canvas. Then position the image with the transform tool (Ctrl / Cmd + T). Hold Alt + Shift and resterize like image below. In Photoshop CC only hold Alt to resterize al sides together. Change Blend Mode to Soft Light with Opacity 50%.

Step 20
Add Adjustment Layer “Solid Color” above all layers.


Step 21
Go to File > Place and use Texture 2 and place it to our work canvas. Blend Mode change to Soft Light with Opacity 30%.


Step 22
Add Adjustment Layer “Gradient Map”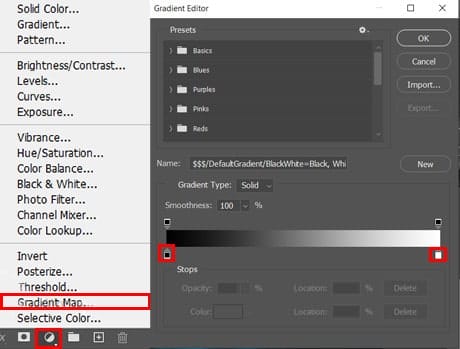

Step 23
Add Adjustment Layer “Selective Color”

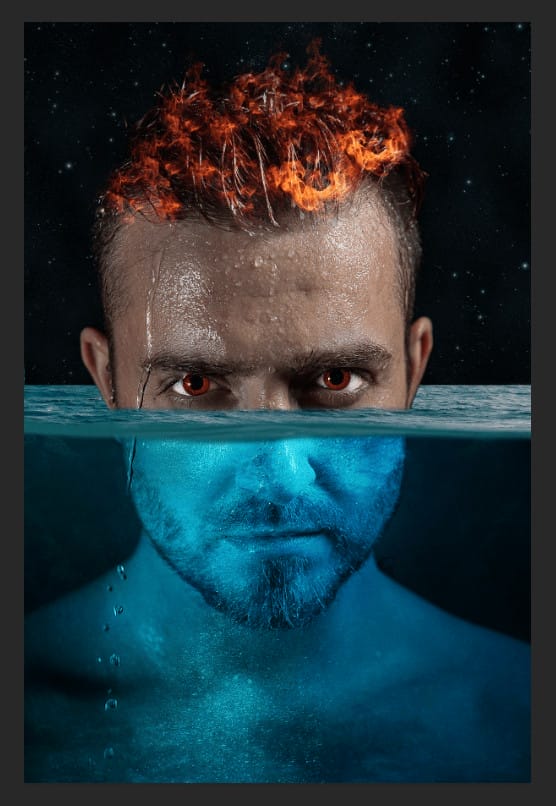
Final Results

Download the PSD
Underwater Man.zip2 responses to “How to Create a Water & Fire Portrait Photo Manipulation in Photoshop”
-

I personally love that this is step by step (and not a video). Going to try this idea and see how it all works out for me – looks interesting!
-
Hello, please do you guys have a video?
Leave a Reply