
Step 47
Create a new layer below all of the mushroom layers. Use a soft brush with the color #1a1a03 with the opacity about 40% to paint a soft shadow for the mushrooms on the hidden side on the left.

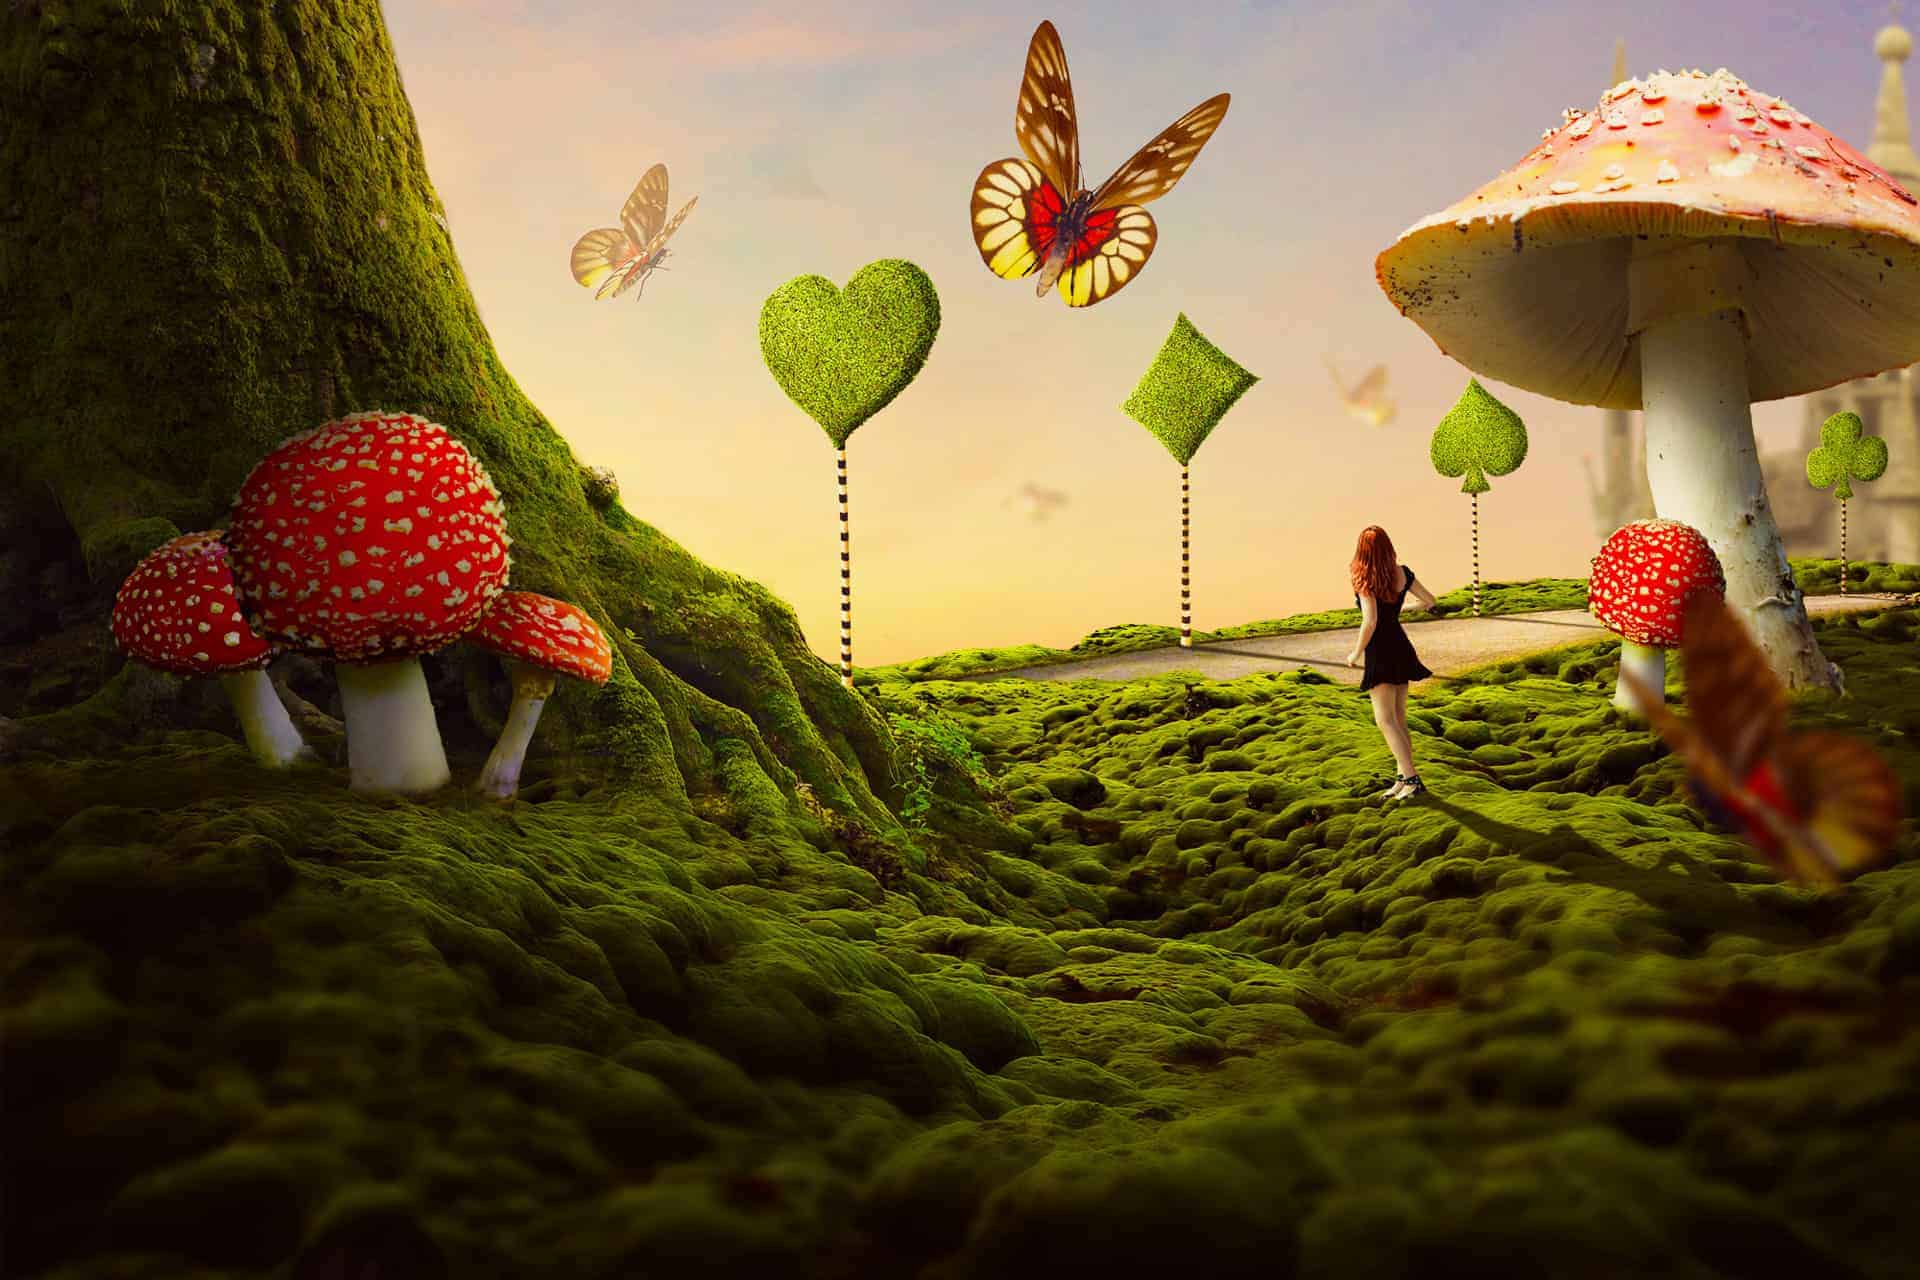
Step 48
Open the butterflies image and take different butterflies to add to the sky area. I’ve added a big one to the foreground and apply a Gaussian Blur of 6 px to it .

Step 49
Apply a Gaussian Blur of 4 px to each of the small butterffy layers in the lower positions.

Step 50
Create a Curves adjustment layer for the biggest butterfly to increase the haze on its lower body a bit. On this layer mask, paint on its top to reduce the effect there.

Step 51
On each of the smaller butterflies on the sky, make a new Color Fill layer and pick the color #e4d7c2. Lower the opacity of these fill layers to 30% and 35% or any values you feel good.

Step 52
Make a group for the butterfly layers and add a Curves adjustment layer to increase a dreamy effect for them. On the layer mask, use a soft black brush with the opacity about 30-50% to reduce the hazy effect on the one on the foreground and on the wings of the biggest butterfly or any details if needed.

Step 53
Create a Gradient Map adjustment layer on top of the layers and pick the colors #480404 and #006020. Lower the opacity of this layer to 20%.

Step 54
Make a Color Balance adjustment layer and change the Midtones and Highlights settings.


Step 55
Add a Photo Filter adjustment layer and pick the color #f5c88d.

Step 56
Create a Curves adjustment layer to increase the contrast of the whole scene.

Make a Vibrance adjustment layer to enhance the final effect:

Final Result
Download the PSD
6 responses to “How to Create a Wonderland Photo Manipulation with Photoshop”
-

OMG, this kind of work must be exposed at museum.
-
You’re genius, a legend, excelent work.
-
Dear,
Always a beautiful, very clear tutorial.
Thanks for sharing.
Yves -
Sorry; stuck on step 8 not 9…
-
Stuck on step 9; the Curves adjustment layer brightens everything, not just the road.
-
You need to to Layer > New
-
Leave a Reply