Make skin look perfect in one-click with these AI-powered Photoshop actions.
Is Photoshop’s Photomerge too slow or not giving the results you need? Microsoft ICE (Image Composite Editor) may be your answer. It’s one of the fastest panorama stitching tools and outperforms many commercial stitching software - yet it’s free. It can even save your panorama as a layered PSD file. Should you use Microsoft ICE instead of Photoshop’s PhotoMerge? Read this article and find out why Microsoft ICE may be a better choice.
How to Create Layered Panorama PSD with with Microsoft ICE
Step 1
Download and install Microsoft ICE. Microsoft ICE is only compatible with Microsoft Windows.
Step 2
Run Microsoft ICE then go to File > New Panorama. If your panorama is created using a robotic head like the GigaPan, then choose File > New Structured Panorama.
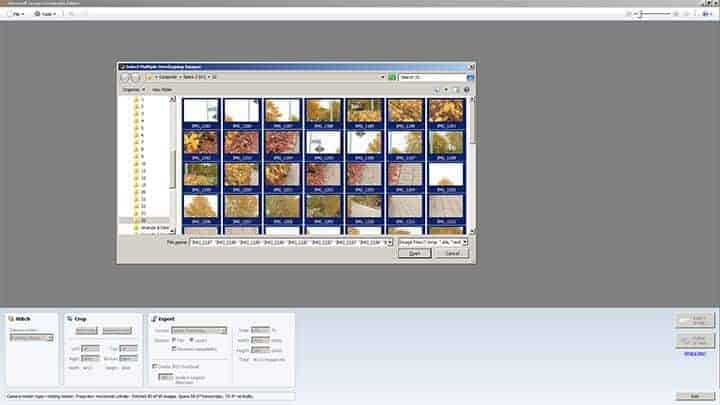
Step 3
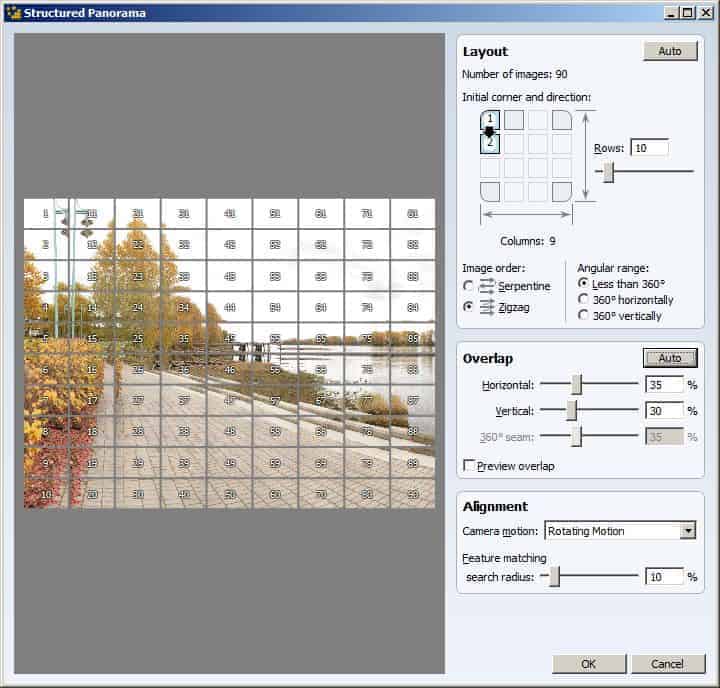
If you are creating a structured panorama, Microsoft ICE will automatically detect the settings for you. If everything looks alright, click OK. If you have a GigaPan or other robotic panoramic heads, this Structured Panorama tool will be very useful for you. I found better and more consistent results with this tool than Gigapan Stitch.
Step 4
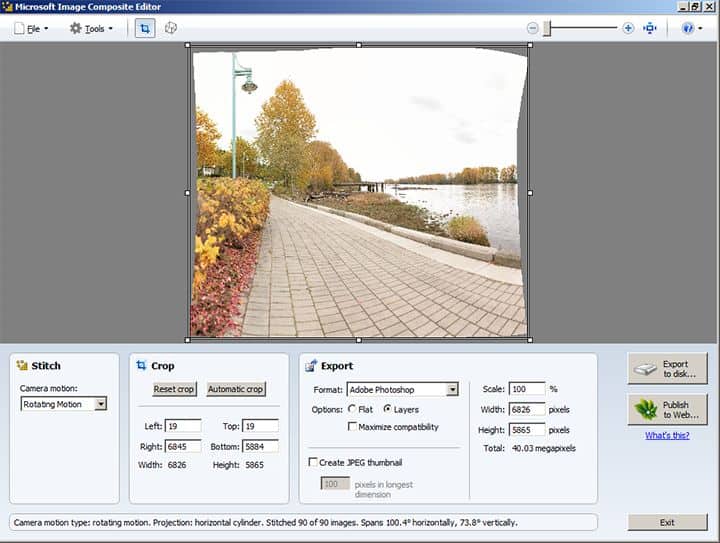
Microsoft ICE will now render your panorama. This may take a minute or more but it’s a lot faster than Photoshop’s Photomerge. Here’s a screenshot of Microsoft ICE when it’s done processing your panorama.
Step 5
Most of the time, ICE does a fine job detecting your images and creating the best panorama out of them. If the panorama doesn’t look good, you can tweak the projection method by clicking on the ![]() on the top. This will bring you the Projection menu where you can change the type of projection. For our panorama, we can fix this by changing the projection from Cylinder (Horizontal) to Perspective.
on the top. This will bring you the Projection menu where you can change the type of projection. For our panorama, we can fix this by changing the projection from Cylinder (Horizontal) to Perspective.
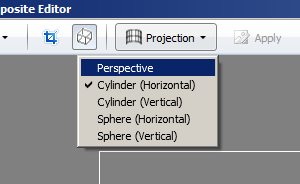
Already you can see that the image has been improved and we can improve it more by adjusting the centerpoint. Start by aligning the horizontal line to your horizon. To do this, click and drag on the middle-vertical line. If your horizon is tilted, drag anywhere outside the bounding box to rotate the horizon.
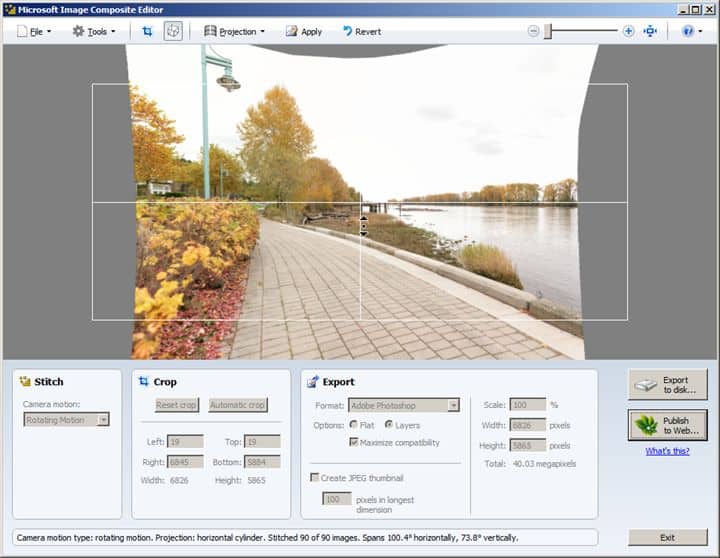
Next, drag the horizontal line to rotate your panorama. Because the sidewalk is the primary subject of this photo, I rotated it so that the vanishing point appears at the end of the path. This fixes the perspective of the lamp and bricks at the expense of cropping off the side of the landscape. When you’re done, click Apply.
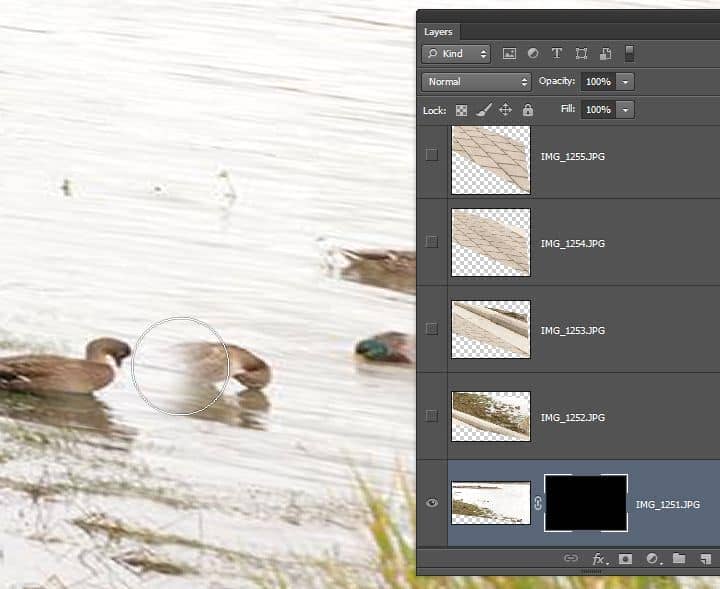

9 comments on “Photoshop Tip: Create Layered Panorama PSDs with Microsoft ICE”
Really enjoyed reading ur blog.
Nice technique. Really useful…amazing!! great to see the amazing work of great experienced art directors!!thanks for the post…
Good info.. thanks! I'd love to have a Gigapan for myself one day.
Your blog is great! These pictures are so interesting , I like cartoon very much, I want to make friends with you
I don't care about making panoramas but the last picture of the sharpness is interesting. Can you do that with a set of photos and trick it into just sharpening the image? I.E. Using burst mode to take 3 pictures of the same scene then putting it into Photosync to sharpen it.
@Denver9999999 Haven't tried but that's a great idea. Photoshop does have a way to do that using Stacking modes. You can go to File > Scripts > Load into Stack and then go to Layer > Smart Objects > Stack Mode > Mean or Median. Those are more for reducing noise but can sharpen the image as a result of less noise. Another software to try is PhotoAcute (http://www.photoacute.com/)
Just noticed that you posted to Photosynth: http://photosynth.net/view.aspx?cid=1b77eff0-b816-40bb-a131-a640cd31bce6
I'm not sure if you found the Photosynth Export plugin for Photoshop: http://research.microsoft.com/en-us/um/redmond/groups/ivm/PSPlugin/ ? This lets you use the workflow that you describe here and still upload to Photosynth.
Thanks for the tip Matt! That's a useful addon
Doesn't work for Mac :,(