Skip to content

Photoshop Matte Painting in Easy Steps

Level
Advanced
Time
1 h+
Steps
49 steps49

Learn how to create a breathtaking scene in simple steps. This Photoshop tutorial will teach you how to blend elements together using nondestructive techniques, paint with vibrant colors, and blur/smudge to create a dramatic scene.

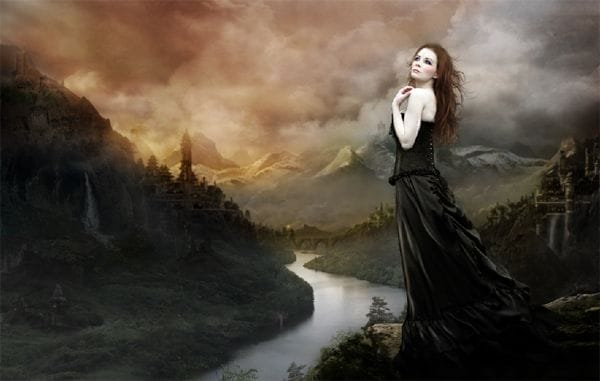
Preview of Final Results

image002


Tutorial Resources


Step 1 Size

Open the background stock. The size of the stock is width: 2250px and Height: 1500px.
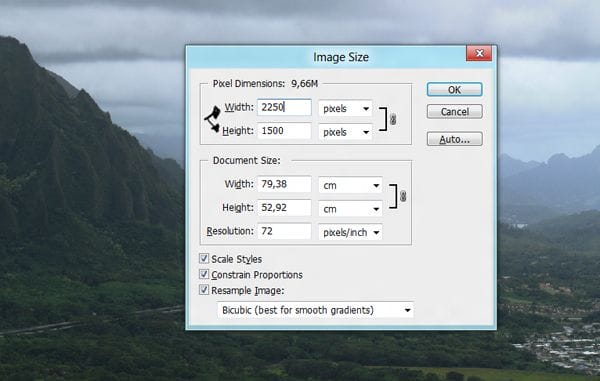
image003

Step 2 Smart Object

Transform the background into a smart object. Pressing right click in the layer thumbnail and selecting the option Convert to smart object.
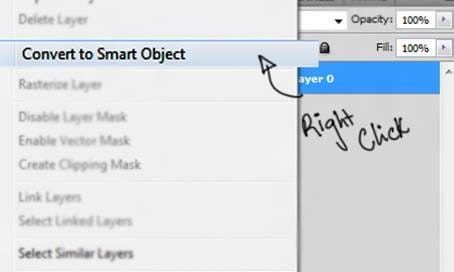
image059

Step 3 Smart Object

Press double click in the smart object thumbnail.
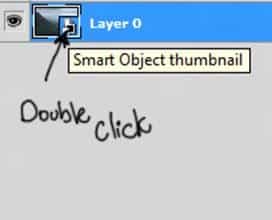
image060

Step 4 Edit

Now a new window will pop up. This allow you to edit the smart object. So press ok.
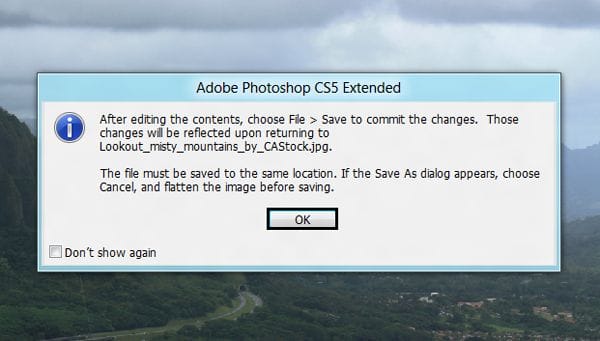
image006

Step 5 Duplicate

Now press Ctrl+J to duplicate the layer in case you need to go back to the original image.In this layer you will use the patch tool to hide undesired parts of the image.
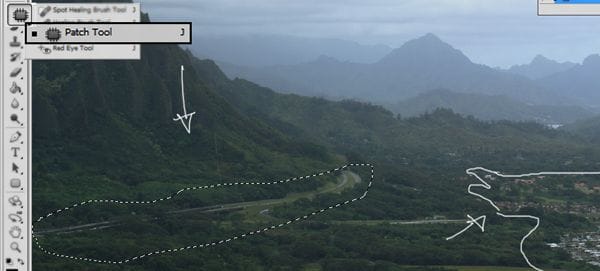
image007

Step 6 Duplicate and Change color

Press Ctrl+J to duplicate the layer and then press Ctrl+U and in the option saturation put -70. The image will have this color.
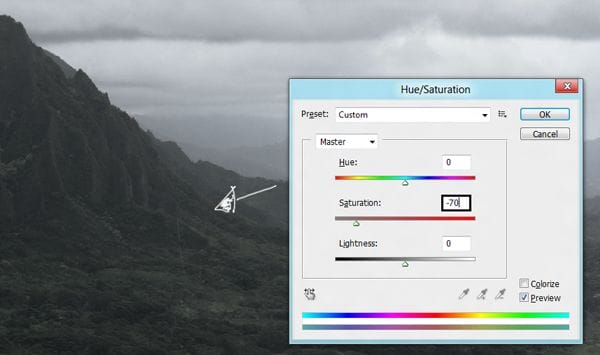
image008

Step 7 Save

The the changes you made to the smart object  press ctrl + S and close the window.
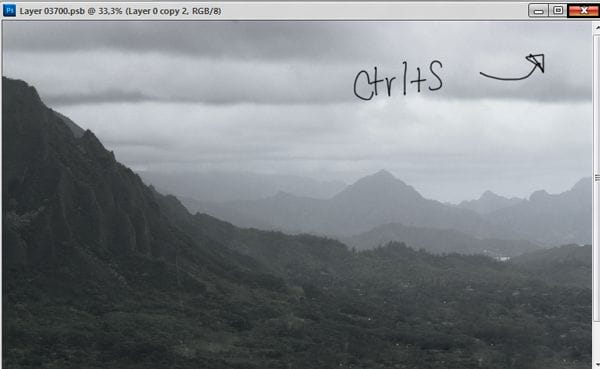
image009

Step 8 River

Now go to folder you have the stocks and grab the image of the river. You will see that the image is an smart object itself, you can change the size clicking in the corners.
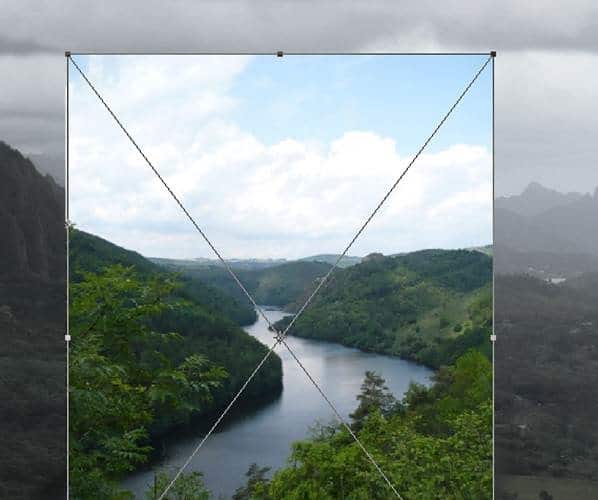
image061

Step 9 Layer Mask

Create a layer mask to erase the undesired parts of the image. Pick a soft round brush to paint over the parts you want to remove. You will have something like this:
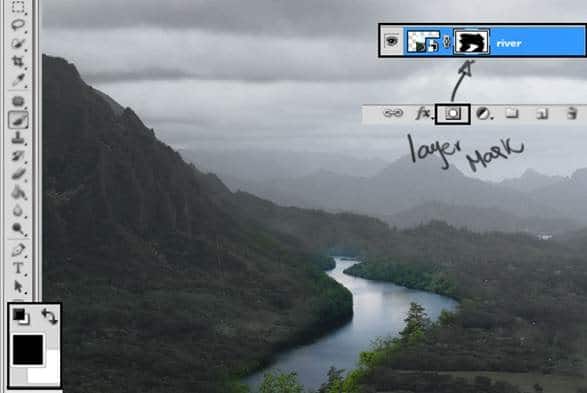
image062

Step 10 Hue and Saturation

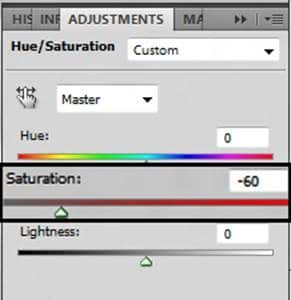
Go to Create a new fill or adjustment layer and click in the option Hue/Saturation.
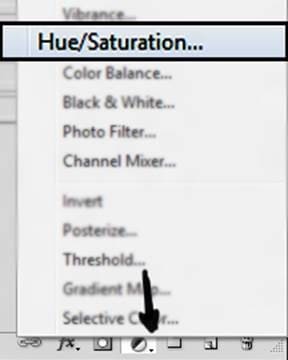
image063

Reduce the Saturation to -60.

image064

Step 11 Apply to one object

To Apply the changes only in the layer of the river you have to press right click over the Hue and Saturation layer and select the option Create Clipping Mask.
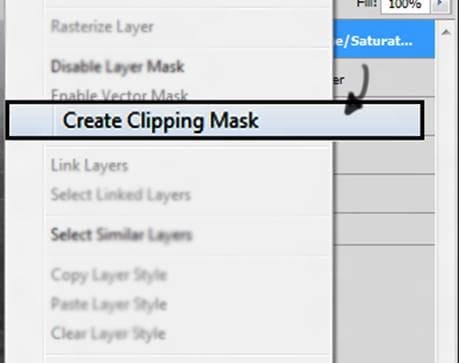
image065

Step 12 Duplicate

Now go back to the Background image and duplicate the layer pressing Ctrl+J and then change the layer mode to soft light.
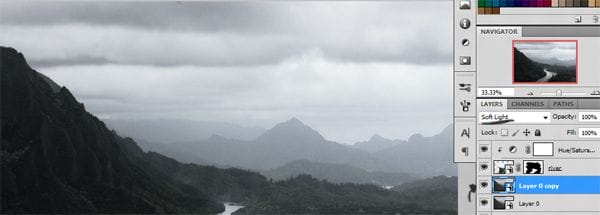
image015

Step 13 City

Grab the image of the city, and repeat the process of creating a new layer mask to blend the layer to the background
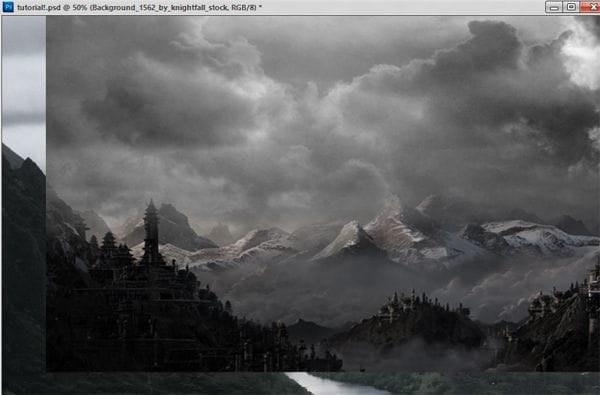
image016

Layer mask:

image017

Step 14 Blur

Now go to filters – blur – Gaussian blur and add 2 radius pixels to get this result:
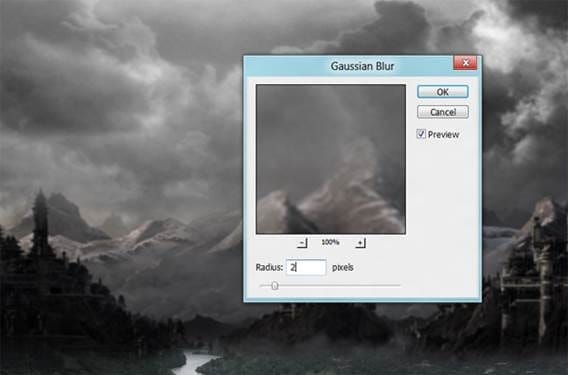
image066

Step 15

Now pick a castle and resize it to fit the mountain like this:
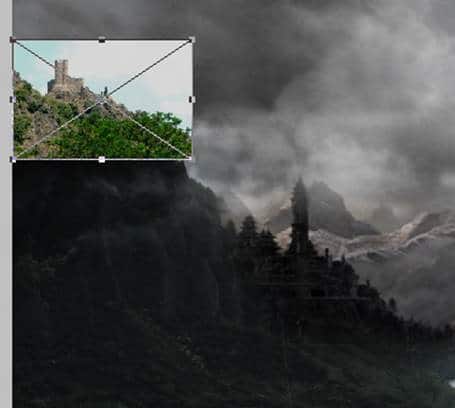
image067

Step 16 Layer Mask

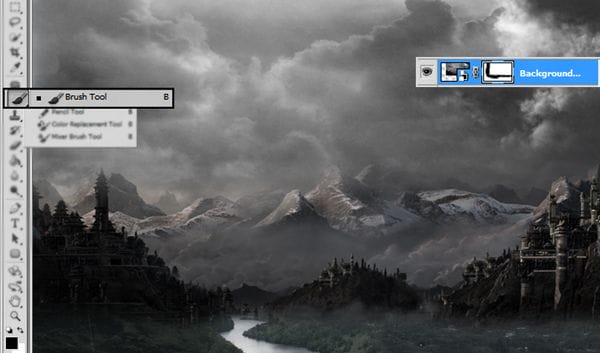
Create a layer mask and like you did before hide with the brush tool the parts you don’t want to use of the image.

41 comments on Photoshop Matte Painting in Easy Steps

41 responses to “Photoshop Matte Painting in Easy Steps”

  1.  Avatar

    Nice work. Well described.

  2. RDV1986 Avatar

    please provide PSD file

  3.  Avatar
    Anonymous

    give me link of mountain you are using.

  4. Louis Wayne Avatar

    Gracias Milady, woo this is awesome tutorial and easy to understand.

  5. Nitika Avatar

    I don’t know where to find the background stock image. Pls help me..

  6. darshan Avatar

    Andrea this tutorial is awesome, thank u for sharing with us…

  7. rasi Avatar

    nice Beautiful work…

  8. Maidul Islam Avatar

    nice post it,like it.

  9. sri Avatar

    supet

  10. Bill Brown Avatar

    Many of the links for resources do not work. So I gave up on trying to do the tutorial. :-(

  11. kuldeep Avatar

    i loved it………………

  12.  Avatar

    Thank you,youre awesome

  13. aadi Avatar

    I can’t not see your all works how can see your all works please help me and give me some trick how can improve my photoshop work I loved it your all work god bless you I hope you will rply me soon …………….

  14. masktao Avatar

    Step 44 -45 not clear, can work fine

    1. Photoshop Tutorials Editor Avatar
      Photoshop Tutorials Editor

      Thanks for the comment! I agree with you that it can be confusing and I think I know why. In the previous step, your foreground color is probably black because you were painting with black. Set it back to white before you start Step 44.

      After that, use the Freeform Pen Tool and draw the lines like shown in the image. Right-click on any one of the stroke and click on Stroke Path. Select Brush from the menu and make sure “Simulate Pressure” is turned on. If the highlights are too thick/thin, undo the previous step, select the brush tool, and change the brush size & hardness. Then redo the “Simulate Pressure” step. keep doing this to get the right stroke – sometimes it takes a few tries.

  15. Prakash Avatar

    Very Nice Work

  16. m.ramesh Avatar

    superb

  17. wander Avatar

    Thanks for the tutorial, it was really useful! This is mine version:
    http://silvialorica.tumblr.com/image/57968536296

  18. wolfden-sky Avatar
    wolfden-sky

    so prefect! amagezine!!

  19. jragonizer Avatar
    jragonizer

    Thank you for the tut! Here is mine http://sta.sh/02fvvyinn0t5

  20. jragonizer Avatar
    jragonizer

    The BACKGROUND stock, which is not linked in the tutorial can be found here:

    http://castock.deviantart.com/art/Lookout-misty-mountains-141109644

    The CITY can be found on Pinterest:

    http://pinterest.com/pin/327003622913465835/

    Heres the CASTLE, I had to screenshot it from this tut:

    http://imageshack.com/scaled/large/202/fjv.png

    STONE is also screen shot, and you will need to do some cloning:

    http://imageshack.com/a/img17/6544/g84u.png

    MOSS is another screenshot, cloning required again:

    http://imageshack.com/scaled/large/546/kvne.png

    You can also google for a lot of good bridges and towers/ancient architecture.

    1. wander Avatar

      I LOVE you! Thanks so much for correct links, you are so kind

  21. jragonizer Avatar
    jragonizer

    The BACKGROUND stock, which is not linked in the tutorial can be found here:

    http://castock.deviantart.com/art/Lookout-misty-mountains-141109644

  22. George Avatar

    Andrea your tutorials are some of the best, thank you Ms. Garcia.

  23. Doku Avatar

    Please fix the image links.

  24. Denise Avatar

    Fantastic work…i am designer and learning to create amazing moodboards..i cant find anything regards of moodboard tutorials, i hope to find it here:-) thanks very much

  25. thomson george Avatar
    thomson george

    beautiful work and extremely appreciable, but could not understand the steps 34 and 34 (creating hair with the help of some hair brushes pen tool or tablet). If possible please elaborate which would be a help to beginners like me.

    thanks and regards

  26. Michael Avatar

    Yeeea, just some of the pictures doesn’t exist anymore, i’d love to make this tutorial but unfortunately nobody can’t

  27. Alix Avatar

    Beautiful work, but when I tried to begin work on it I’m not able to access any of the pictures! Help!

  28. David Avatar

    I don’t know where to find the background stock image :'[

    1.  Avatar
      Anonymous

      click the new..

  29. luca minardi Avatar
    luca minardi

    Grande ottimo tutorial spero di riuscir a far qualcosa di vagamente simile ;) Great!!

  30. Samjot Avatar

    Nice Tutorial. It gives a so much knowledge for photo-shop beginers Thanks for sharing your experiance.

  31. Ana Avatar

    Thank you for tutorial. Amazing work!

  32. Roshna Avatar

    SIR,, FIX LINK PLZ

  33. brahmanandam Avatar
    brahmanandam

    madam..excellent creative work nearly 50 steps to create that final image what a Patience. I am just beginner in Photoshop and its most helpful to me your working steps…thankyou

  34. jimmy Avatar

    amazing and beautiful tutorial Andrea , thank u for ur time and effort , also

  35. José Parcerisa V Avatar
    José Parcerisa V

    Andrea excellent tutorial, I admire your work very much you are very talent and an artist. Your friend José.

  36. Roy Avatar

    I like your tutorials but you have broken deviantart links. I much prefer stock that are not from deviantart because they disappear and the owners have usage rules that make them difficult to use.

    1. Jacq. Avatar

      I totally agree with you.

Leave a Reply

Comments 41

Photoshop Matte Painting in Easy Steps

Discover more from Photoshop Tutorials

Subscribe now to keep reading and get access to the full archive.

Continue reading