
Here are 3 of the most popular wedding photo effects that every wedding photographer should know. In the first part, you’ll learn how to access the hidden split toning presets and apply them so that they don’t affect the tonal information in your photo. Next, you’ll learn how to increase contrast in a B&W photo without clipping any highlights or shadows. This is especially useful in wedding photos where you have dark areas in the grooms tuxedo and bright areas in the brides dress. Finally, you’ll learn how to use just one curves layer to create a popular film effect. This technique can be used in Adobe Lightroom 4 to create effects seen in many expensive Lightroom presets.
Split Toning
The first effect you will learn is split toning. Split toning is an effect that tints the highlights and shadows of your black & white photo to give it a two-tone color effect. You can do this easily in Adobe Lightroom but sometimes you need to do it in Photoshop for more control. Thankfully, Photoshop CS6 already comes with 32 photographer-created split toning presets.

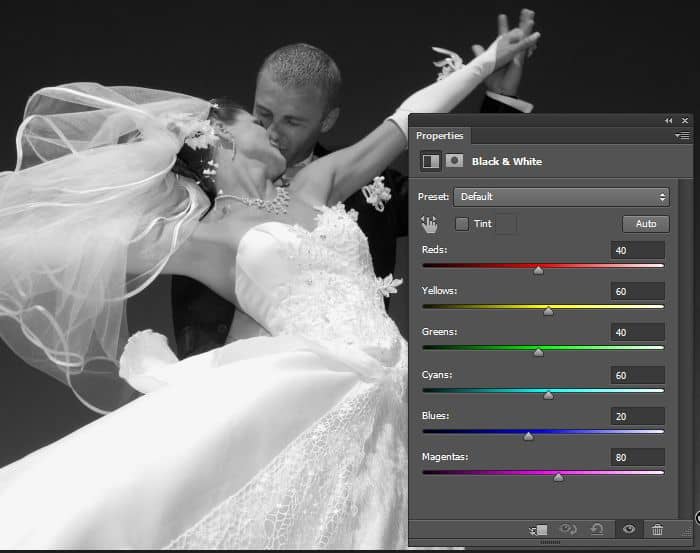
Before you apply this effect, you need to convert your image to a black and white photo. You can do this easily by adding a Black & White adjustment layer (Layer > New Adjustment Layer > Black & White). Feel free to make any adjustments you like or use the auto button to have Photoshop guess the best settings for you.
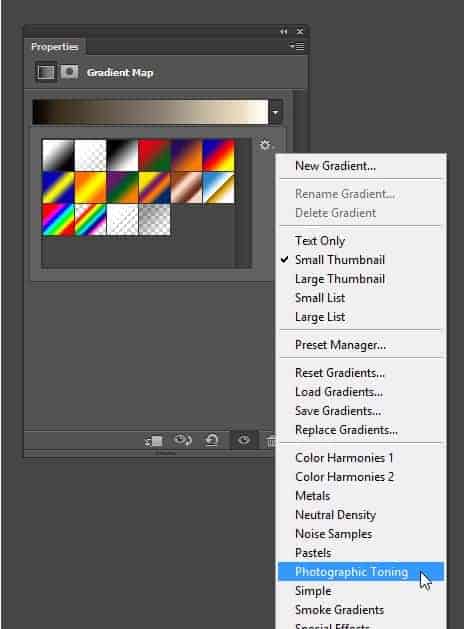
Next, add a Gradient Map adjustment layer (Layer > New Adjustment Layer > Gradient Map) then set the blending mode of this layer to color. This blending mode makes the layer affect only the color of the layers below and it’s useful when you want to protect or preserve the tonal information in your photo. Go into your Properties panel and click on the arrow button beside the gradient to bring up the gradient preset picker. In the preset picker, click on the presets menu and load the photographic toning presets.
Photoshop CS6 has 39 built-in presets and they’re all created by a professional photographer. To make things easier, you can download a chart of all the toning presets here. Pick any toning preset that you want to use. Some of these presets can look overly strong but this is done purposely so that you can lower the opacity of the layer to fine tune your settings. After picking your tone, lower the opacity to get the results that you like. To adjust the balance of the colors, go into the gradient editor and reposition the colors.
30 responses to “3 Photo Effects for Wedding Photographers”
-

Beautiful video. Thank you.
-
Very useful tips! Thanks for sharing. :)
-
I am able to take on any Photoshop challenge with stunning result. My skills include but are not limited to skin retouching, facial enhancements, acne and blemish removal, posture correction, background extraction or replacement, adding or subtracting elements from photos, eye color correction and flash glare wedding album corrected, don’t hesitate to buy my gigs and leave your worries behind. Though I’ve worked on some rather challenging projects over time, not once have I had one unsatisfied customer.
-
I like to create any design in Photoshop. For that’s reason this tutorial is very interesting to me.Wonderful tutorial..Thanks for sharing.
-
I have see all your photo for marriege.Insted of me,I have created one website for photoshop i dont know exactly what is sentences to write for home page.these all sentence become to be an attractive.so pls help me.
Thanks&Recrds
vilas alagi -
The first image looks very nice with the toning. It’s like a recipe to get all those curves to create the right effect.
-
Hey people,is it possible to manipulate a picture with a phone or it just needs computor ?
-
I downloaded the couple running in the field (before and after photo). Imported into lightroom. The FILM LOOK (aka Raised black) are a lot more aggressive that mentioned in tutorial.
But – what I really want to know is what settings were used to clear out details in the sky, but that didn’t effect the dress? (PS:I am using lightroom to accomplish this, not photoshop) -
thank you :)
means a lot -
Hello, thank you for posting these tutorials, this is just what I was looking for to help make my wedding photos look unique.
Regards
Rob -
Wow the song is very cool.
-
This blog post is really a good information piece for people who are not aware about Photoshop affects of photos and how a good technical knowledge can help you out in creating stunning photographs for your clients.
-
I can say this is a good read. This article is really helpful especially to those who are interested in photography. I like how he explained everything and even created a screenshot for the techniques that he gave. Wedding photos will surely look great with the help of this tutorial. Great job!
-
cám ơn rất nhiều !
-
Some great tips and advice- thank you.
I love black & white photos as do my clients but I must admit I have not tried the split-toning yet. May have to give it a try.
-
Well… I liked the “before” images in all examples.
-
wery nice tutorial.
-
“This can even make bland photos look memorable” …
…
….
…..
Why not just take better photos and throw out the bland ones? I mean, this is part of being a better photographer, not relying on filters/effects to “make” your photo. Start with a good photo, then apply your interesting effects. Using this stuff on bland photos is like spray painting a pile of crap. It is still crap.No offense intended, I just think there is more to a photo than the effects. I used to rely on effects almost exclusively. I did not become a better photographer until I started paying attention to the more important things.
-
You are taking it out of context by extending the speakers meaning and applying your own ideology to it.
-
I agree. Too many people out there are buying/selling actions and lightroom presets!!!!!
I love Photoshop, but I do my best to get everything perfect in camera before I go into Photoshop…especially with wedding photography. It should be editorial style, not instagram style.
-
-
Hi,
what’s the opening song title of the video? thanks. -
A great read and some lovely pictures! I love black and white photography and have just launched a website solely for black and white images. If you get chance I would be interested to see what you think. Thanks for your time. Andrew
-
VSCO use camera profiles and do not work with jpg photo. $119 too…. So try to make all in curves and no camera profiles.
-
THAT GOOD …………
-
Thank you very much
-
How do you make effects like this?
http://jamiesondean.com/jennifer-martin-wedding-photography-toronto/-
He uses lens filters effects with lightroom
-
VSCO
Google it up
Nuff said -
Increase noise
Do the contrast thing with the curves they teach you in the video
I tried it and it looks very close
-
-
good video
Leave a Reply