Make skin look perfect in one-click with these AI-powered Photoshop actions.
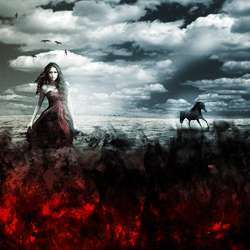
Learn how to create this artistic photo manipulation using a combination of stock photos. This tutorial will show you techniques for combining images and create a grunge-style fire.
Preview of Final Results
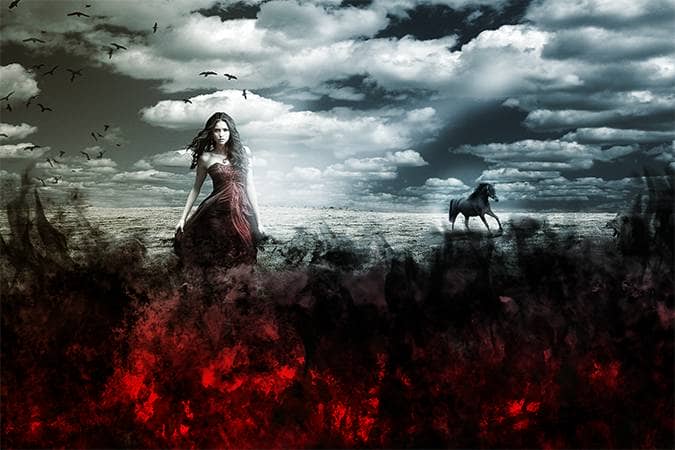
Girl in the Field Photoshop Tutorial
Tutorial Resources
Step 1
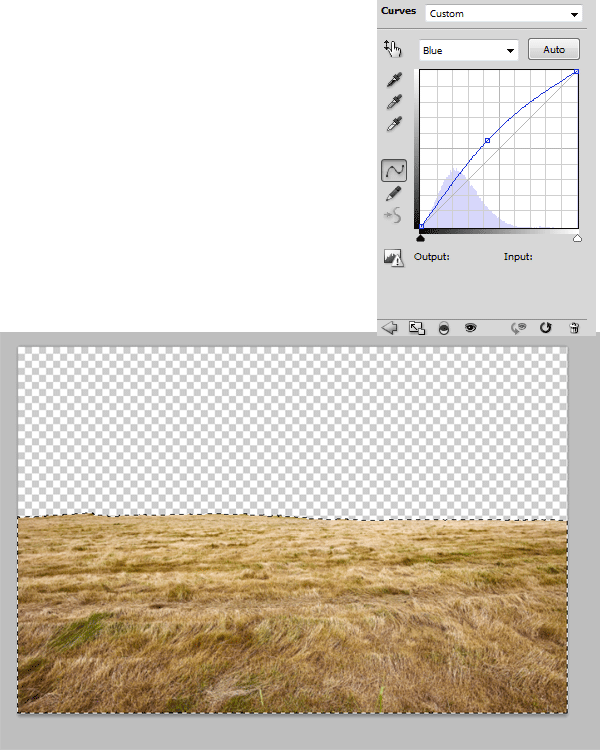
Open file "Field" and using the Quick Selection Tool (W) make a selection of the ground. Press Ctrl + J to make a new layer from selection and add a Curves Adjustment layer to tone it down a little.
Step 2
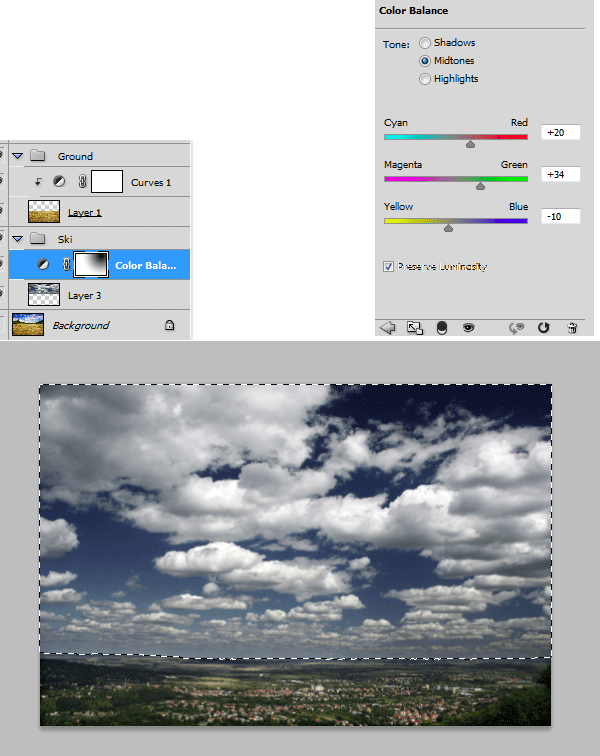
Open file "Sky" and using the Quick Selection Tool (W) make a rough selection of the ski. Press Ctrl + C to copy then paste it with Ctrl + V in our scene. Move this layer below the "Ground" layer. Press Ctrl + T to free transform this clouds layer like shown in the image below and apply a Color Balance adjustment layer to lower the intensity of the blue color.
Step 3
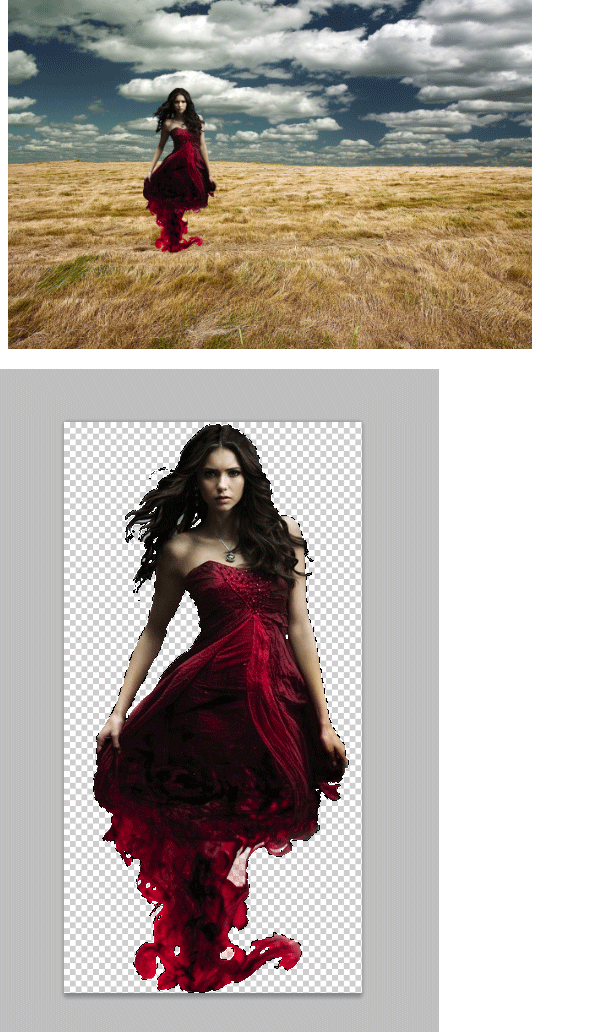
Open file "Girl" and Ctrl + click on the "Layer 0" to select the opaque pixels. Copy (Ctrl + C) then paste (Ctrl + V) into our scene. Use Free Transform (Ctrl + T) to size and position the girl like shown below. The girl will be our point of interest in this scene. Notice that I didn't place her in the middle but to the left side of the image, at about one third from the left and two thirds from the right. Placing your key elements or points of interest like this makes your scene more dynamic and interesting. This is called "the rule of thirds" and if you are serious about composition you should search for thorough information about it.
Step 4
Our girl is a bit dark for the scene so let's adjust this by adding a Curves Adjustment Layer and dragging the curve upwards. Alt + click in between the Curves layer and the "Girl" layer to clip the Curves layer to the "Girl" layer (by doing this we apply the Curves Adjustment Layer only to the "Girl" layer, without affecting other layers).
Because I am writing this tutorial after I finished my scene I know that a beam of light will hit the right side of the girl. A blue beam of light. So to make the scene look more convincing we should modify the colors and the right side of the girl's body accordingly.
Make a new layer (Ctrl + Alt + Shift + N) and clip it to the girl layer (or in this case to the Curves Adjustment Layer, which is already clipping the girl layer) and using a light blue color (#aeccff) paint with a round soft brush at 10% opacity the right side of the girl. Change the layer's blend mode to Color Dodge and lower the opacity to 80%. Select a light red color (#df1314) and repeat the procedure above, but this time on the left side.

9 comments on “Create an Artistic Photo Manipulation of a Girl in a Red Field”
That was a fun tutorial. I used PSE9 so I didn't have some of the selections, but it still turned out pretty good. Thanks!
Thank you for the great tutorial! It has been very helpful to see a few techniques in action.
nice
wow,,, good tutorial... :)
oh It's Elena
No wonder why the picture looks so familiar.
Thank you for providing and amazingly written tutorial. As someone very new to photoshop this was very easy to understand for the most part so I appreciate that you took into account complete newbies by providing things like shortcuts for doing stuff as well as detailed enough but concise explanations. I wish I could find more tutorials of this quality.
The only confusing part to me was the curve adjustment for the girl with the blue and red bit. I didn't really understand that step but I think there is only so much you can explain without showing it through video or something.
Still an amazing tutorial.
woww amazing picture, thanks sob
Thank You!
Thank You Beautiful !!!!