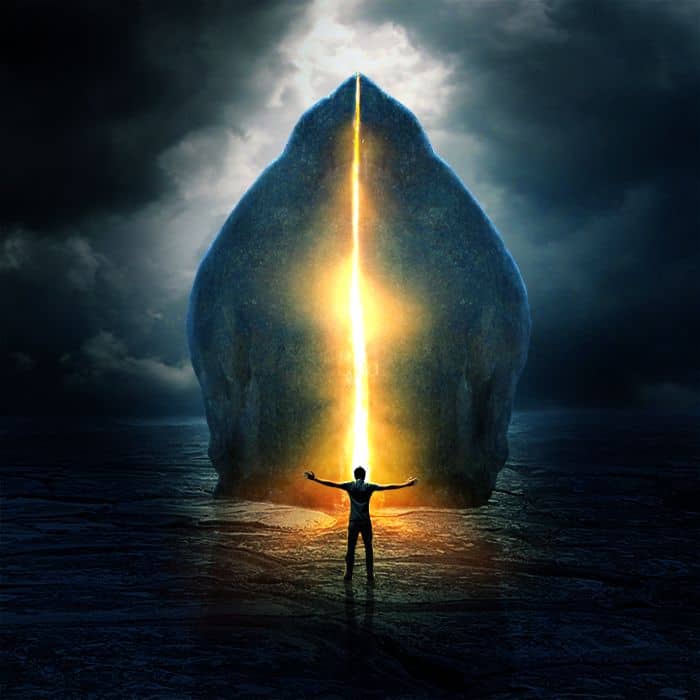
![portal4[4] portal4[4]](https://cdn.photoshoptutorials.ws/wp-content/uploads/2012/09/portal44.jpg?strip=all&webp=82&avif=82&w=1920)
Add layer mask to clear the bottom of sky. Then name this layer as “sky”.
![portal4a[4] portal4a[4]](https://cdn.photoshoptutorials.ws/wp-content/uploads/2012/09/portal4a4.jpg?strip=all&webp=82&avif=82&w=1920)
Step 5
I notice that there are some noise on sky part. To fix it, I duplicate sky layer ( press Cmd/Ctrl+J), go to Filter-Noise-Dust & Scratches:
![portal5[4] portal5[4]](https://cdn.photoshoptutorials.ws/wp-content/uploads/2012/09/portal54.jpg?strip=all&webp=82&avif=82&w=1920)
![portal5a[4] portal5a[4]](https://cdn.photoshoptutorials.ws/wp-content/uploads/2012/09/portal5a4.jpg?strip=all&webp=82&avif=82&w=1920)
Then use soft black brush on layer mask to clear the any parts you don’t want to be blurred:
![portal5b[4] portal5b[4]](https://cdn.photoshoptutorials.ws/wp-content/uploads/2012/09/portal5b4.jpg?strip=all&webp=82&avif=82&w=1920)
Step 6
Now we’ll use a cliff from a stock image to make the portal. Open cliff stock. You can use your own image if you can’t download this image from Photoxpress. Extract it with the method you like ( I use Polygonal Lasso Tool as it’s very easy in this case):
![portal6[4] portal6[4]](https://cdn.photoshoptutorials.ws/wp-content/uploads/2012/09/portal64.jpg?strip=all&webp=82&avif=82&w=1920)
Move it into our picture and place it in the center, remember to scale it as needed:
![portal6a[4] portal6a[4]](https://cdn.photoshoptutorials.ws/wp-content/uploads/2012/09/portal6a4.jpg?strip=all&webp=82&avif=82&w=1920)
Duplicate this cliff and apply Flip Horizontal then move it to the right, position it as shown below:
![portal6b[4] portal6b[4]](https://cdn.photoshoptutorials.ws/wp-content/uploads/2012/09/portal6b4.jpg?strip=all&webp=82&avif=82&w=1920)
Add layer mask for these cliff layers and use black brush with big hardness ( 70-80%) ( don’t use soft brush as it will leave very soft and unatural look for our picture) to clear some parts of bottom, the top, center. You can see how I applied this brush for each cliff layer ( now I name them as “portal part 1” and “portal part 2” – you can get them as portal doors):
![portal6c[4] portal6c[4]](https://cdn.photoshoptutorials.ws/wp-content/uploads/2012/09/portal6c4.jpg?strip=all&webp=82&avif=82&w=1920)
![portal6d[4] portal6d[4]](https://cdn.photoshoptutorials.ws/wp-content/uploads/2012/09/portal6d4.jpg?strip=all&webp=82&avif=82&w=1920)
Step 7
To make some depth for the portal , I make a new layer with Clipping Mask above each portal layer, set to Overlay and fill with 50% gray:
![portal7[4] portal7[4]](https://cdn.photoshoptutorials.ws/wp-content/uploads/2012/09/portal74.jpg?strip=all&webp=82&avif=82&w=1920)
Take Dodge and Burn Tool ( hit O) with Midtone Ranges and medium Exposure ( 50-55% – Dodge tool) and 20- 30% for Burn Tool to darken and brighten some parts of portal parts. I changed the mode to Normal to let you see how I applied these tools ( bright parts-Dodge Tool, dark parts-Burn Tool):
![portal7a[4] portal7a[4]](https://cdn.photoshoptutorials.ws/wp-content/uploads/2012/09/portal7a4.jpg?strip=all&webp=82&avif=82&w=1920)
![portal7b[4] portal7b[4]](https://cdn.photoshoptutorials.ws/wp-content/uploads/2012/09/portal7b4.jpg?strip=all&webp=82&avif=82&w=1920)
Overlay mode ( result of this step):
![portal7c[4] portal7c[4]](https://cdn.photoshoptutorials.ws/wp-content/uploads/2012/09/portal7c4.jpg?strip=all&webp=82&avif=82&w=1920)
Step 8
In this step we’ll create shadow for portal parts. Make a new layer under “portal part 1”. Hold the Cmd/Ctrl key and click inside the thumbnail of “portal part 1” layer to load its selection:
![portal8[4] portal8[4]](https://cdn.photoshoptutorials.ws/wp-content/uploads/2012/09/portal84.jpg?strip=all&webp=82&avif=82&w=1920)
Go to Edit-Fill and fill this selection with black:
![portal8a[4] portal8a[4]](https://cdn.photoshoptutorials.ws/wp-content/uploads/2012/09/portal8a4.jpg?strip=all&webp=82&avif=82&w=1920)
Choose Edit-Transform-Flip Vertical then hit Cmd/Ctrl+T to transform this part:
![portal8b[4] portal8b[4]](https://cdn.photoshoptutorials.ws/wp-content/uploads/2012/09/portal8b4.jpg?strip=all&webp=82&avif=82&w=1920)
Lower opacity to 30%:
![portal8c[4] portal8c[4]](https://cdn.photoshoptutorials.ws/wp-content/uploads/2012/09/portal8c4.jpg?strip=all&webp=82&avif=82&w=1920)
To get the softer look for this shadow , choose Filter-Blur-Gassian Blur and set radius as 3 :
