![portal8d[4] portal8d[4]](https://cdn.photoshoptutorials.ws/wp-content/uploads/2012/09/portal8d4.jpg?strip=all&webp=82&avif=82&w=1920)
Add layer mask and use soft black brush with opacity and flow about 50% to blur shadow top and right:
![portal8e[4] portal8e[4]](https://cdn.photoshoptutorials.ws/wp-content/uploads/2012/09/portal8e4.jpg?strip=all&webp=82&avif=82&w=1920)
With same technique we make shadow for another part of portal:
![portal8f[4] portal8f[4]](https://cdn.photoshoptutorials.ws/wp-content/uploads/2012/09/portal8f4.jpg?strip=all&webp=82&avif=82&w=1920)
Step 9
To add more light for the portal as it’s shone from behind, I use Inner Shadow effect. Right click each portal layer, choose Blending options-Inner Shadow and fill with settings below:
![portal9[4] portal9[4]](https://cdn.photoshoptutorials.ws/wp-content/uploads/2012/09/portal94.jpg?strip=all&webp=82&avif=82&w=1920)
This is result we have:
![portal9a[4] portal9a[4]](https://cdn.photoshoptutorials.ws/wp-content/uploads/2012/09/portal9a4.jpg?strip=all&webp=82&avif=82&w=1920)
Step 10
To fix some parts of the portal, I use Clone Tool again. Make a new layer on the top and use this tool to remove some unwanted parts as the screenshot below shows:
![portal10[3] portal10[3]](https://cdn.photoshoptutorials.ws/wp-content/uploads/2012/09/portal103.jpg?strip=all&webp=82&avif=82&w=1920)
![portal10a[3] portal10a[3]](https://cdn.photoshoptutorials.ws/wp-content/uploads/2012/09/portal10a3.jpg?strip=all&webp=82&avif=82&w=1920)
Step 11
To change the light and contrast of picture, make a new layer and press G to active Gradient Tool. Choose Radiant Gradient with default color (black and white). Drag a line from center to bottom:
![portal11[3] portal11[3]](https://cdn.photoshoptutorials.ws/wp-content/uploads/2012/09/portal113.jpg?strip=all&webp=82&avif=82&w=1920)
![portal11a[3] portal11a[3]](https://cdn.photoshoptutorials.ws/wp-content/uploads/2012/09/portal11a3.jpg?strip=all&webp=82&avif=82&w=1920)
![portal11b[3] portal11b[3]](https://cdn.photoshoptutorials.ws/wp-content/uploads/2012/09/portal11b3.jpg?strip=all&webp=82&avif=82&w=1920)
Change the mode of this layer to Soft light 100%:
![portal11c[3] portal11c[3]](https://cdn.photoshoptutorials.ws/wp-content/uploads/2012/09/portal11c3.jpg?strip=all&webp=82&avif=82&w=1920)
Step 12
To darken the land , make a new layer and I use soft brush with color . Paint on the land and leave a small part around the portal. Put the mode as Multipy 100%:
![portal12[3] portal12[3]](https://cdn.photoshoptutorials.ws/wp-content/uploads/2012/09/portal123.jpg?strip=all&webp=82&avif=82&w=1920)
![portal12a[3] portal12a[3]](https://cdn.photoshoptutorials.ws/wp-content/uploads/2012/09/portal12a3.jpg?strip=all&webp=82&avif=82&w=1920)
You can see the picture change the mood from day to night.
Step 13
Open light stock. I found a perfect stock image ( light of fire) for this tutorial purpose. Make selection around light part then copy it into our canvas, resize and transform it ( Cmd/Ctrl+T), position it onto the portal :
![portal13[3] portal13[3]](https://cdn.photoshoptutorials.ws/wp-content/uploads/2012/09/portal133.jpg?strip=all&webp=82&avif=82&w=1920)
![portal13a[3] portal13a[3]](https://cdn.photoshoptutorials.ws/wp-content/uploads/2012/09/portal13a3.jpg?strip=all&webp=82&avif=82&w=1920)
Change the mode to Screen 100%. You can see most of dark part disappeared. I add layer mask to remove remained part and some parts of the light to make it look natural. You can vary brush size for different parts of it:
![portal13b[3] portal13b[3]](https://cdn.photoshoptutorials.ws/wp-content/uploads/2012/09/portal13b3.jpg?strip=all&webp=82&avif=82&w=1920)
Duplicate this layer and apply Flip Horizontal for it. Use layer mask with same method to make these lights look like going out from the cleft between portal doors. Name these layers as “light 1” and “light 2”:
![portal13c[3] portal13c[3]](https://cdn.photoshoptutorials.ws/wp-content/uploads/2012/09/portal13c3.jpg?strip=all&webp=82&avif=82&w=1920)
Step 14
On light 1 layer, I make selection for a part of light and set feather =0.5. Copy this part into a new layer as we did in step 2. Move it above light layers. Place it on the top of portal. You can use Eraser Tool to clear any unecessary parts:
![portal14[3] portal14[3]](https://cdn.photoshoptutorials.ws/wp-content/uploads/2012/09/portal143.jpg?strip=all&webp=82&avif=82&w=1920)
![portal14a[3] portal14a[3]](https://cdn.photoshoptutorials.ws/wp-content/uploads/2012/09/portal14a3.jpg?strip=all&webp=82&avif=82&w=1920)
Step 15
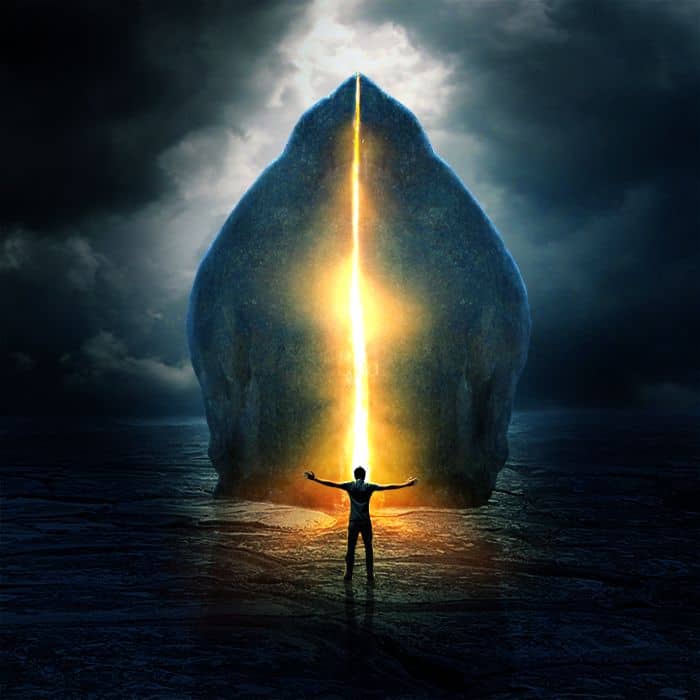
To make a more visible cleft between portal doors , make a new layer and use white brush to draw a line from the top to bottom of the cleft. Change the mode to Overlay 100%:
