![portal15[3] portal15[3]](https://cdn.photoshoptutorials.ws/wp-content/uploads/2012/09/portal153.jpg?strip=all&webp=82&avif=82&w=1920)
![portal15a[3] portal15a[3]](https://cdn.photoshoptutorials.ws/wp-content/uploads/2012/09/portal15a3.jpg?strip=all&webp=82&avif=82&w=1920)
Step 16
In this step we’ll add more light in front of portal. Make a new layer and use soft brush with color painting on this part and then set the mode to Overlay 70%. There is part I paint with brush 100% opacity ( in front of portal) and with 70% opacity ( around this part):
![portal16[3] portal16[3]](https://cdn.photoshoptutorials.ws/wp-content/uploads/2012/09/portal163.jpg?strip=all&webp=82&avif=82&w=1920)
![portal16a[3] portal16a[3]](https://cdn.photoshoptutorials.ws/wp-content/uploads/2012/09/portal16a3.jpg?strip=all&webp=82&avif=82&w=1920)
Step 17
To make some light rays going out from the cleft, I use a new layer. Use brush with color to spot on the picture as shown below:
![portal17[3] portal17[3]](https://cdn.photoshoptutorials.ws/wp-content/uploads/2012/09/portal173.jpg?strip=all&webp=82&avif=82&w=1920)
Hit Cmd/Ctrl+T to stretch it longer:
![portal17a[3] portal17a[3]](https://cdn.photoshoptutorials.ws/wp-content/uploads/2012/09/portal17a3.jpg?strip=all&webp=82&avif=82&w=1920)
Set the mode to Overlay 70% and you can use layer mask to clear any unwanted parts.
![portal17b[3] portal17b[3]](https://cdn.photoshoptutorials.ws/wp-content/uploads/2012/09/portal17b3.jpg?strip=all&webp=82&avif=82&w=1920)
Duplicate this ray and move it to the right:
![portal17c[3] portal17c[3]](https://cdn.photoshoptutorials.ws/wp-content/uploads/2012/09/portal17c3.jpg?strip=all&webp=82&avif=82&w=1920)
Duplicate and move to the center and increase opacity to 100%:
![portal17d[3] portal17d[3]](https://cdn.photoshoptutorials.ws/wp-content/uploads/2012/09/portal17d3.jpg?strip=all&webp=82&avif=82&w=1920)
Step 18
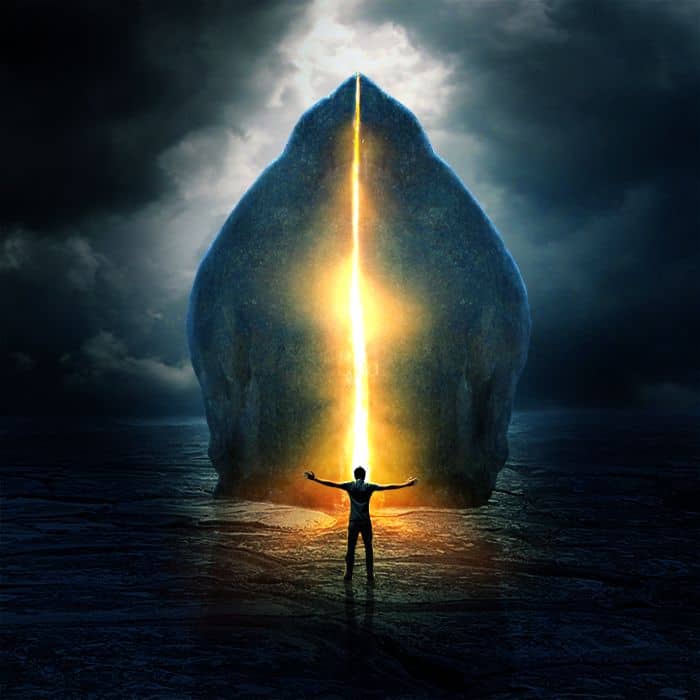
Open man stock. Isolate the man, downsize and place him in front of portal:
![portal18[3] portal18[3]](https://cdn.photoshoptutorials.ws/wp-content/uploads/2012/09/portal183.jpg?strip=all&webp=82&avif=82&w=1920)
![portal18a[3] portal18a[3]](https://cdn.photoshoptutorials.ws/wp-content/uploads/2012/09/portal18a3.jpg?strip=all&webp=82&avif=82&w=1920)
Name this layer as “man”.
Create a new layer under man layer. Use same techniques done in step 8 to make shadow on the land for the man. Call it “man shadow 1”:
![portal18b[3] portal18b[3]](https://cdn.photoshoptutorials.ws/wp-content/uploads/2012/09/portal18b3.jpg?strip=all&webp=82&avif=82&w=1920)
To create cast shadow to make him really look like standing on the land, create a new layer between man and man shadow 1. Use soft black brush with very small size ( 3-5 px) to paint under man’s feet.
![portal18c[3] portal18c[3]](https://cdn.photoshoptutorials.ws/wp-content/uploads/2012/09/portal18c3.jpg?strip=all&webp=82&avif=82&w=1920)
Step 19
To change color and light/darkness of the man to fit background I use some adjustment layers above man layer with Clipping Mask:
Go to Layer-New adjustment layer- Curves:
![portal19[3] portal19[3]](https://cdn.photoshoptutorials.ws/wp-content/uploads/2012/09/portal193.jpg?strip=all&webp=82&avif=82&w=1920)
![portal19a[3] portal19a[3]](https://cdn.photoshoptutorials.ws/wp-content/uploads/2012/09/portal19a3.jpg?strip=all&webp=82&avif=82&w=1920)
Selective Color:
![portal19b[3] portal19b[3]](https://cdn.photoshoptutorials.ws/wp-content/uploads/2012/09/portal19b3.jpg?strip=all&webp=82&avif=82&w=1920)
Hue/Saturation:
![portal19c[3] portal19c[3]](https://cdn.photoshoptutorials.ws/wp-content/uploads/2012/09/portal19c3.jpg?strip=all&webp=82&avif=82&w=1920)
On Curves layer, use soft black brush to clear the unwanted effect on man arms:
![portal19d[3] portal19d[3]](https://cdn.photoshoptutorials.ws/wp-content/uploads/2012/09/portal19d3.jpg?strip=all&webp=82&avif=82&w=1920)
Step 20
To darken the shirt as it’s too bright against the dark background I use a new layer with Clipping Mask and take brush with color . Paint over the shirt and change the mode to Multipy 80%:
![portal20[3] portal20[3]](https://cdn.photoshoptutorials.ws/wp-content/uploads/2012/09/portal203.jpg?strip=all&webp=82&avif=82&w=1920)
To darken jeans I use brush with color painting on a new layer and set the mode to Multipy 100%:
![portal20a[3] portal20a[3]](https://cdn.photoshoptutorials.ws/wp-content/uploads/2012/09/portal20a3.jpg?strip=all&webp=82&avif=82&w=1920)
Step 21
In order to make some glowing light for the man , first I use Inner Shadow effect. Right lick man layer, choose Blending options. I use a bright yellow for light effect () :
![portal21[3] portal21[3]](https://cdn.photoshoptutorials.ws/wp-content/uploads/2012/09/portal213.jpg?strip=all&webp=82&avif=82&w=1920)
![portal21a[3] portal21a[3]](https://cdn.photoshoptutorials.ws/wp-content/uploads/2012/09/portal21a3.jpg?strip=all&webp=82&avif=82&w=1920)
Step 22
To make this light more visible, I use three layers with Clipping Mask for the man. Take soft brush with very small size and color painting over man contour. You should do it gently and subtly and erase any unwanted effects. I change first layer to Color 100%, the rest as Normal 80% and Overlay 80%:
