
Preview of Final Results
Download the PSD
Cyborg.zip | 60.8 MB
Android Photoshop Tutorial
Tutorial Resources
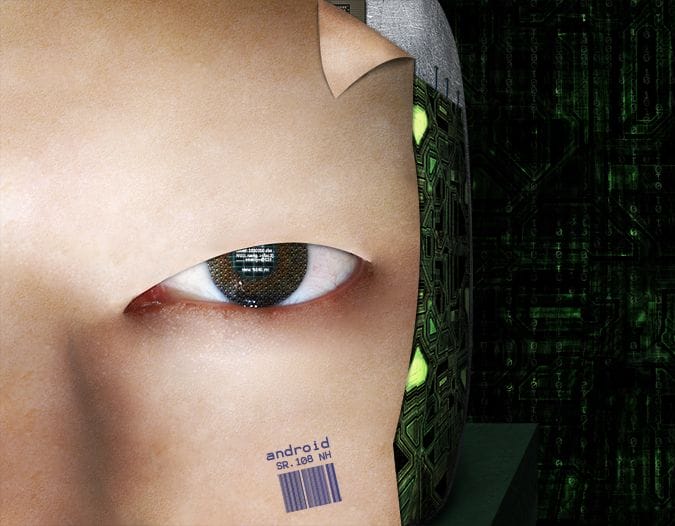
Step 1
Open file “Face” and crop the left part of the face. First let’s remove the highlights from the pupil. Add a new layer or duplicate the existing one and using the Clone Stamp tool remove the highlights. Next duplicate the existing layer again and remove the eyelashes by using the Clone Stamp tool. If you make any mistakes or if the cloned areas look fake use the Patch Tool. This is the reason I use duplicate layers.
TIP (When using Clone Stamp or other tools it is better for the sake of simplicity and the matter of file size to not use duplicates of the background. However, some tools – like the Patch tool – require this step. Be aware if you used the Clone Stamp tool on a new layer and than you are using the Patch tool you might get weird/non results because you are working only with little pixel information. Also if you want to use self-blending – blending a file with itself – don’t use duplicates of the background, rather add a Curves adjustment layer or a Hue/Saturation layer and change it’s blend mode. The results will be the same as if you blended the original background, however the file size will increase very little – which is desirable, especially if you are working with files on the internet or if storage is an issue.)

Step 2
Time to deal with the face. Select the Healing Brush tool and start working on the areas shown below. Look in the options of the brush tool and make sure Sample is Current&Below. You can also change the brush opacity mode to Lighten if you work in darker areas of the face. Make a selection like shown below than use the Clone stamp tool to fill this area with adjacent samples of skin. Press Ctrl+Shift+Alt+E to make a new layer from all visible than use the Patch tool to refine our new skin area (the area over the eyebrow) and around the eye.
TIP (Patch Tool is your friend when doing facial retouching. If after you use the Clone Stamp tool or the Healing Tool an area looks fake and has repeating patterns use the Patch Tool to blend it seamlessly with the surrounding skin. I cannot emphasize enough how important this tool is in facial retouching . When it looks fake use the Patch Tool)
2 responses to “How to Create a High-Tech Cyborg Photo Manipulation in Photoshop”
-

Elegant, modern, very different..
-
you can always be creative in making robotic effect to an object. This Adrian’s is an example, simple effect for beginner to try. I like IA, so I made some androids from my fave actors. Hi5, Adrian! :)
Leave a Reply