Download Lightroom presets and LUTs, absolutely free. Use the presets to add creativity and style to your photos.
Learn how to create this freezing cold manipulation with Photoshop! You'll learn how to work with difference ice and crystal photos and complete the look with a cold blue photo effect.
Preview of Final Results
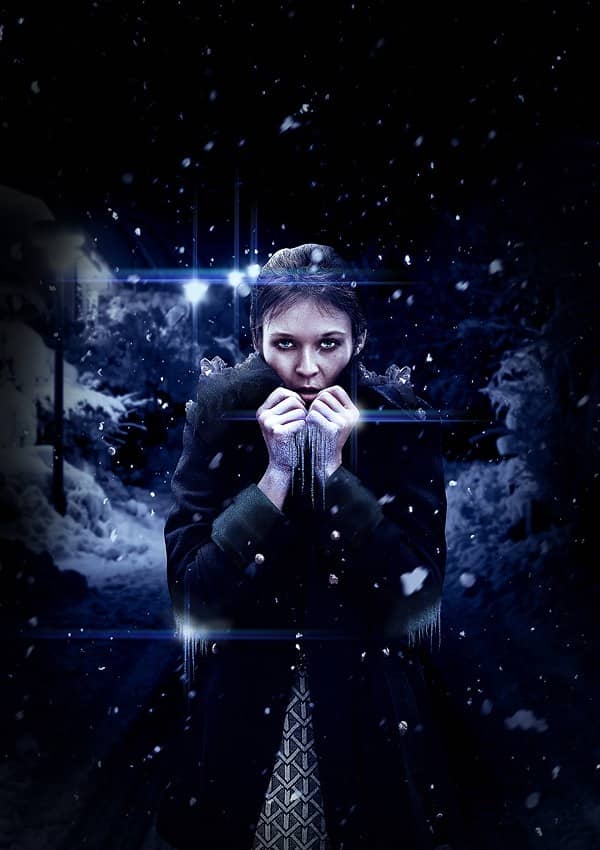
Download the PSD
Frozen.zip | 6.63 MB
Download from Website
Freezing Cold Portrait Photo Manipulation Photoshop Tutorial
Resources
- Background - sxc.hu
- Girl - sxc.hu
- Frost Texture - sxc.hu
- Icicles - sxc.hu
- Snowflakes - sxc.hu
- Crystal - enchantedgal
Step 1
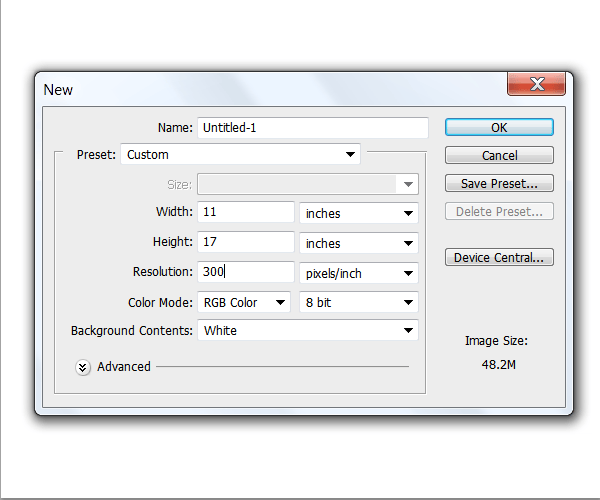
Create a new document in Photoshop. It should be around 11 inches wide by 17 inches long and with a depth resolution of 300dpi.
Step 2
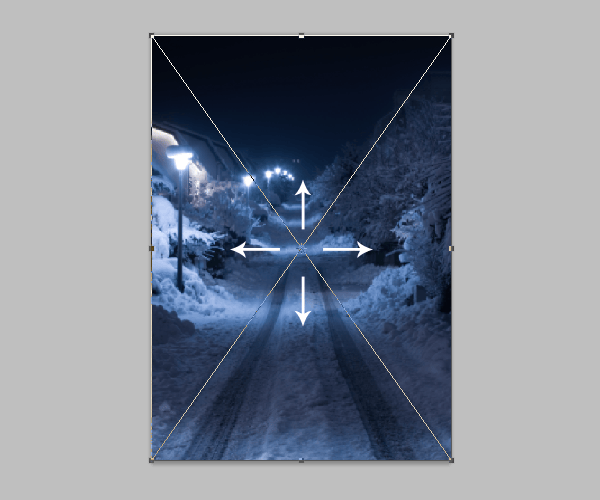
Drag to your document the background frozen road stock image and resize it to fill all the canvas by dragging the anchor points to fit the whole image:
Step 3
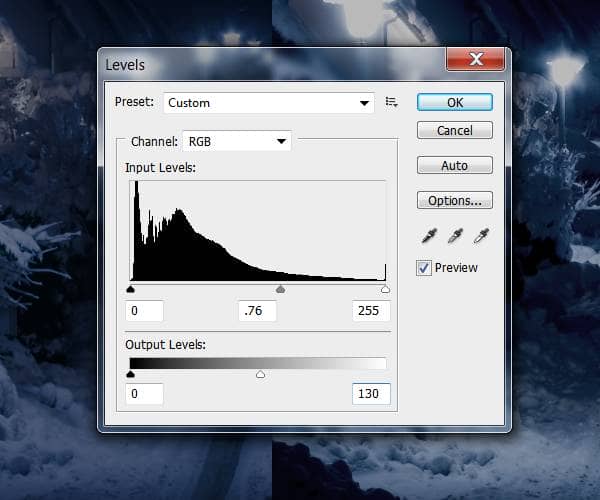
The background looks too bright at the moment and we need to change that in order to create a gloomy dark night mood. Open up the levels menu (Image > Adjustments > Levels or Ctrl+L) and apply the settings as shown below:
Step 4
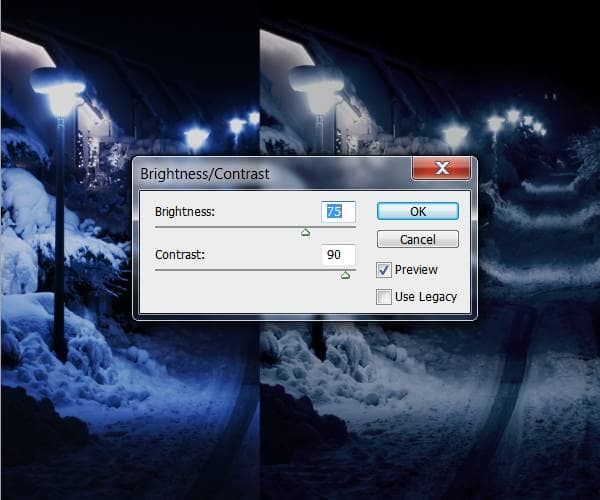
Use the Brightness/Contrast tool (Image > Adjustments > Brightness/Contrast) and set the Brightness value to 75 and Contrast to 90
Step 5
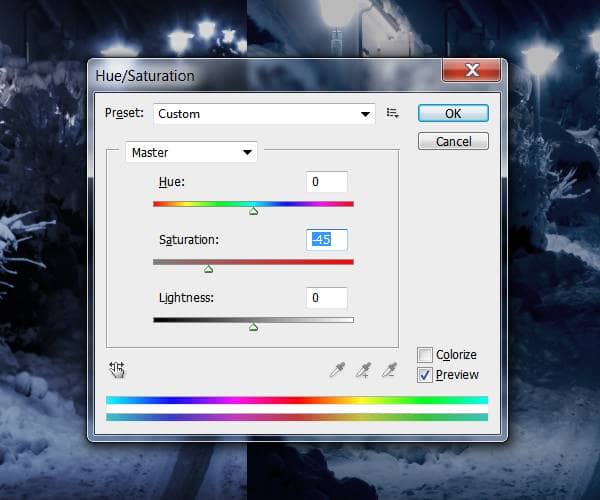
Since we made some changes to the lighting of the background, the colors got a bit too saturated. To fix this, use the Hue/Saturation tool (Image > Adjustments > Hue/Saturation or Ctrl+U) to lower the saturation to –45.
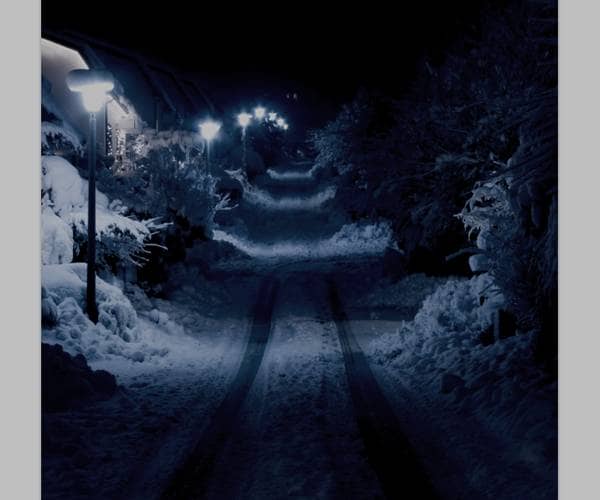
Here’s how your background should look.
Step 6
Now we’re going to blur the background to add some depth to the overall image and ensure it doesn’t upstage the rest of the photo manipulation. Apply a Gaussian Blur (Filter > Blur > Gaussian Blur) with a radius of 8 pixels.
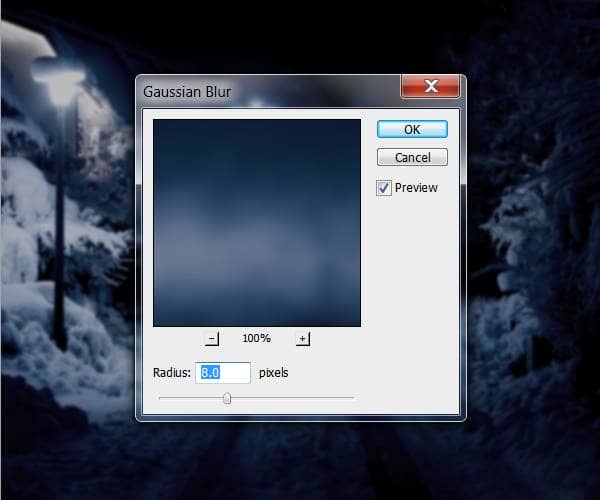
Here’s how the background should look now.
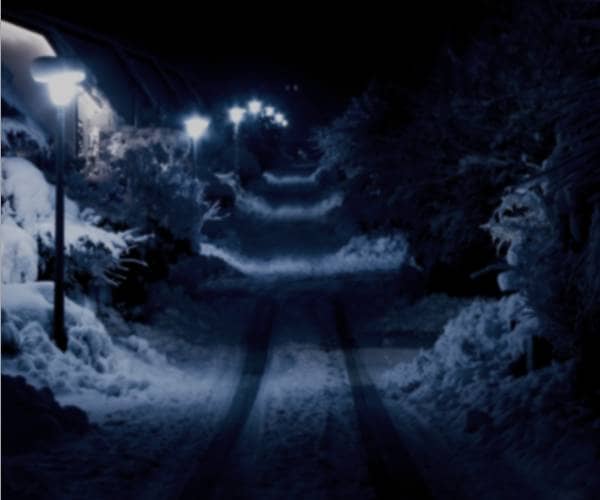
Step 7
In this step, we’re going to set our adjustment layers so that we can work under them and create a moody feel to our composition. Start by selecting all the adjustment layers in the Layers palette then place them all into a new layer group (Ctrl+G). Name this group “Adjustments”. Next, add a Gradient Map fill layer (Layer > New Adjustment Layer > Gradient Map). Click on the Gradient to bring up the Gradient editor.
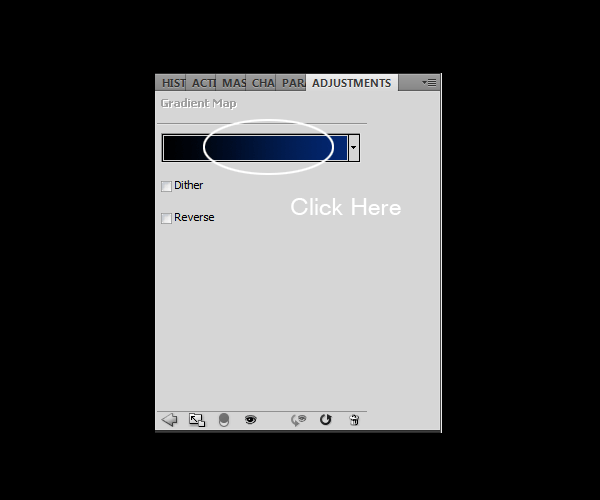
Create a gradient like shown below. To create this gradient, click on the bottom left stop then change the color to black (#000000) then click OK. Click on the bottom right stop then set the color to #032871 then click OK and OK again to exit out of the Gradient Editor.

One comment on “How to Create This Freezing Cold Portrait Photo Manipulation in Photoshop”
Great, thanks for all the helpful info!