
Use this technique to create a high contrast or low contrast image using a set of contrast adjustment layers.
Preparing the Document
In this page, we’ll create the two contrast adjustment layers. One will be for the highlights of the image and the other for the shadows.
Step 1
Open a photo you would like to edit. Or, you may use the photo used in this tutorial (from iStockPhoto).

Step 2
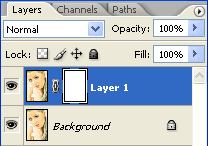
Duplicate the layer (Layer> Duplicate Layer or Ctrl+J) and add a layer mask to the new layer (Layer> Add Layer Mask> Reveal All).
Step 3
Make sure the layer mask is activated. The thumbnail of the layer mask in the layers window should have a white border around it. If it doesn’t, click on the thumbnail to activate the layer mask.
Step 4
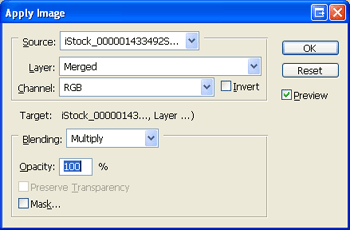
With the layer mask selected, open the Apply Image tool (Image> Apply Image). The default settings should be fine so you may simply click OK if the settings are default:
Layer: Merged
Channel: RGB
Invert: Unchecked
Blending: Multiply
Opacity: 100%
Step 5
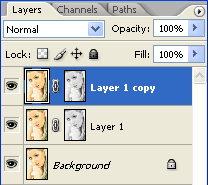
Duplicate the current layer (Layer> Duplicate Layer or Ctrl+J).
Step 6
Activate the layer mask of the top layer. Make sure the layer mask is activated. The thumbnail of the layer mask in the layers window should have a white border around it. If it doesn’t, click on the thumbnail to activate the layer mask.
Step 7
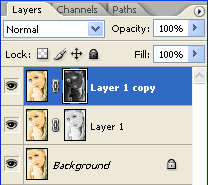
With the layer mask activated, Invert (Image> Adjustments> Invert or Ctrl+I).
Adjusting the Contrast Layers
Now that we have the contrast layers created, the rest is very simple. Simply follow these steps to achieve your desired effect.
Step 8
Change the blending mode of the layers to the following:
- For a high contrast effect:Top Layer: Screen
Middle Layer: Multiply
- For a low contrast effect:Top Layer: Multiply
Middle Layer: Screen


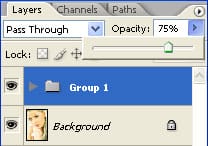
Step 9
To reduce the strength of the effect, select the top two contrast layers and group the selected layers (Layer> Group or Ctrl+G). Then, select the new group and adjust the opacity.
Final Results
")
")
4 responses to “Contrast Layers”
-

You got the stacking wrong – for a high contrast look the multiply layer has to be the one on top at about half the strength of the screen layer below.
-
Thanks a lot
-
easy and simple that is it thanks for sharing
-
Hi,
Bhai Method ko sahi sa samjha nahi pa rha ho.
Leave a Reply