Luminar AI lets you turn your ideas into reality with powerful, intelligent AI. Download the photo editor and see how you can completely transform your photos in a few clicks.
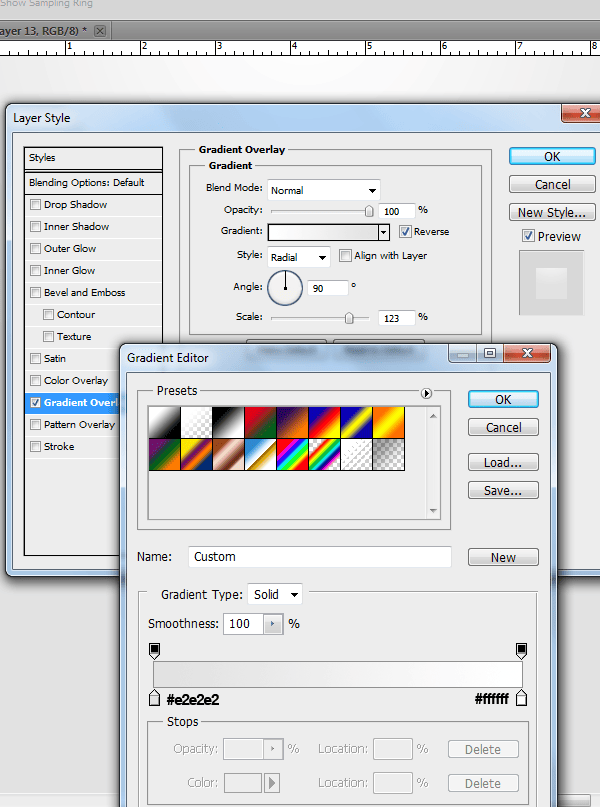
Step 15
Open your texture in photoshop and place it above your background layer and change the layer to soft light.
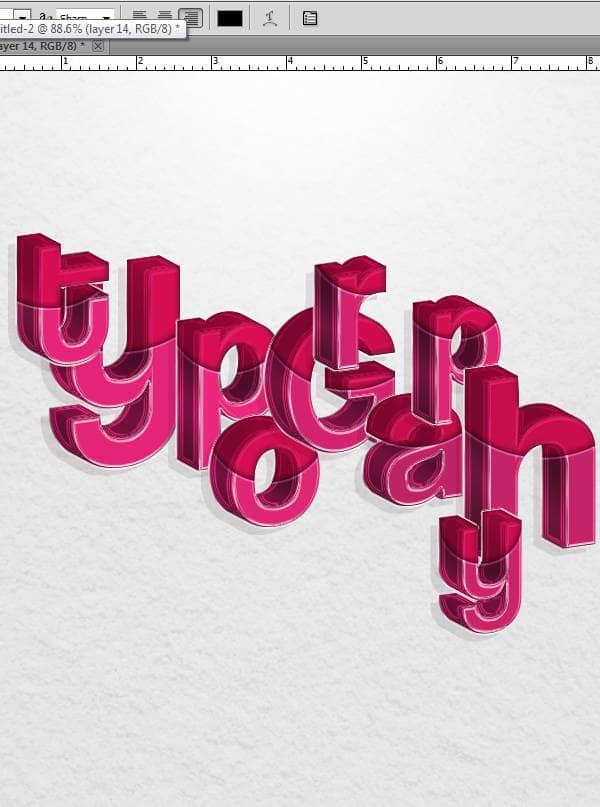
Step 16
Create a new layer and grab your paint brush tool and use the cloud brush and put them under your font.
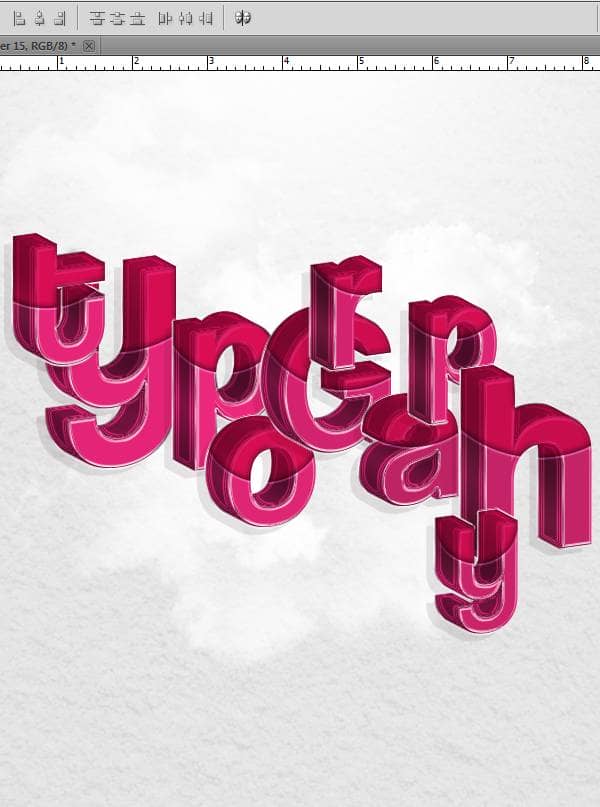
Step 17
Create a New layer and use the paintbrush brushes and place them on your canvas like so. The colors I used are: #0578a5, #5ed950, #f2eb17, #0ef2ea, #640ef2, #f20eef, #f20e24, #f28a10, #f2ea0e
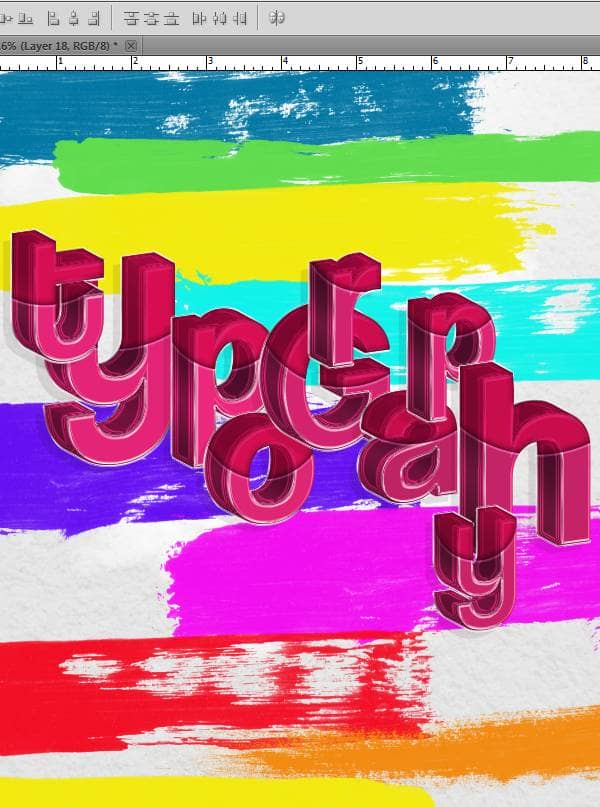
Step 18
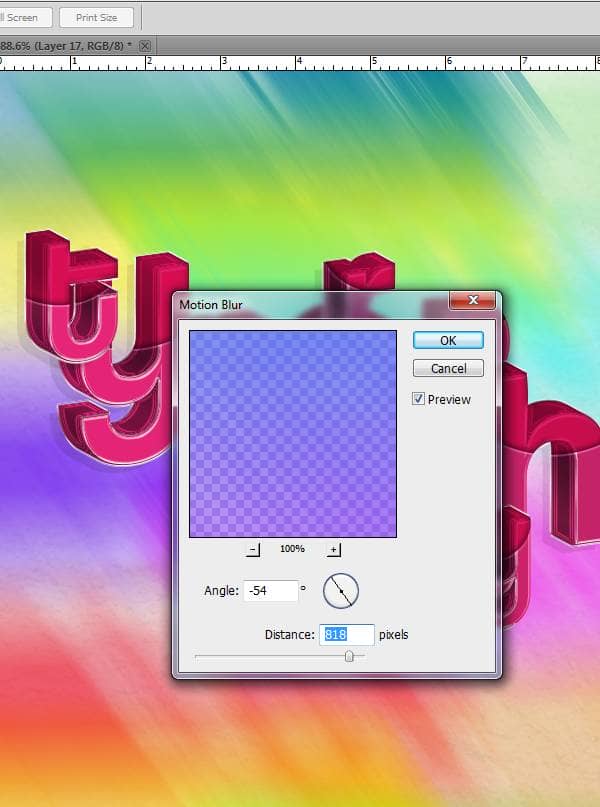
Now Filter>Blur>Motion Blur
Step 19
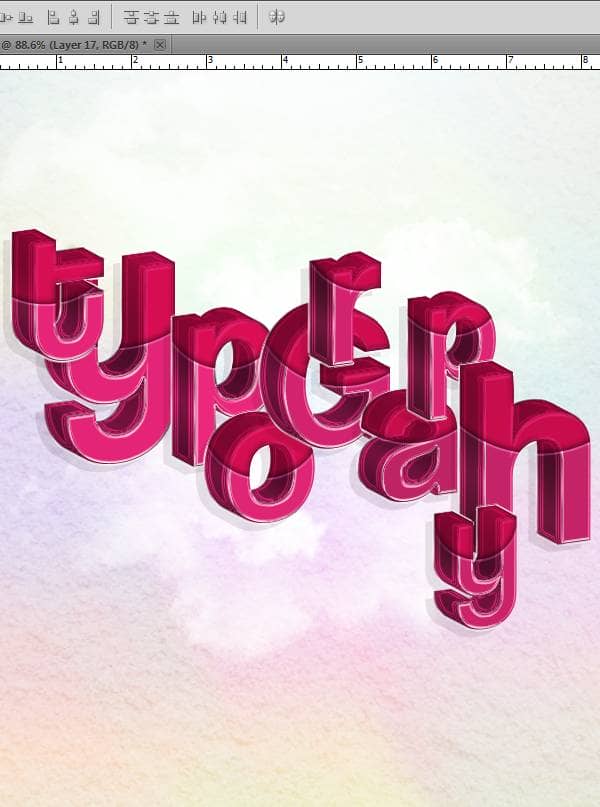
Change this layer to Overlay
Step 20
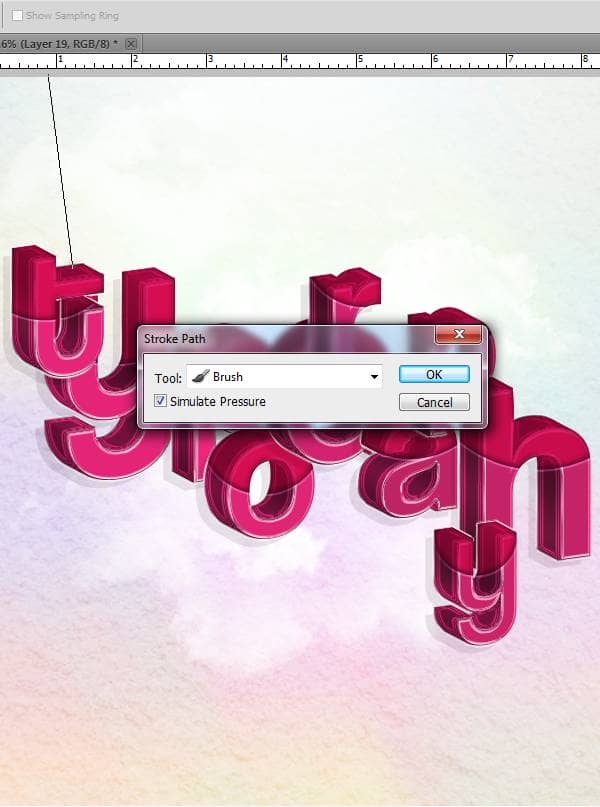
Now we will add the strings, make a new layer and grab your pen tool (make sure that your paint brush tool is set to 3px Hard round brush) make a line from the top of your letter to the top of your document. Right click the line and select Stroke path
Step 21
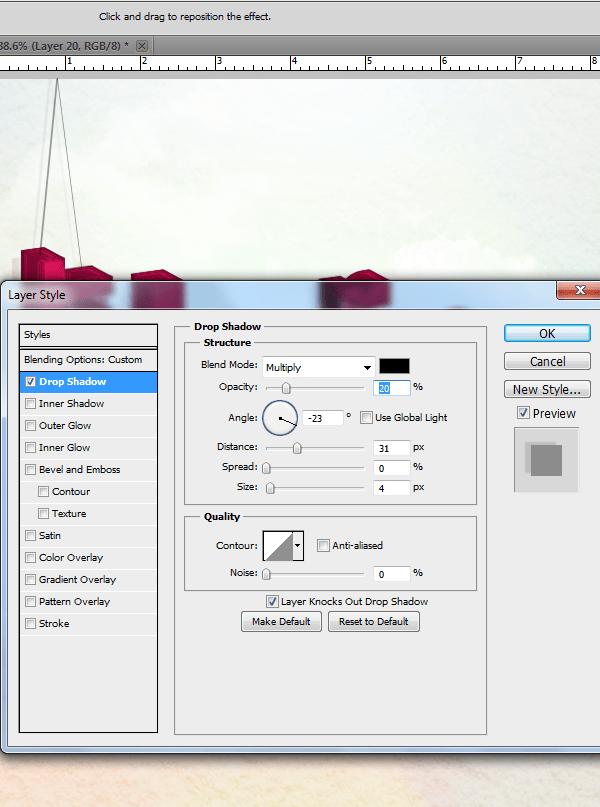
Make another one and apply a Drop shadow to both. Note: I used 3px and 2px lines when making the strings
Step 22
Make strings for the rest of the letters
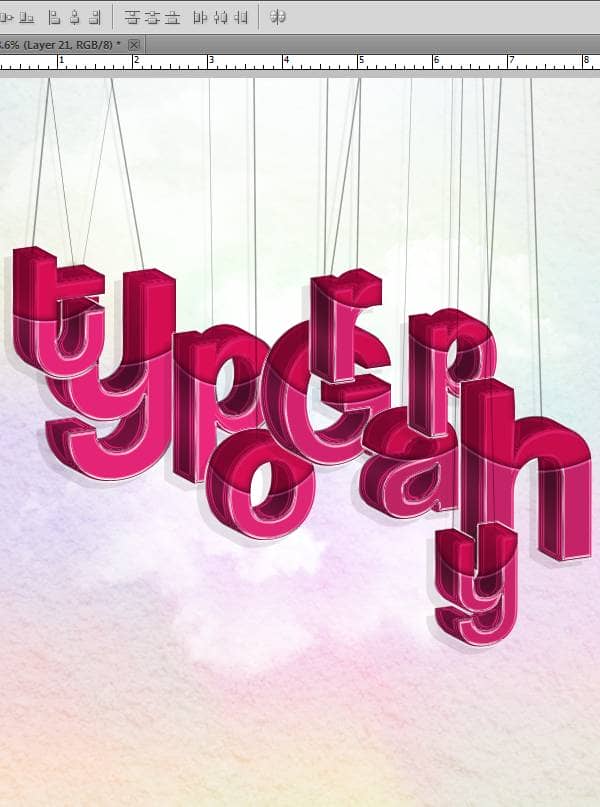
Step 23
Grab your paint brush tool again and place the "Brushilicious" brushes on some of the letters.
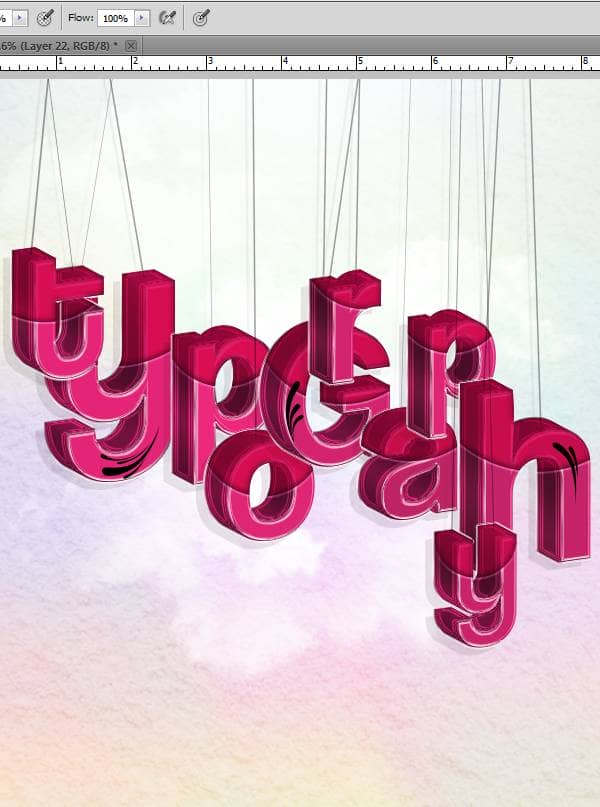
Step 24
Add this layer style to them. Make sure that the layer fill is set to 0%
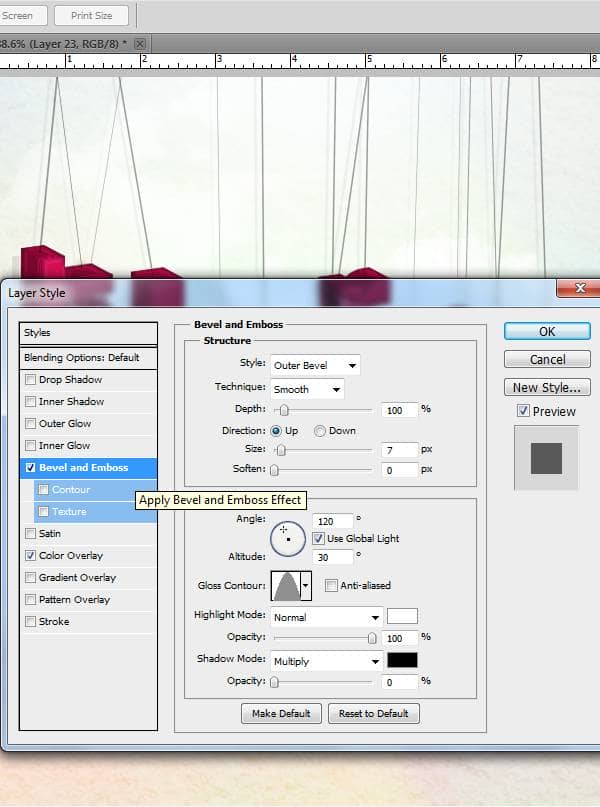
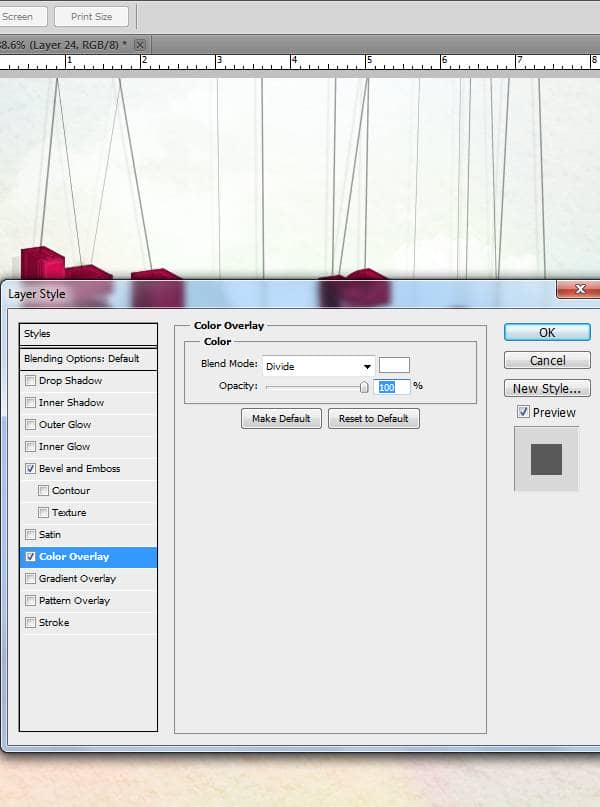
Final Results
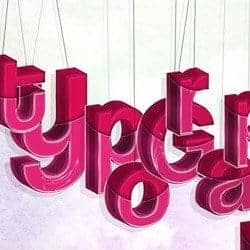
![final-results[1] final-results[1]](https://cdn.photoshoptutorials.ws/images/stories/19cf36e17859_12358/final-results1.png?strip=all&lossy=1&quality=70&webp=70&avif=70&w=1920&ssl=1)
Download the PSD
Hanging Typography.zip | 3.59 MB
Download from Website
Tutorial by Ashlee Harrell
 Thank you for following. I hope you enjoyed it!
- Ashlee Harrell

14 comments on “How to Create Hanging Typography in Photoshop and Illustrator”
this tutorial was not that great it would have been nice to see the layers that you where using at the time. not mention that the stroke layer that i had was far different than yours.
OMG!
Fabulous this tutorial. Congratulations.
Unfortunately the files are with the link off, is updating.
*Cloud Brush – Brusheezy
*Single Swirlies Brush – Brusheezy
I did a search on google but could not find the original file.
I do not want to replace.
Thank you for sharing.
Help. When I open the psd in illustrator, I don't get the dialog box to convert the layers. I could not find any way online to fix this.
Thanks for posting, those are very useful for me! :)
I am stuck on setep 11. I tried maybe 100 times. I did the other steps perfectly but 11 is just not happening.
I am about to go crazy. Just please maybe you can add a video of that step ( I have CS6 by the way )
And how do you an idea: do it all at once, in accordance with what is PDS.
I downloaded the original file, and quickly realize that the values in the figures for each step - complete nonsense! The author is not a good person! Sometimes it is necessary to use a brain!
Hi,
I am stuck on step 7 and 8. I have done this tutorial multiple times and have followed the instructions down to the last detail, but my letter never turns out like step 8 at all! It has this weird design in the copied letter insead. Please help!
Download the PSD (at the top of the tutorial) and compare your file with the PSD. Try copying and pasting the layer style to your document (right-click on the layer style then click copy layer style). If it fixes it, it's probably something to do with your layer style.
Insulting someone like that will not get you want you want.
Hi there! I love the tutorial! I just have one problem ... when I move the text over to Photoshop, it becomes transparent on the sides, and then does not bevel correctly. Any suggestions? Thank you so much!
I had the same problem with my letters. Some of them had chunks of the bevel missing and they all had these transparent lines running across on the extrusions. I'm thinking it's the font I'm using, will have to try it again with the correct font when I get home.
I'm stuck with step 12 ... It won't make the nice color over it. And I've tried it a couple of times, but for the rest this is amazing!
it seem there was a step missing, lets call it as step 12a
12a: after done step 12, then make 0 fill for the black (or whatever color you choosed) layer that you create before. try it.
note:for get same result re-adjust the value on all inside blending option for the layers, because the font size is mattter. but all ok for the angel shade, etc.
great tutorial! thanks